Who is this article for?
You want to bill a client for an appointment: create the invoice, send it by email, then send a receipt once the client has paid. This article explains the whole process, step by step.
Before you start: make sure your appointment types have a price in Settings > Appointments (www.colib.io/settings?show=appointments). Colib uses this price to fill in the invoice for you.
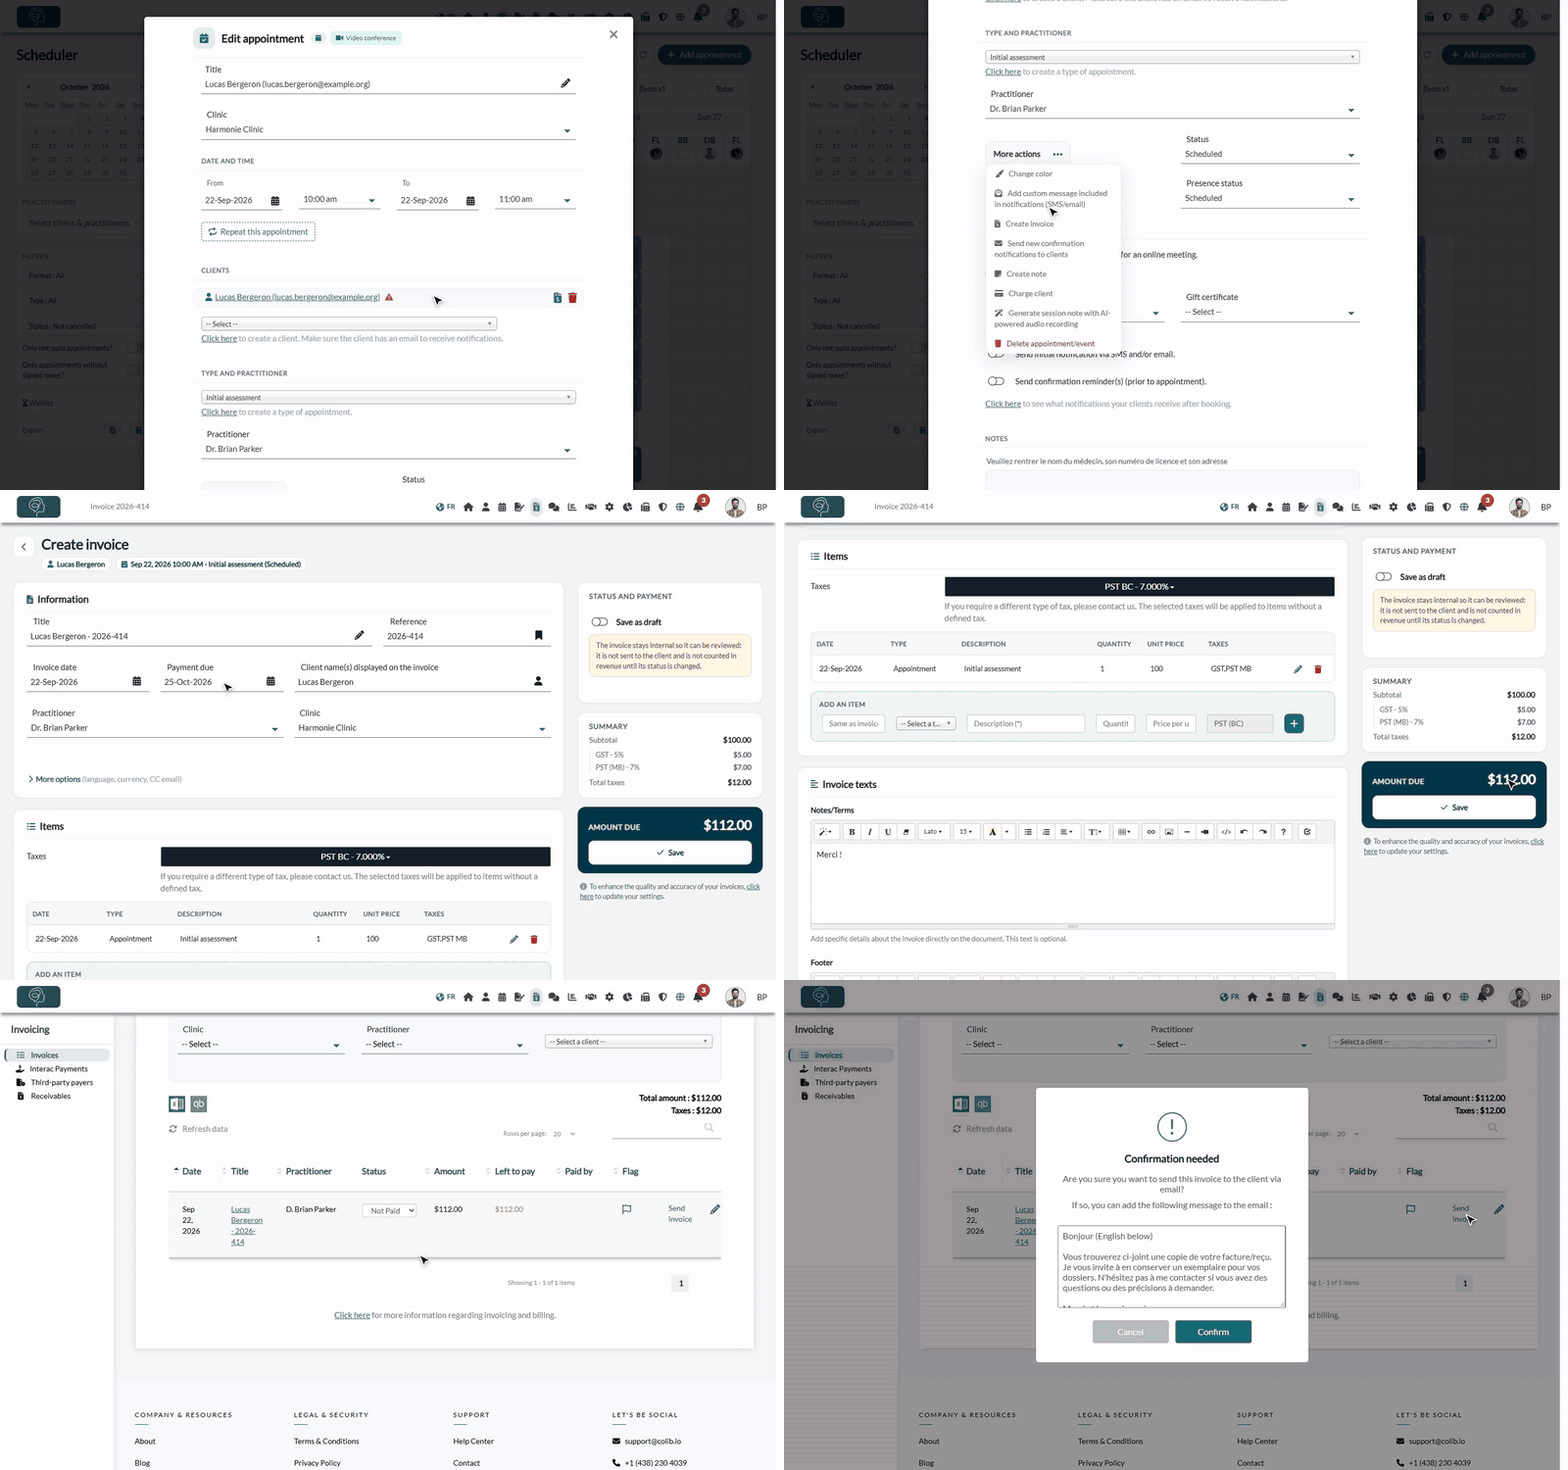
1Create the invoice from the appointment
- Open the appointment in your Scheduler (www.colib.io/scheduler).
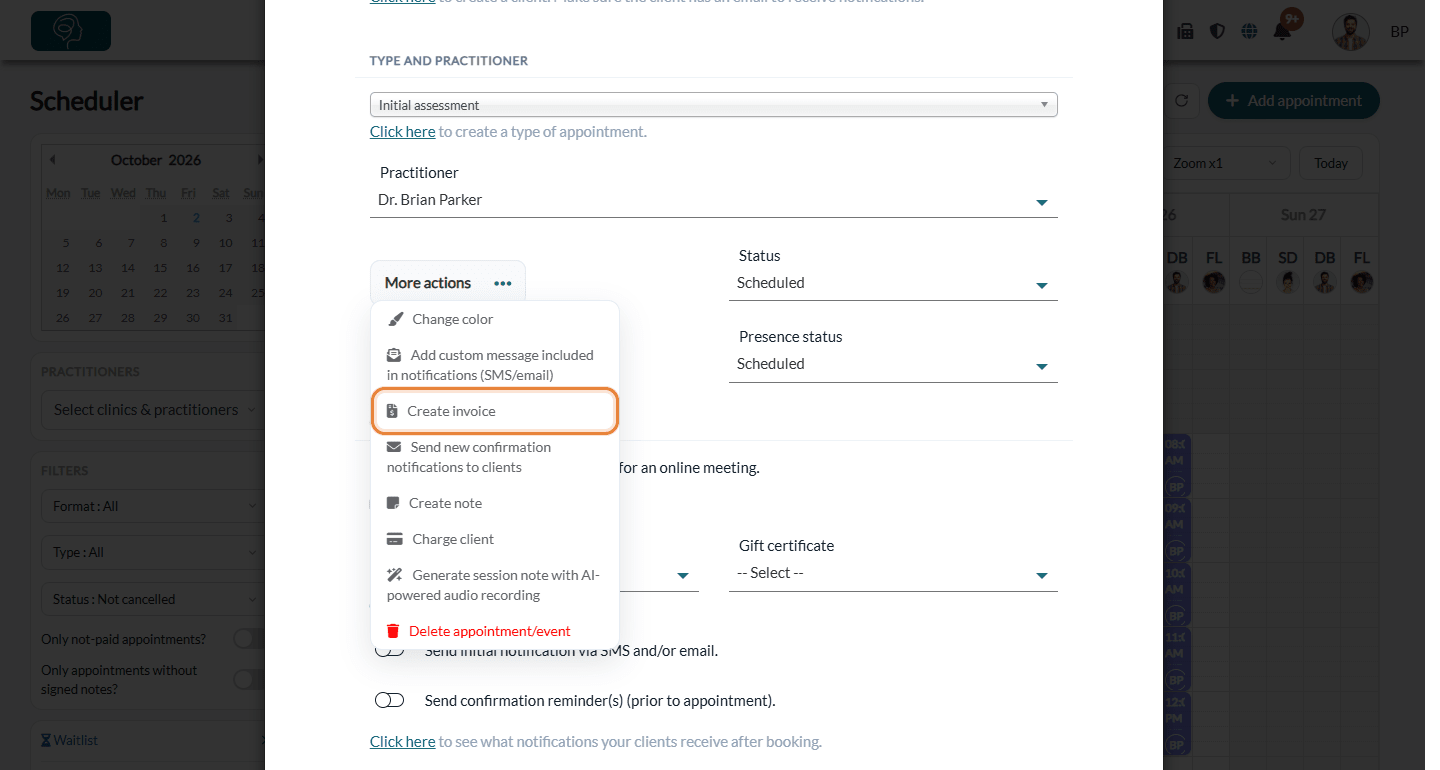
- Scroll down and click More actions.
- Click Create invoice. The invoice opens, already filled in with the client, the date and the price of the appointment.
Other ways to start an invoice:
- From the client record: in the Appointments tab, click Create invoice on the row of the appointment. The Create invoice button on the left of the record creates an invoice for this client without choosing an appointment first.
- From the Invoices page (www.colib.io/invoices): click Create Invoice, choose the client and, optionally, the appointment, then click Continue.
- For a group appointment: in the appointment, click the invoice icon next to the name of the client to bill. The invoice is created for this client only.
- For several appointments at once: see How to create one invoice for several appointments.
2Check the invoice and save it
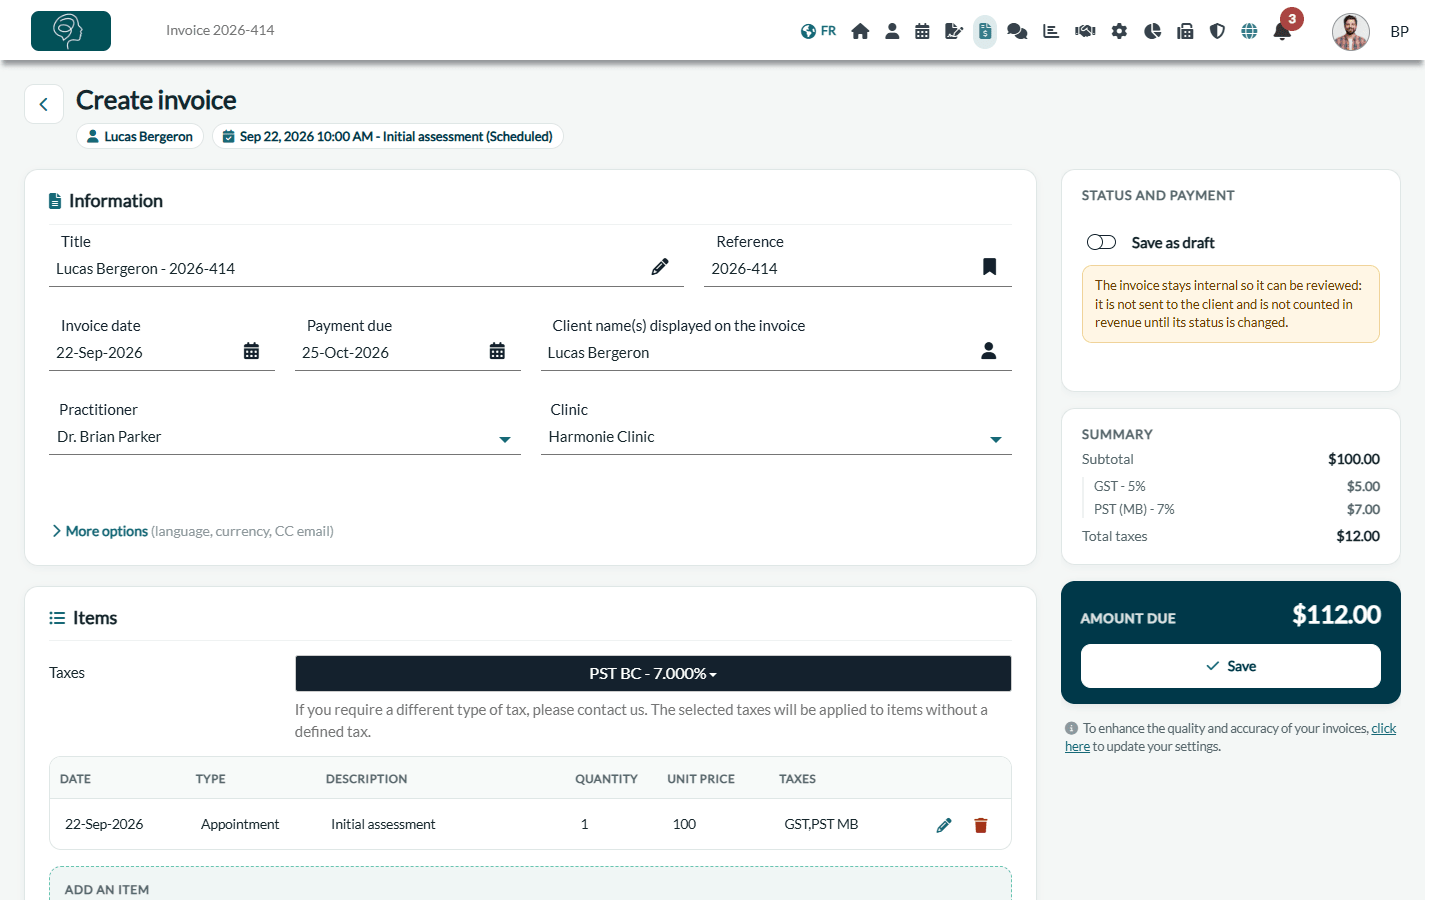
- The invoice is a single page made of cards. In the Information card, check the Title, Reference (invoice number), Invoice date, Payment due, Client name(s) displayed on the invoice and Practitioner (and the Clinic if your practice has several clinics). The client and the linked appointment are shown at the top of the page, under the title.
- Click More options to change the Language of the document or the Currency, or to enter a CC Email (optional): this address receives a copy of the invoice and receipt emails.
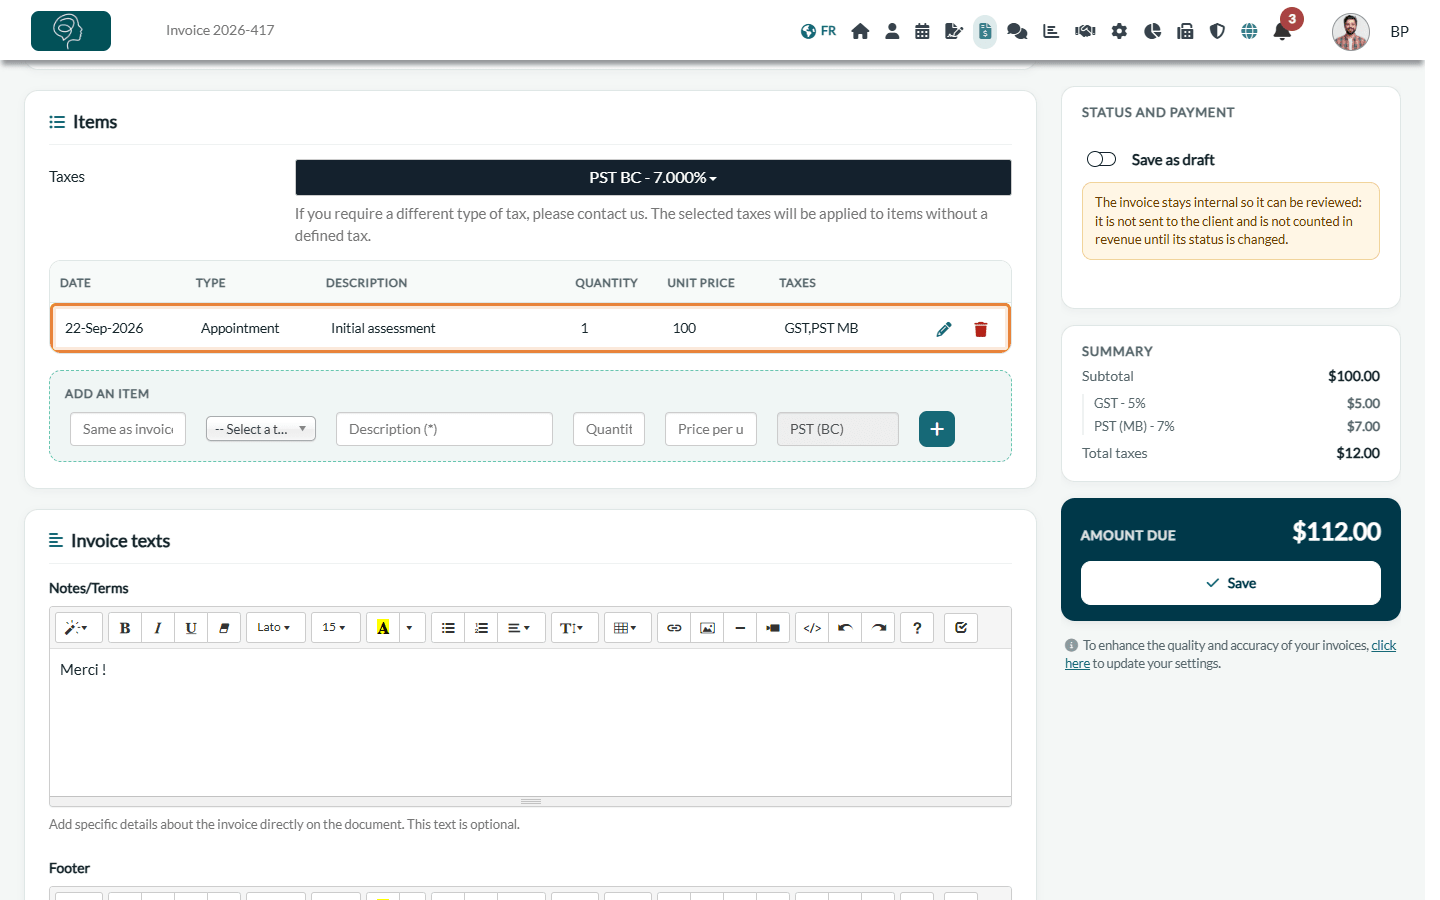
- Check the Items card. Its Taxes list sets the taxes applied to the items that have no tax of their own. To add a line, under Add an item, choose a type, a description, a quantity and a price, then click the green + icon. The pencil and trash icons edit or delete a line.
- Optionally, in the Invoice texts card, fill in Notes/Terms (printed on the invoice) and the Footer. The Comment stays internal: your clients never see it.
- Check the Summary (subtotal and taxes) and the Amount due in the panel on the right, then click Save just below. On a narrower screen, the amount due and the Save button stay in a bar at the bottom of the screen.
The invoice is created with the Not Paid status and appears in your list of invoices. Saving does not send anything to the client.
To keep the invoice internal while you review it, turn on Save as draft in the Status and payment panel before saving: the invoice is not sent to the client and is not counted in your revenue until you change its status.
3Send the invoice to the client
- Right after saving, a preview of the invoice opens: click the envelope icon (Send via email). You can also click Send invoice on the row of the invoice in the Invoices page (www.colib.io/invoices).
- In the confirmation window, you can edit the message added to the email.
- Click Confirm. The client receives the invoice as a PDF attachment.
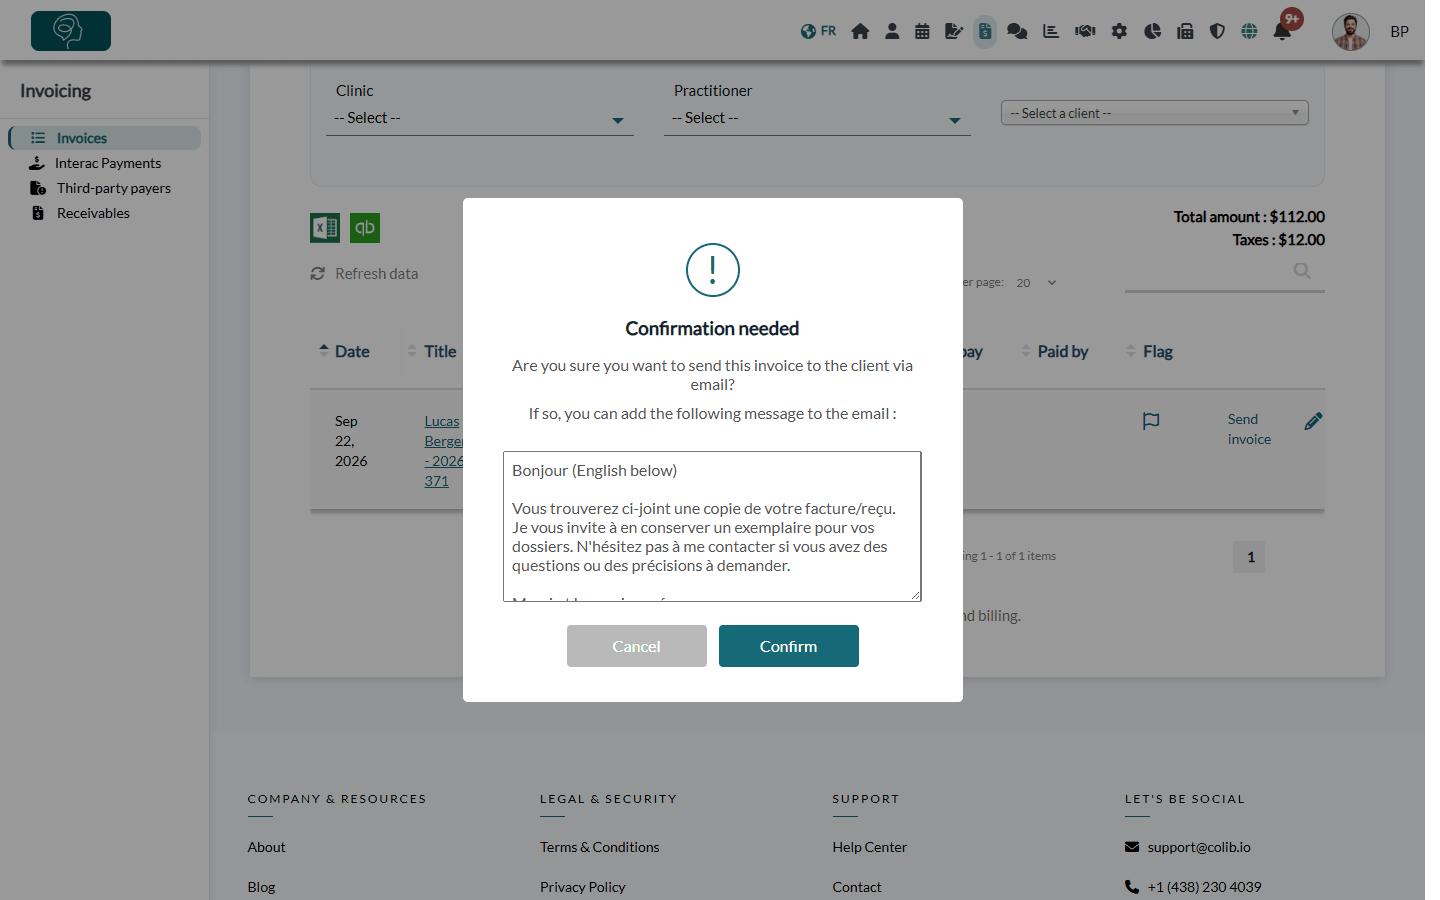
The invoice is sent by email only (not by SMS), with the PDF attached. When online payments are enabled and the option Add “Pay” button to invoice emails and client portal. is turned on in Settings > Invoices > Online payments (www.colib.io/settings?show=invoices), the email also contains a Pay button: the client pays by card on a secure page, without creating a Colib account or logging in.
Once the invoice has been sent, the link becomes Send invoice again: use it to send a reminder. To send reminders automatically, see How to automate invoice payment reminders.
4Mark the invoice as paid and send the receipt
When the client has paid (cash, e-Transfer, card terminal, etc.), record the payment: the invoice then becomes a receipt.
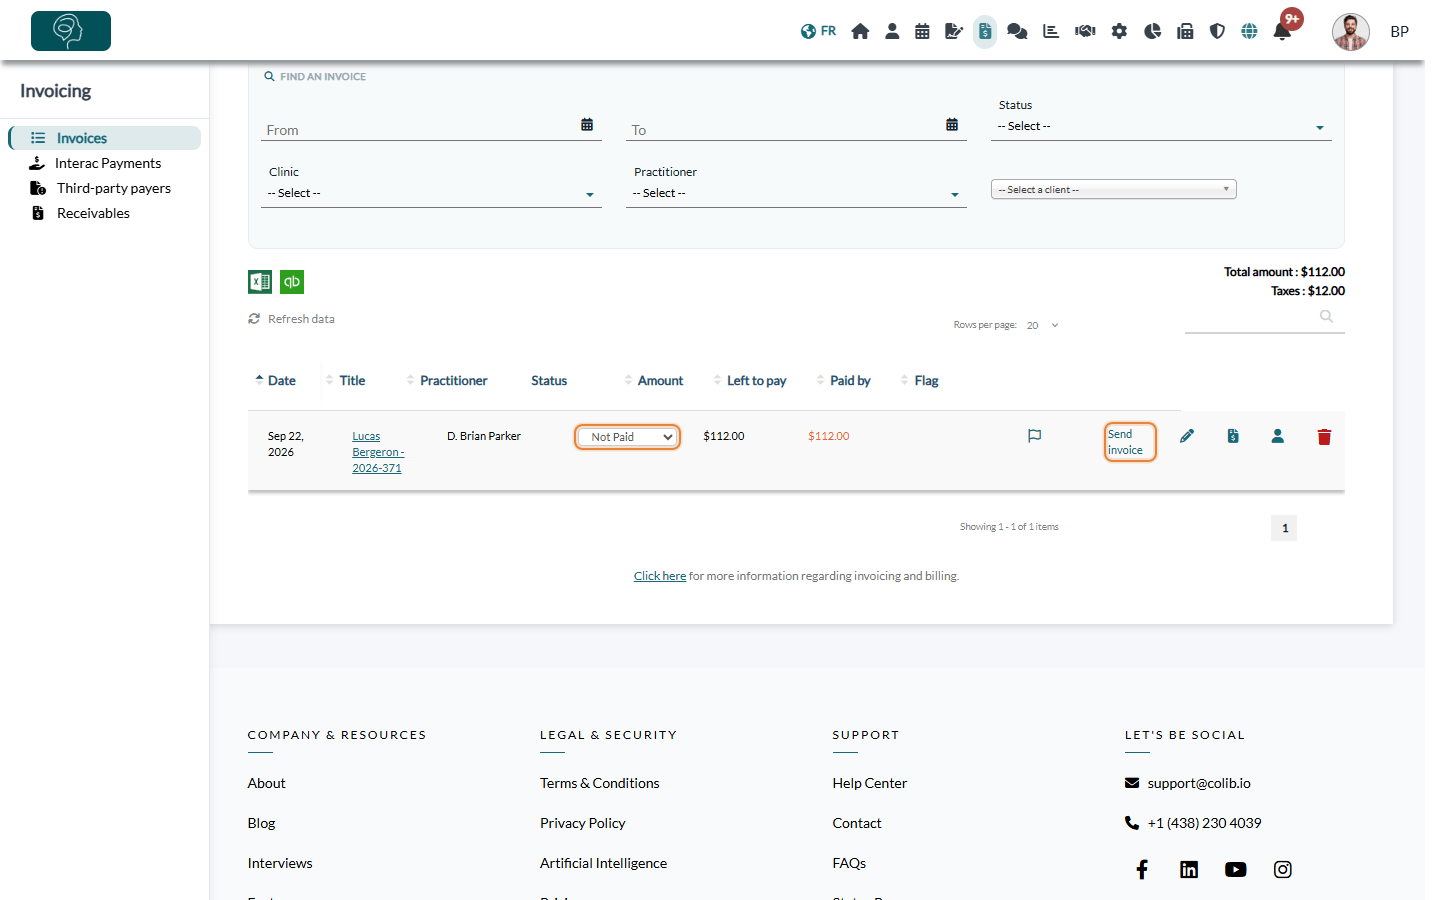
- In the Invoices page, change the status of the invoice to Paid. You can also open the invoice, select Paid in Status (Status and payment panel on the right), enter the Payment date and the Payment method, then click Save.
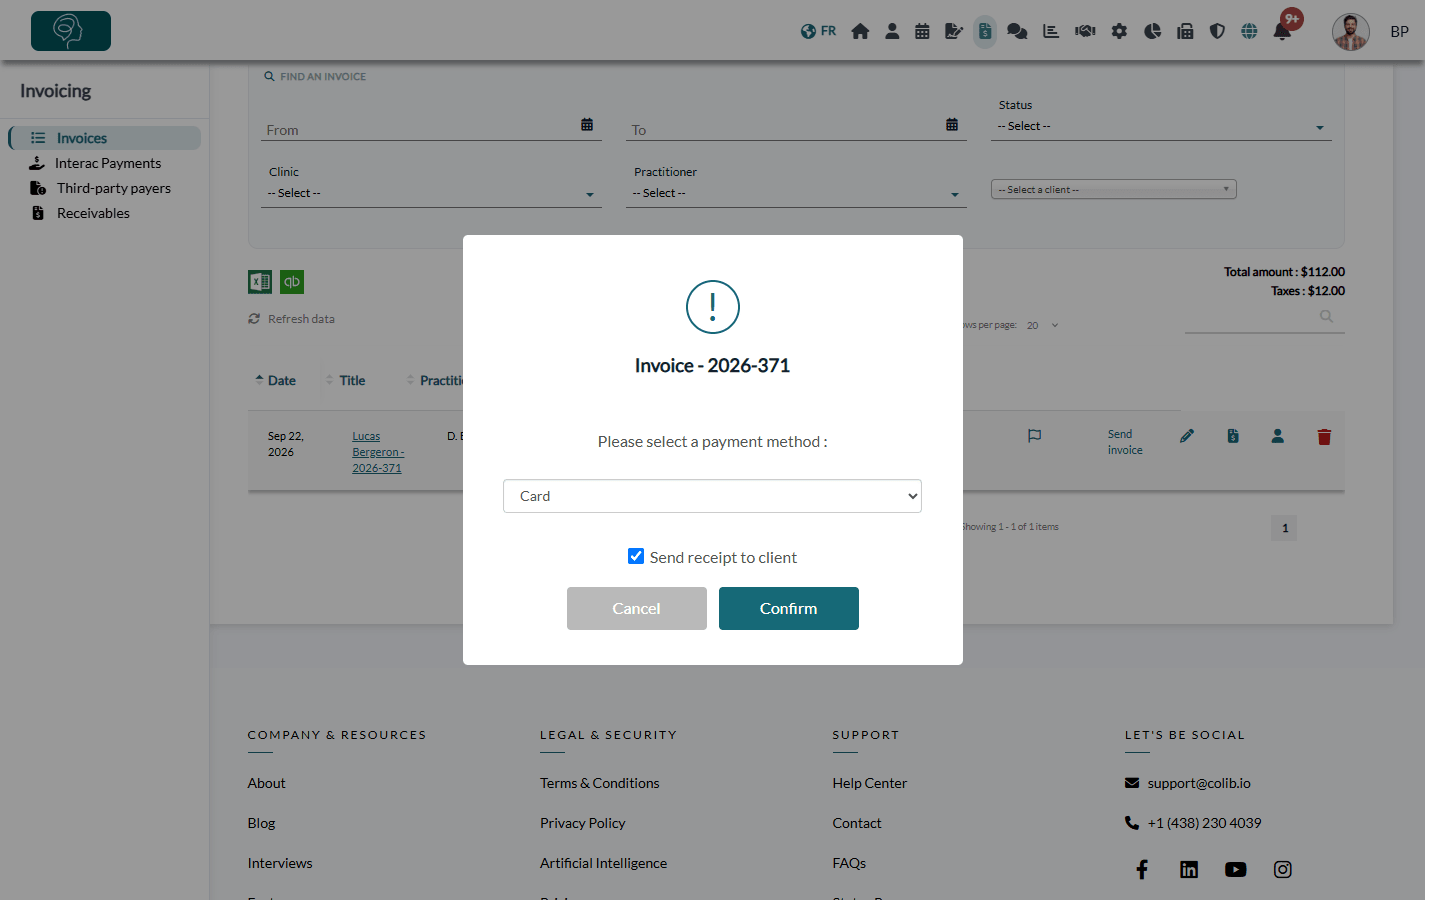
- If your practice requires a payment method, a window asks you to choose it (Card, e-Transfer, Cash, Third party, Other). Keep Send receipt to client checked to email the receipt right away, then click Confirm.
- Otherwise, click Send receipt on the row of the invoice whenever you want. Later, the link becomes Send receipt again.
The receipt is the same document, titled RECEIPT, with the payment date and the payment method.
Good to know
- Client who has already paid: create and save the invoice, then mark it as paid right away to send the receipt directly.
- Charge a saved card: if the client's card is saved in Colib, use Charge client instead of Create invoice. See How to charge a client's saved credit card.
- Automate it: in Settings > Invoices (www.colib.io/settings?show=invoices), the Automation section can send the invoice when an appointment is marked as completed, and send the receipt as soon as a payment is recorded.
- Online payment: when online payments are enabled, your clients can pay the invoice by card from the email or from their client portal. See How do I activate the online payment system on Colib?.
- Duplicate warning: if an invoice already exists for the same client and appointment, a warning at the top of the invoice gives you a link to it.
- Edit or change the status later: see How to edit a receipt (invoice already paid) and How to change the status of an invoice.
Still have a question?
Write to us at support@colib.io, we will be happy to help.
Was this article helpful?
That’s Great!
Thank you for your feedback
Sorry! We couldn't be helpful
Thank you for your feedback
Feedback sent
We appreciate your effort and will try to fix the article