Who is this article for?
You use QuickBooks Online for your accounting and you want to bring the invoices created in Colib into it. Colib is not directly connected to QuickBooks, but it exports your invoices in a file that QuickBooks can import in a few steps.
1Export your invoices from Colib
- Go to the Invoices page (www.colib.io/invoices).
- In Find an invoice, choose the period with From and To. You can also filter by Status, practitioner, clinic or client: the export contains exactly the invoices displayed.
- Click the green QuickBooks icon (Export to QuickBooks). A CSV file is downloaded to your computer.
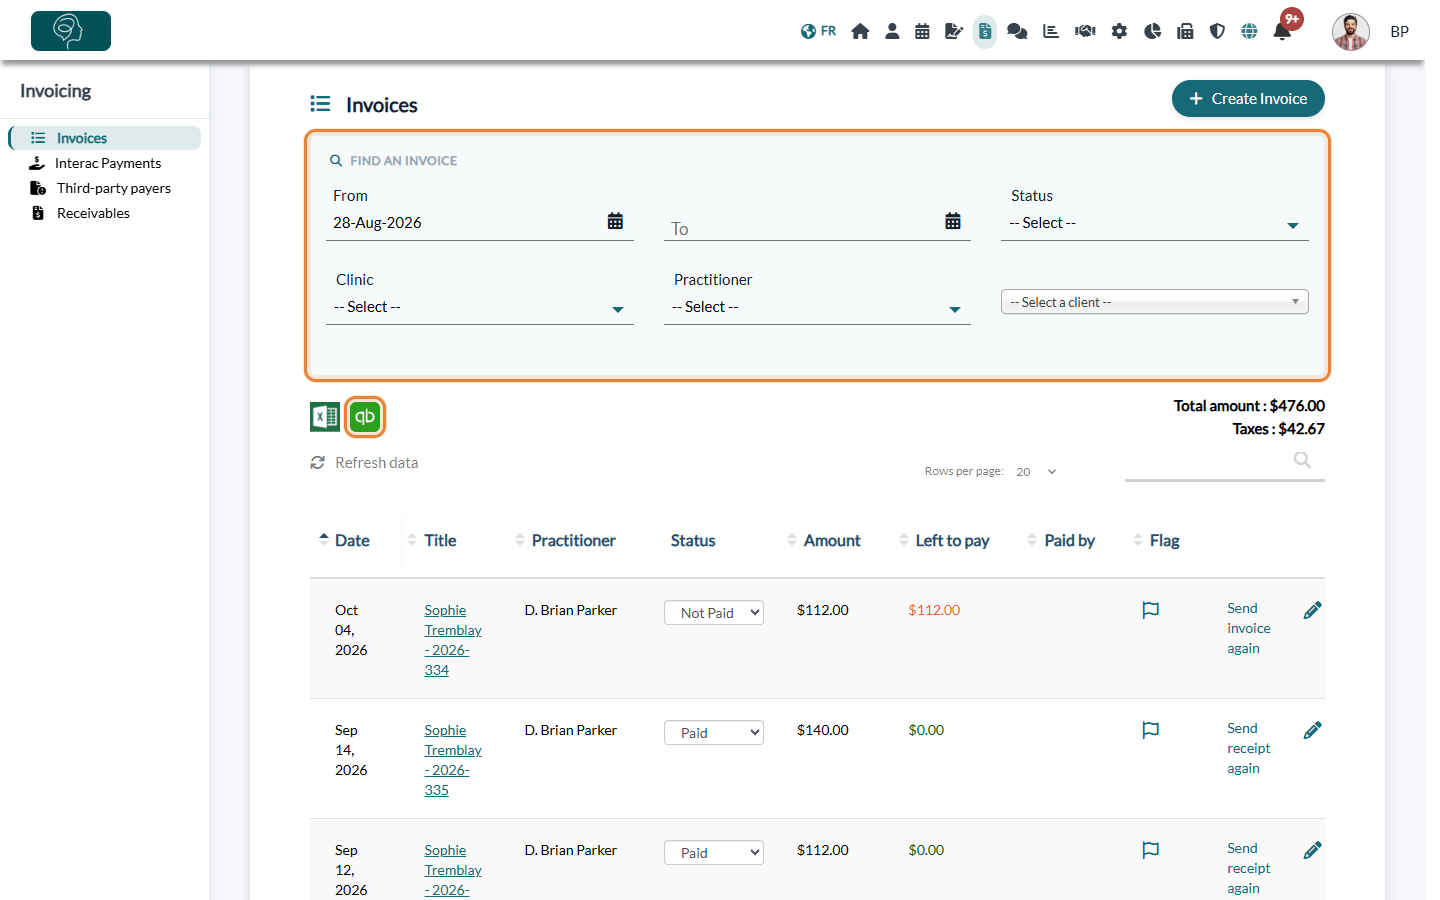
Tip: to import only what has been collected, choose Paid in Status before exporting. The green Excel icon next to it exports the same invoices to an Excel file.
The file contains one row per invoice item: invoice number, client name, invoice date and due date, item type, description, quantity, unit price, amount before taxes and tax code. The status of the invoice (and, for a paid invoice, the payment date and method) is added in the memo.
2Import the file into QuickBooks Online
- Sign in to QuickBooks Online and open the invoice import page (app.qbo.intuit.com/app/dataimport/invoices).
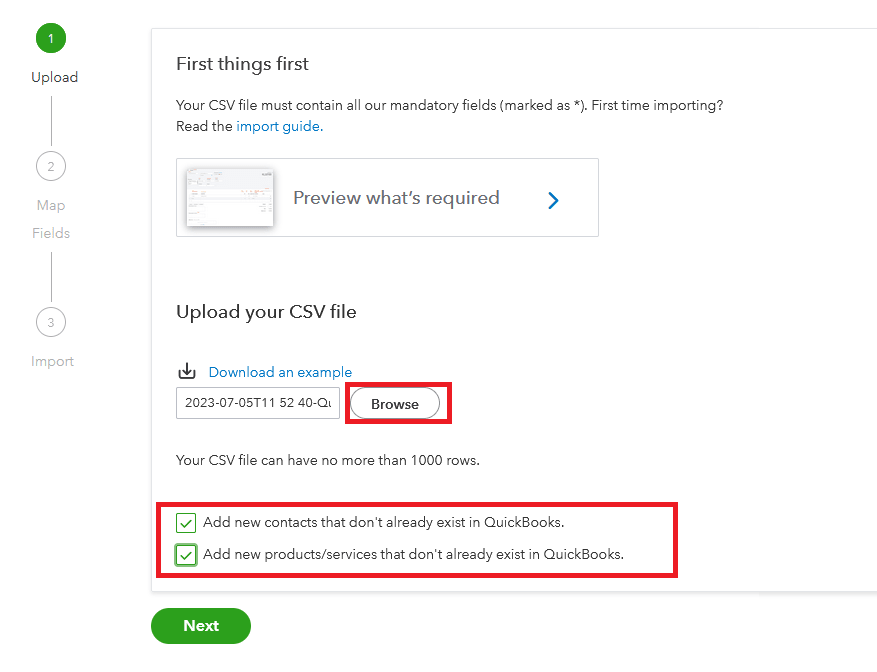
- Click Browse and select the file exported from Colib.
- Check the two boxes at the bottom of the page (Add new contacts that don’t already exist in QuickBooks and Add new products/services that don’t already exist in QuickBooks), then click Next.
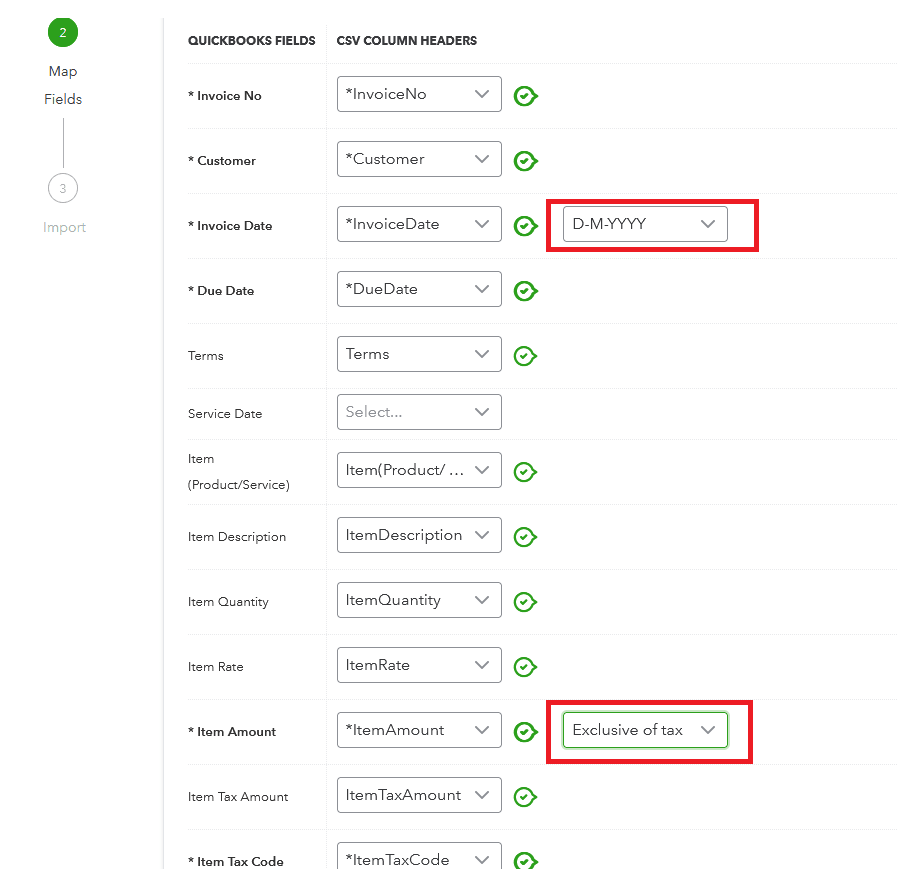
- On the field mapping screen, choose the date format that starts with the day (dates in the Colib file are written day/month/year).
- For Item Amount, choose Exclusive of tax: the amounts in the file are before taxes. Click Next.
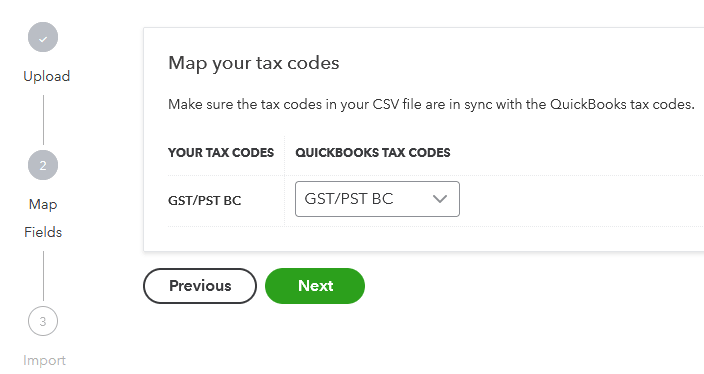
- Check that each tax code of the file matches the right QuickBooks tax code, then click Next.
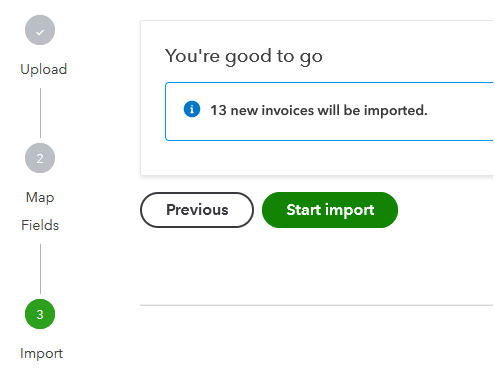
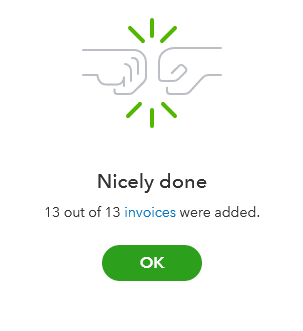
- QuickBooks shows the number of invoices that will be imported. Click Start import.
Good to know
- File size: QuickBooks accepts up to 1,000 rows per file. If you have many invoices, export shorter periods (for example, one month at a time).
- Avoid duplicates: import each period only once. The invoice number of Colib is used as the QuickBooks invoice number.
- QuickBooks screens: QuickBooks may change its import screens. If a screen looks different, refer to the QuickBooks help.
- Reports: for summaries of your revenue, payments and taxes, see the Reports section of Colib (www.colib.io/reports).
Still have a question?
Write to us at support@colib.io, we will be happy to help.
Was this article helpful?
That’s Great!
Thank you for your feedback
Sorry! We couldn't be helpful
Thank you for your feedback
Feedback sent
We appreciate your effort and will try to fix the article