Who is this article for?
Every practice tracks different information about its clients: the referring physician, the insurance company, how the client heard about you, their occupation, and so on. With additional fields, you add your own fields to every client record, in the format that suits you.
This article explains how to create these fields, where to fill them in, and how to ask for them when a client books online.
Before you start: additional fields are managed in Settings > Clients (www.colib.io/settings?show=clients). You need access to the practice settings to create, modify or delete them.
1Open the additional fields
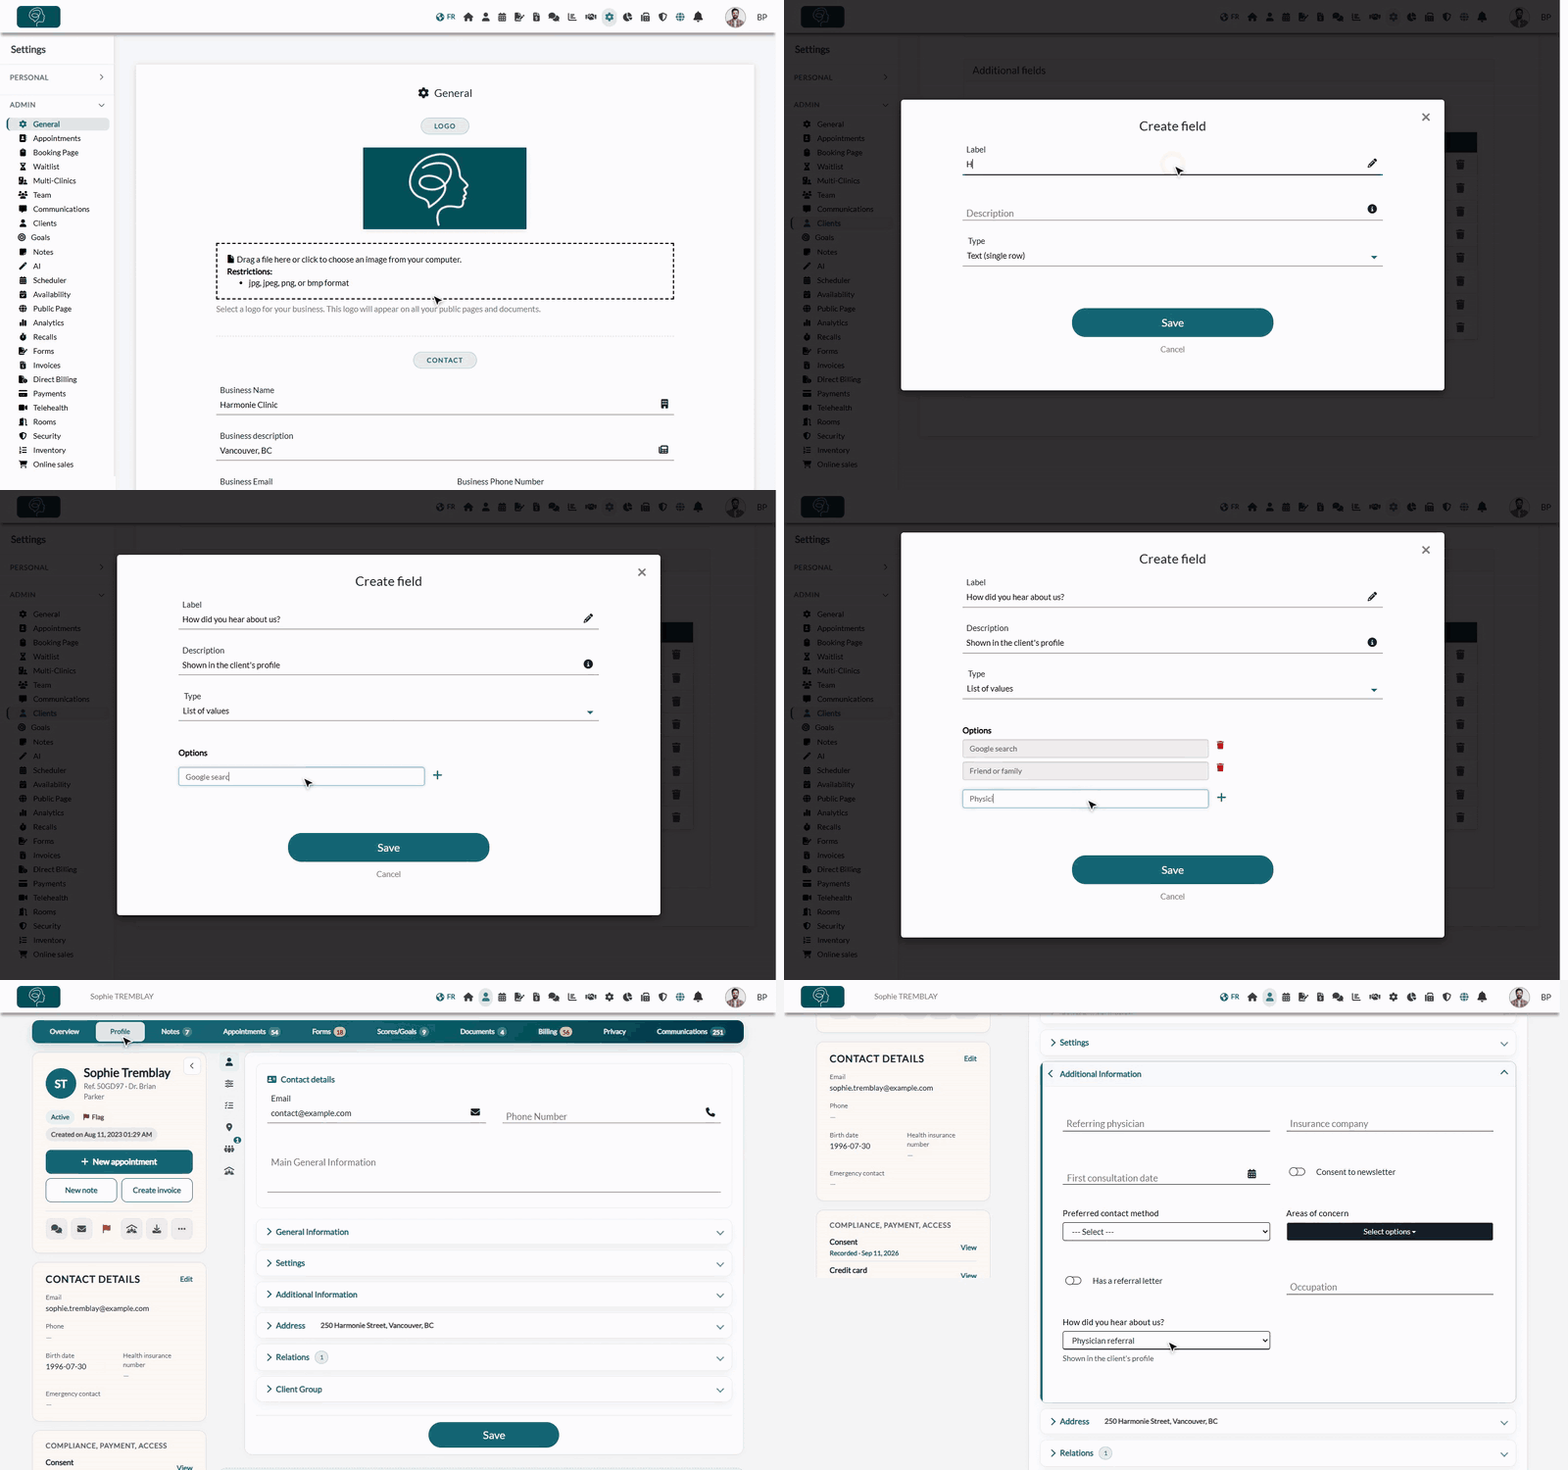
- Go to www.colib.io/settings?show=clients. You can also click the Settings icon (gear) in the top bar, then Clients in the Admin menu on the left.
- Scroll down to the Additional fields section. It lists the fields already created, with their label and type.
2Create a field
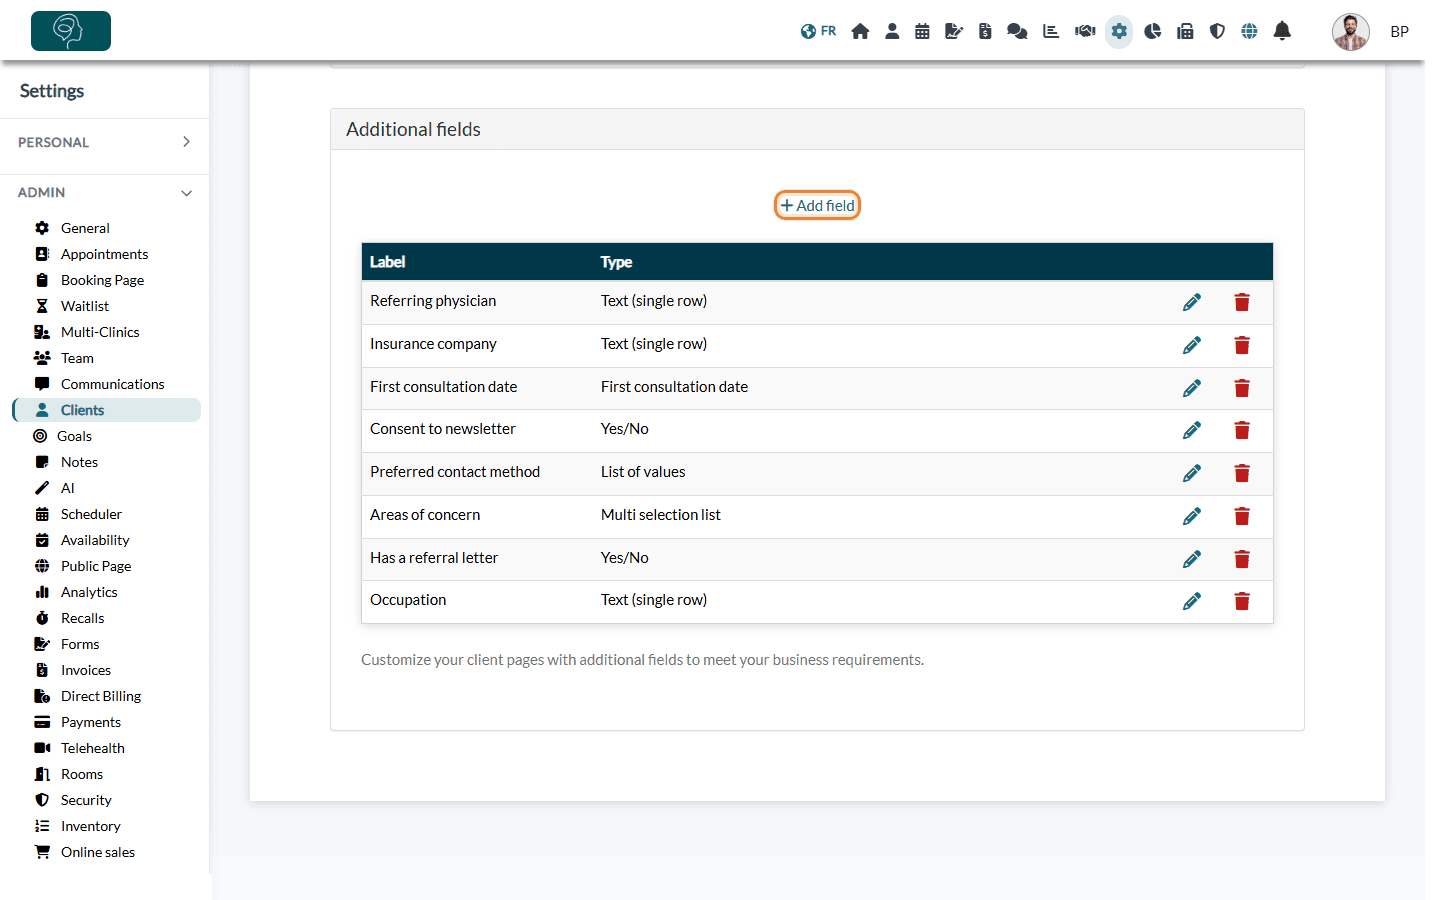
- Click Add field.
- Enter the Label: this is the name of the field as it will appear in the client record (for example, How did you hear about us?).
- Optionally, enter a Description: it is shown under the field to help your team fill it in.
- Choose the Type of field (see the table below).
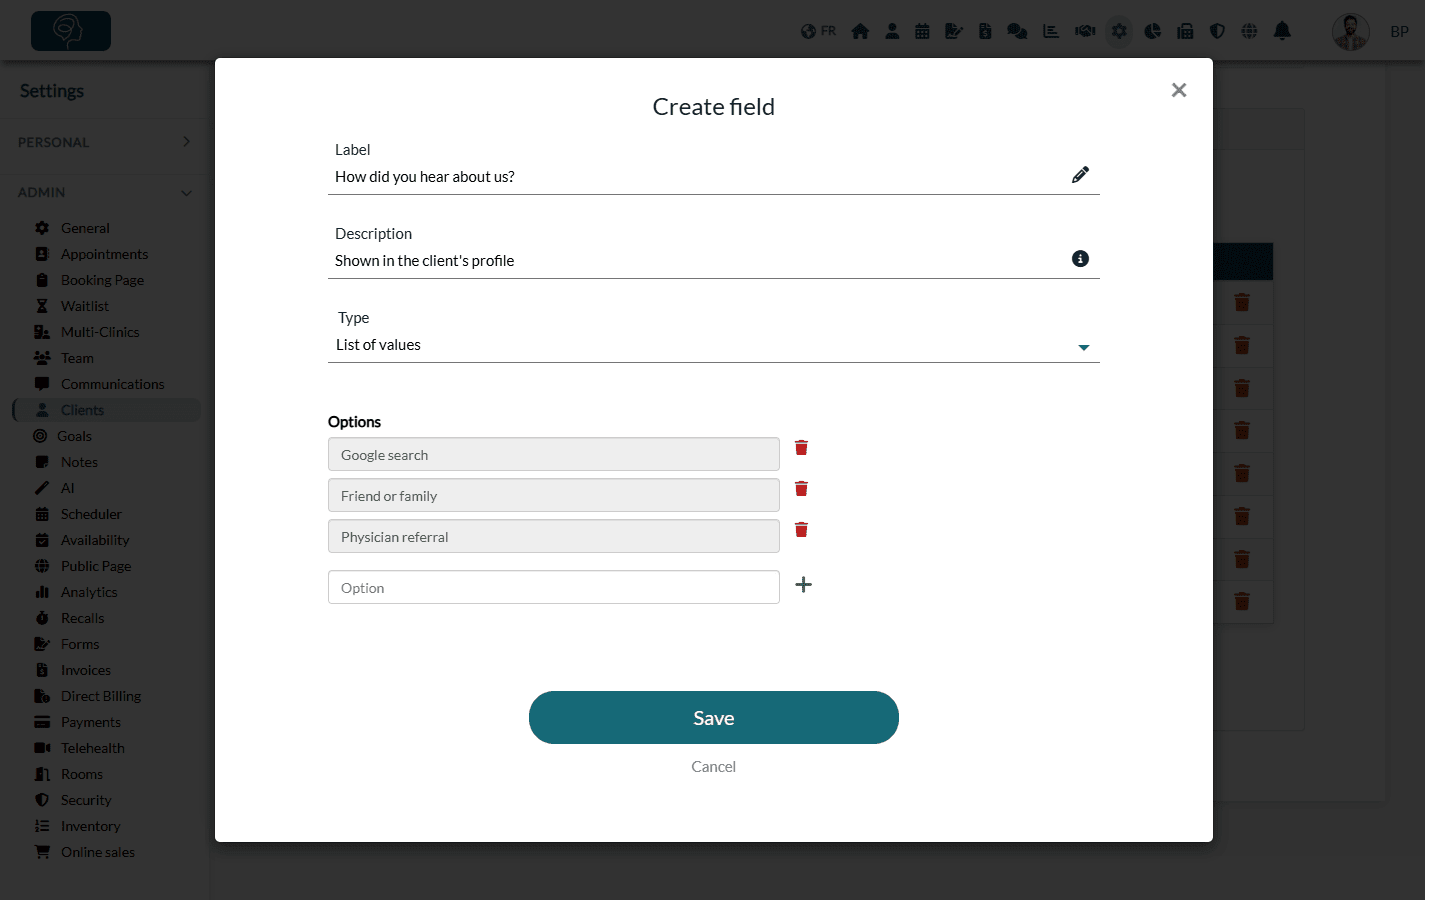
- For a list, type each choice in Option and click the + button to add it. The trash icon removes a choice.
- Click Save. The new field appears at the bottom of the list.
| Type | Use it for |
|---|---|
| Text (single row) | A short piece of information: referring physician, occupation, file number from another system. |
| Text (several rows) | A longer text: background, special instructions. |
| Date | A date chosen in a calendar: first consultation, end of coverage. |
| Yes/No | A switch: has a referral letter, consents to the newsletter. |
| List of values | One choice among the options you define: how did you hear about us, preferred contact method. |
| Multi selection list | Several choices among the options you define: areas of concern, languages spoken. |
Important: the type of a field cannot be changed once the field is created. If you chose the wrong type, delete the field and create it again.
3Fill in the fields in the client record
- Open the client's record from your client list (www.colib.io/clients).
- Click the Profile tab.
- Open the Additional Information section: all your additional fields are there.
- Fill them in, then click Save at the bottom of the page.
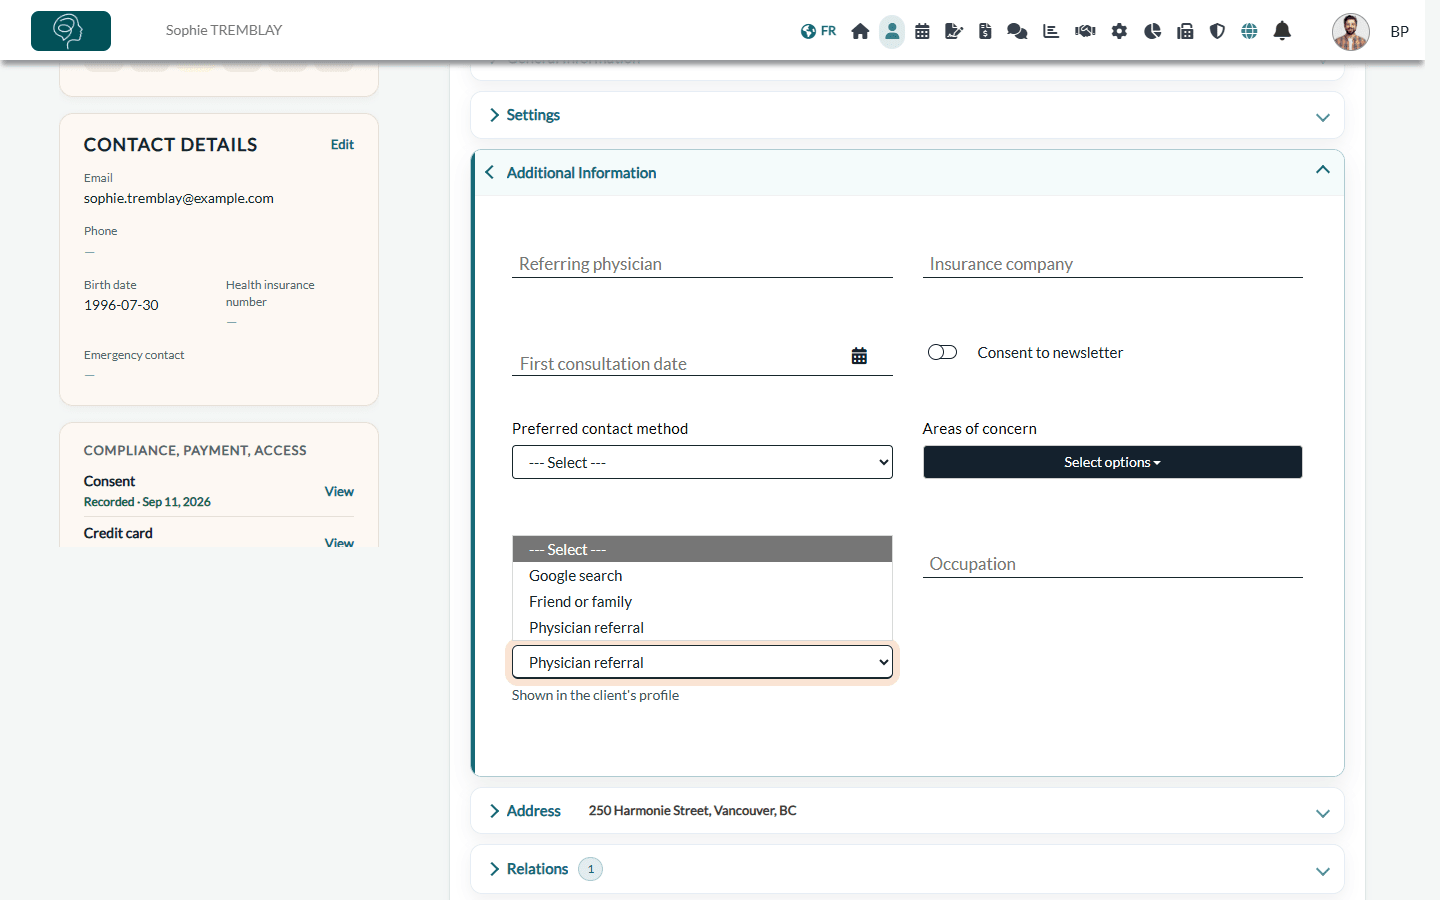
The Additional Information section only appears once at least one additional field has been created.
4Ask for the fields on your booking page (optional)
You can ask your clients to fill in some of these fields themselves when they book online. Their answers are saved directly in their client record.
- Go to Settings > Booking Page (www.colib.io/settings?show=bookingpage).
- In the Additional client fields section, turn on each field to display on the first step of the booking page.
- For each selected field, you can change the Label on the booking page (the wording your clients see) and make the field Mandatory.
- Save your settings.
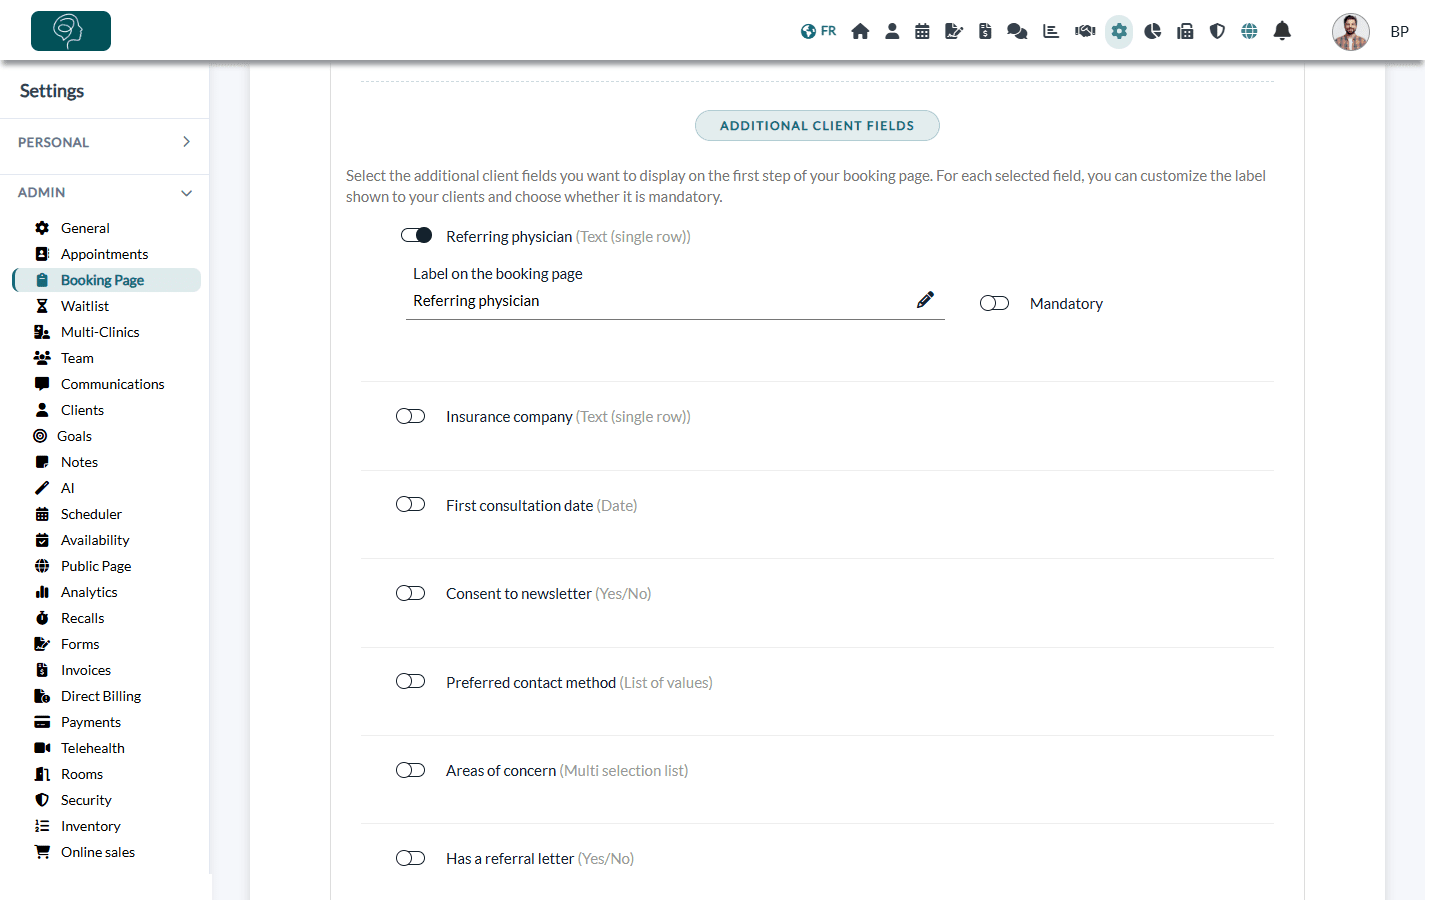
This section is only visible when online booking by clients is enabled.
Good to know
- Change the order — in Settings > Clients (www.colib.io/settings?show=clients), drag and drop the rows of the table to reorder the fields. The client record follows the same order.
- Rename a field or edit its options — click the pencil icon on its row.
- Delete a field — click the trash icon on its row.
- Shared by the whole practice — additional fields are the same for every client and every practitioner of the practice.
Important: deleting a field also permanently deletes the information entered in that field for all your clients, as well as the answers collected on your booking page. This cannot be undone.
Still have a question?
Write to us at support@colib.io, we will be happy to help.
Was this article helpful?
That’s Great!
Thank you for your feedback
Sorry! We couldn't be helpful
Thank you for your feedback
Feedback sent
We appreciate your effort and will try to fix the article