Who is this article for?
This article is for anyone in your practice who adds new clients to Colib by hand: practitioners, receptionists and administrators. It explains how to create a client record, which information is required, and what you can do once the record exists.
Before you start: you do not always need to create clients yourself. Clients who book online or fill in one of your online forms get a record automatically, and you can import an existing client list. See Do I have to create all clients manually?.
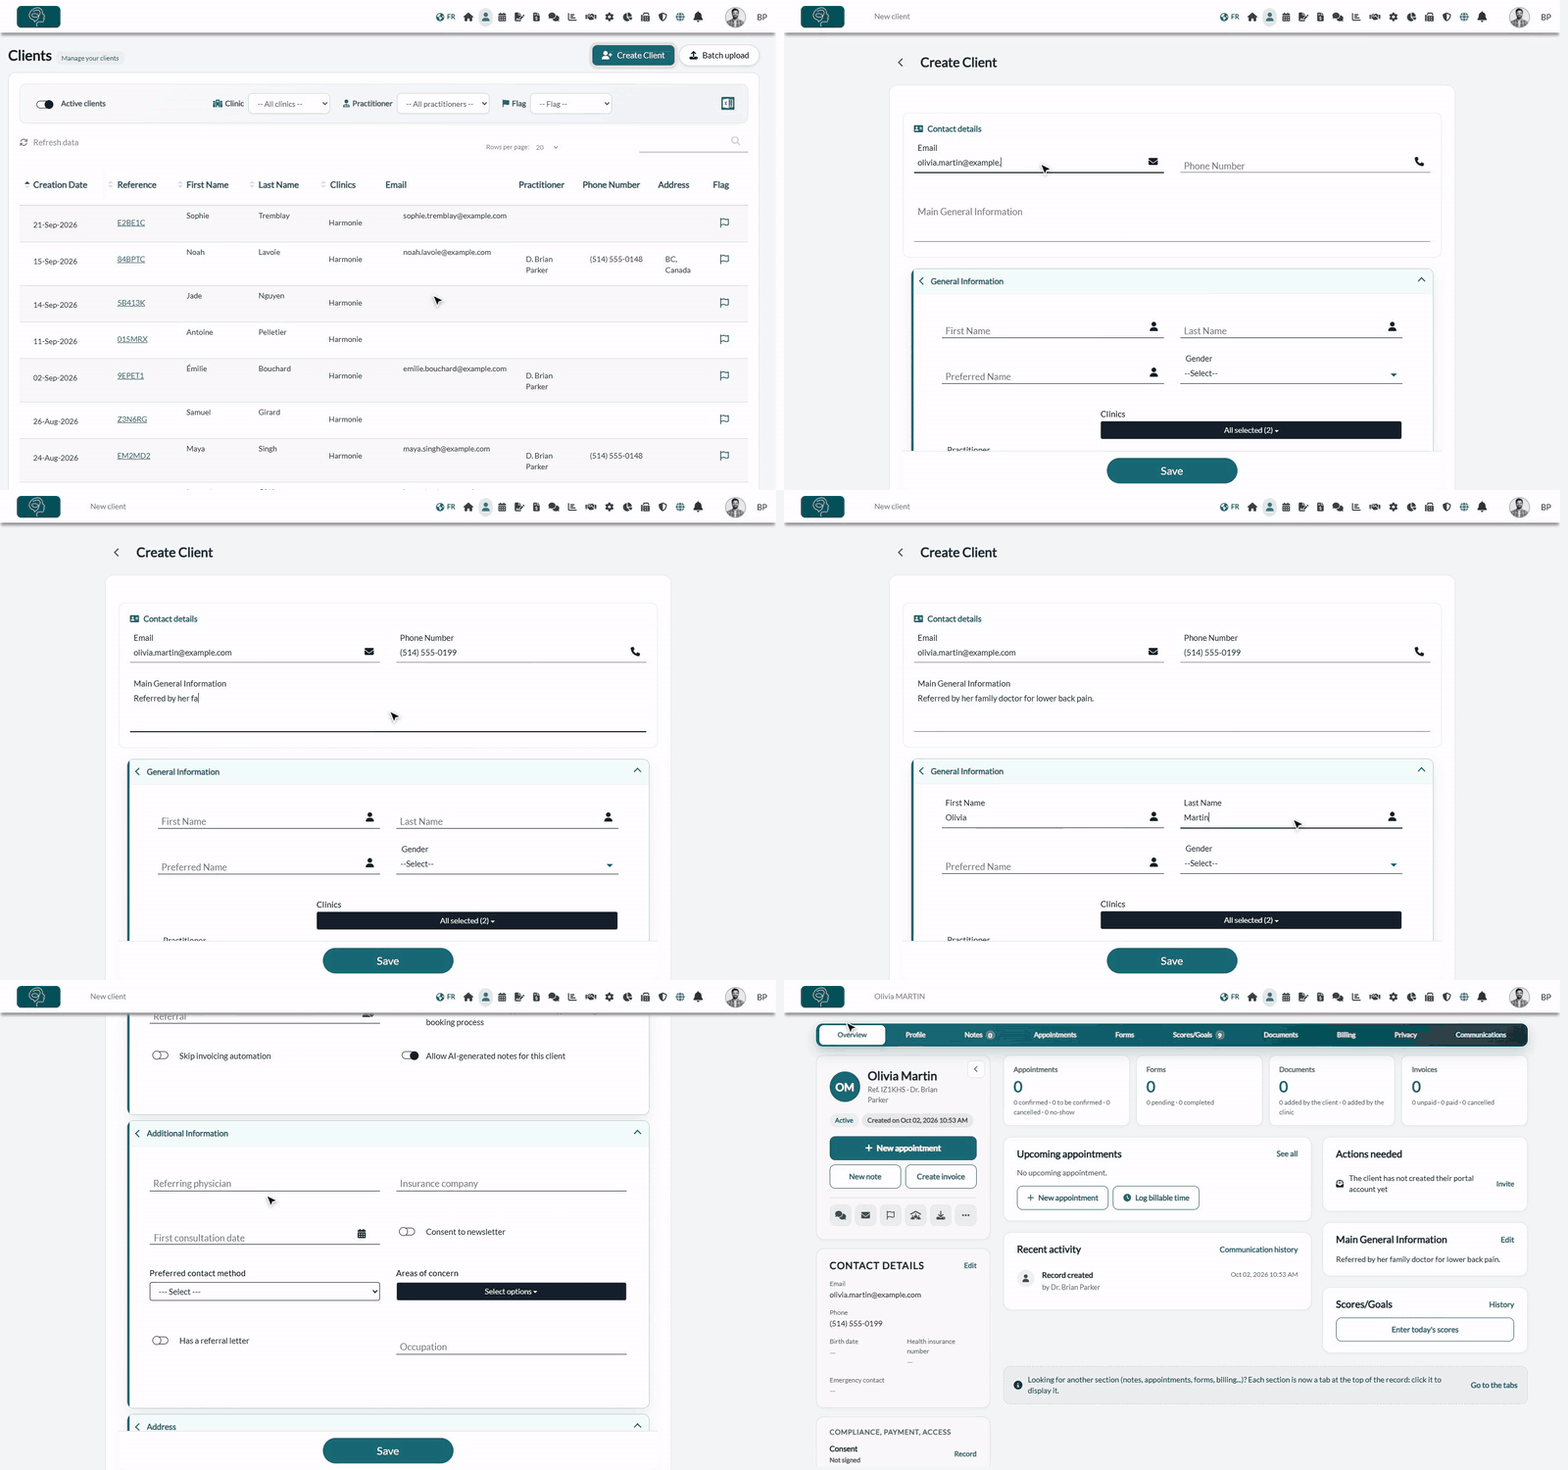
1Open the creation form
You can start from two places.
From the client list
- Go to Clients (www.colib.io/clients).
- Click Create Client at the top right of the page.
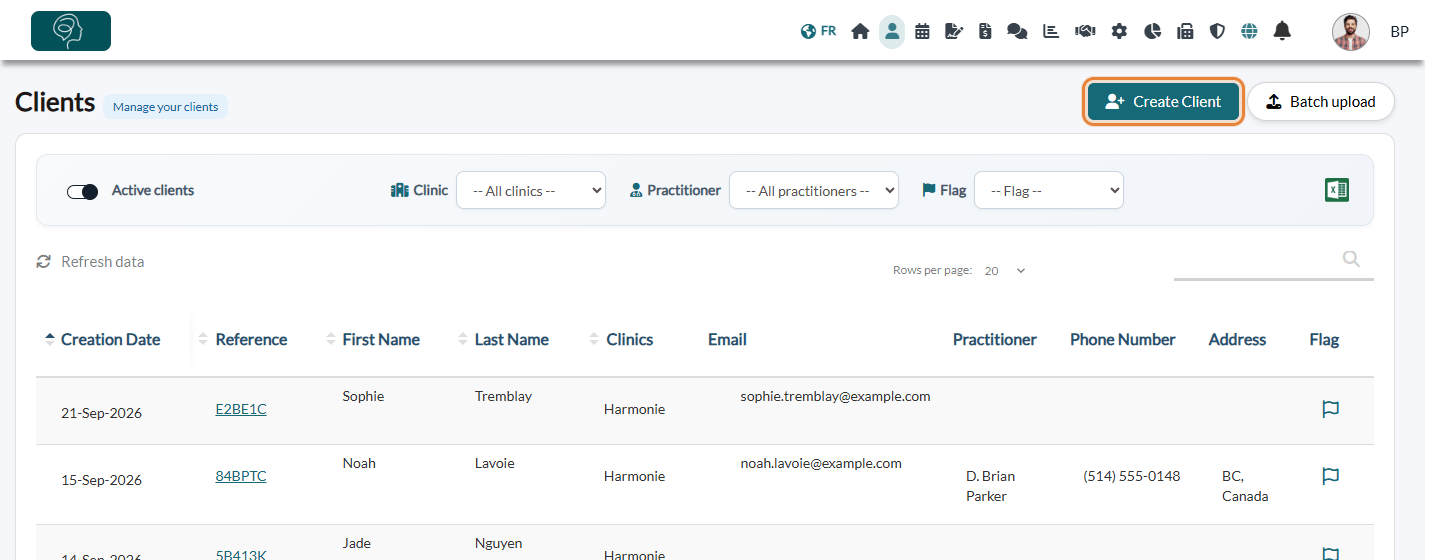
While booking an appointment
If the client does not exist yet when you book their appointment, you do not have to close the appointment window and start over:
- In the appointment window, under the client list, click Click here in the sentence Click here to create a client.
- Fill in the client form (see the next steps) and click Save.
- Colib takes you back to the scheduler, with the new client already selected and the date, time and appointment type you had chosen.
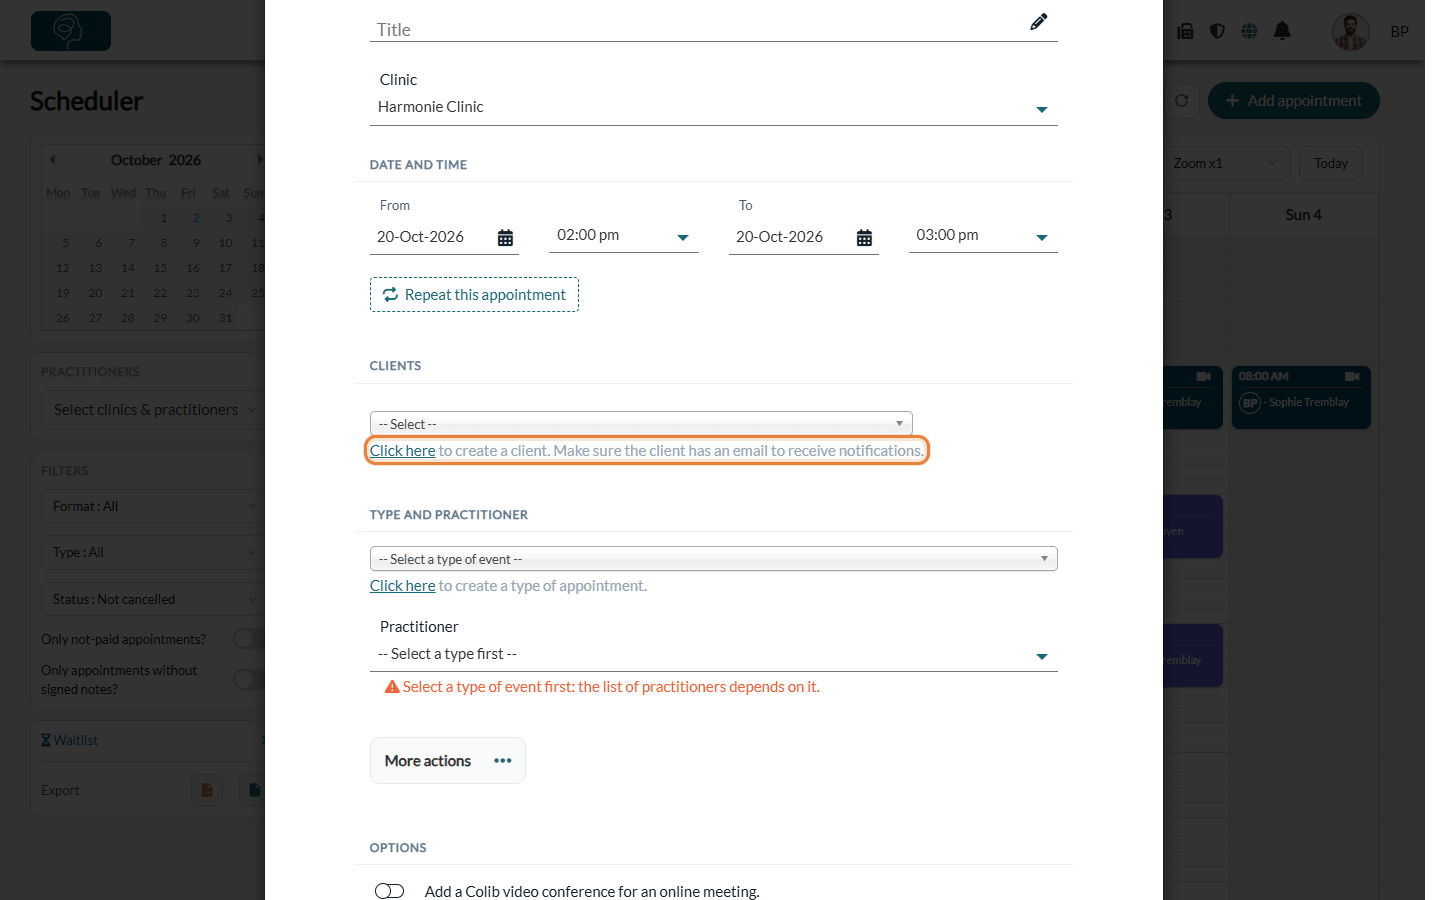
2Enter the client's information
The Create Client form is divided into sections. Only two fields are required: First Name and Last Name. Everything else is optional and can be completed later.
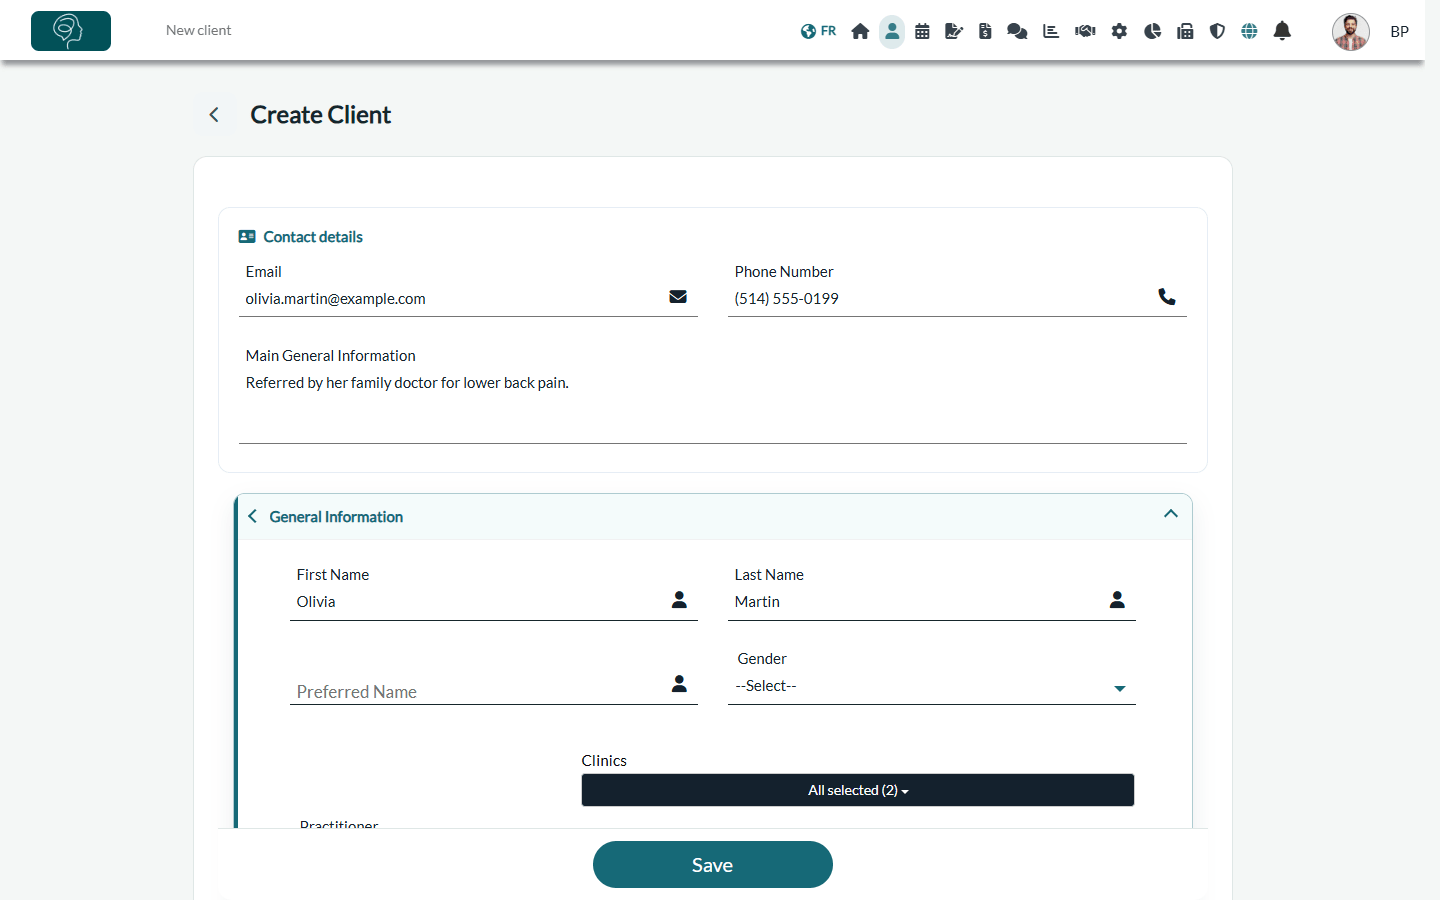
| Section | What to enter |
|---|---|
| Contact details | Email and Phone Number. Also Main General Information: a free note shown on the client's overview (for example, the reason for consultation). |
| General Information | First Name and Last Name (required), Preferred Name, Gender, Practitioner (you by default) and Additional practitioners assigned to the client, Birth Date, Health insurance number, Emergency Contact, Professional Activity, Reference Number (generated automatically, you can change it), Additional emails for email communications (people copied on every email sent to the client, separated by semicolons) and Active client. |
| Settings | Time zone, Language, Preferred communications, Fee modification (sliding scale), Referral, and three switches: Authorized to view all appointment types during the booking process, Skip invoicing automation and Allow AI-generated notes for this client. |
| Additional Information | Your own custom fields, if you created some. See How to add custom fields to your client records. |
| Address | Street address (with address suggestions as you type), city, postal code, country and province. |
| Relations | Links to other people with Add relation. |
Multi-clinic practice: a Clinics field also appears. Select between 1 and 3 clinics for the client.
3Check the language and communication preferences
In the Settings section, two fields decide how Colib communicates with the client:
- Language: the language of the emails and text messages the client receives.
- Preferred communications: Email & SMS, Email only or SMS only. It sets the channels Colib uses to send notifications to the client.
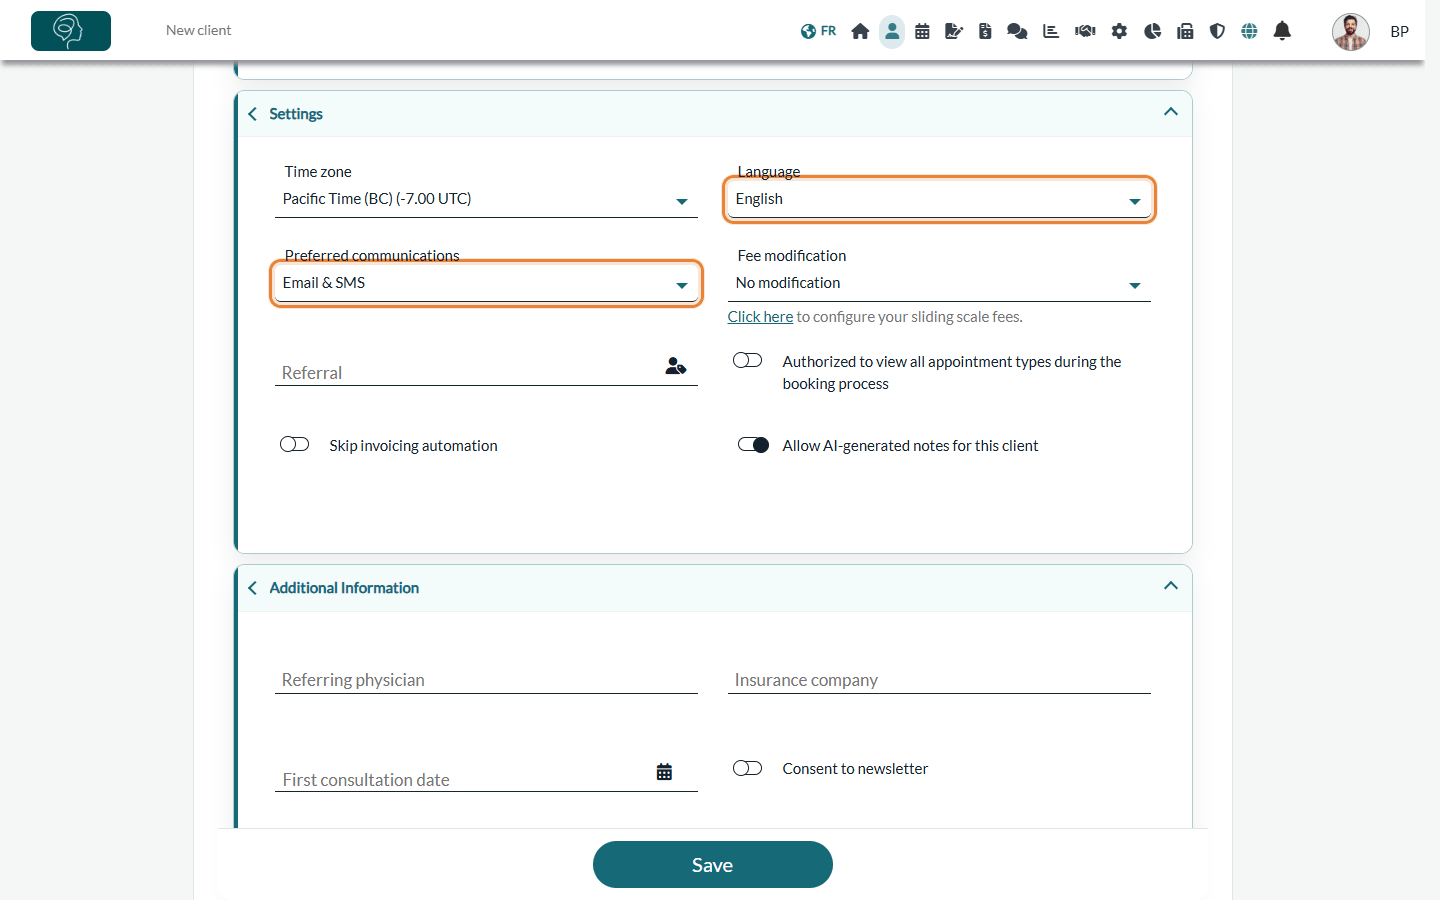
Enter an Email if you want the client to receive appointment notifications by email, forms to fill in, and an invitation to the client portal. Text messages are only sent to Canadian and US phone numbers.
4Save
- Click Save at the bottom of the screen.
- The client record opens, with its tabs (Overview, Profile, Notes, Appointments, Forms, Documents, etc.). You can now book an appointment, write a note or create an invoice.
If you turned on automatic welcome emails, the client receives your welcome email as soon as the record is saved. See How to configure and send a welcome email to clients.
5Invite the client to the client portal (optional)
With an account on the client portal, the client can see their appointments, fill in forms, read the documents you share and pay their invoices.
- Open the client record.
- Click the ... button (More actions) under the client's name, then Invite to join the client portal. You can also click Invite in the Actions needed card of the Overview tab.
- Confirm. The client receives an email with a link to create their account.
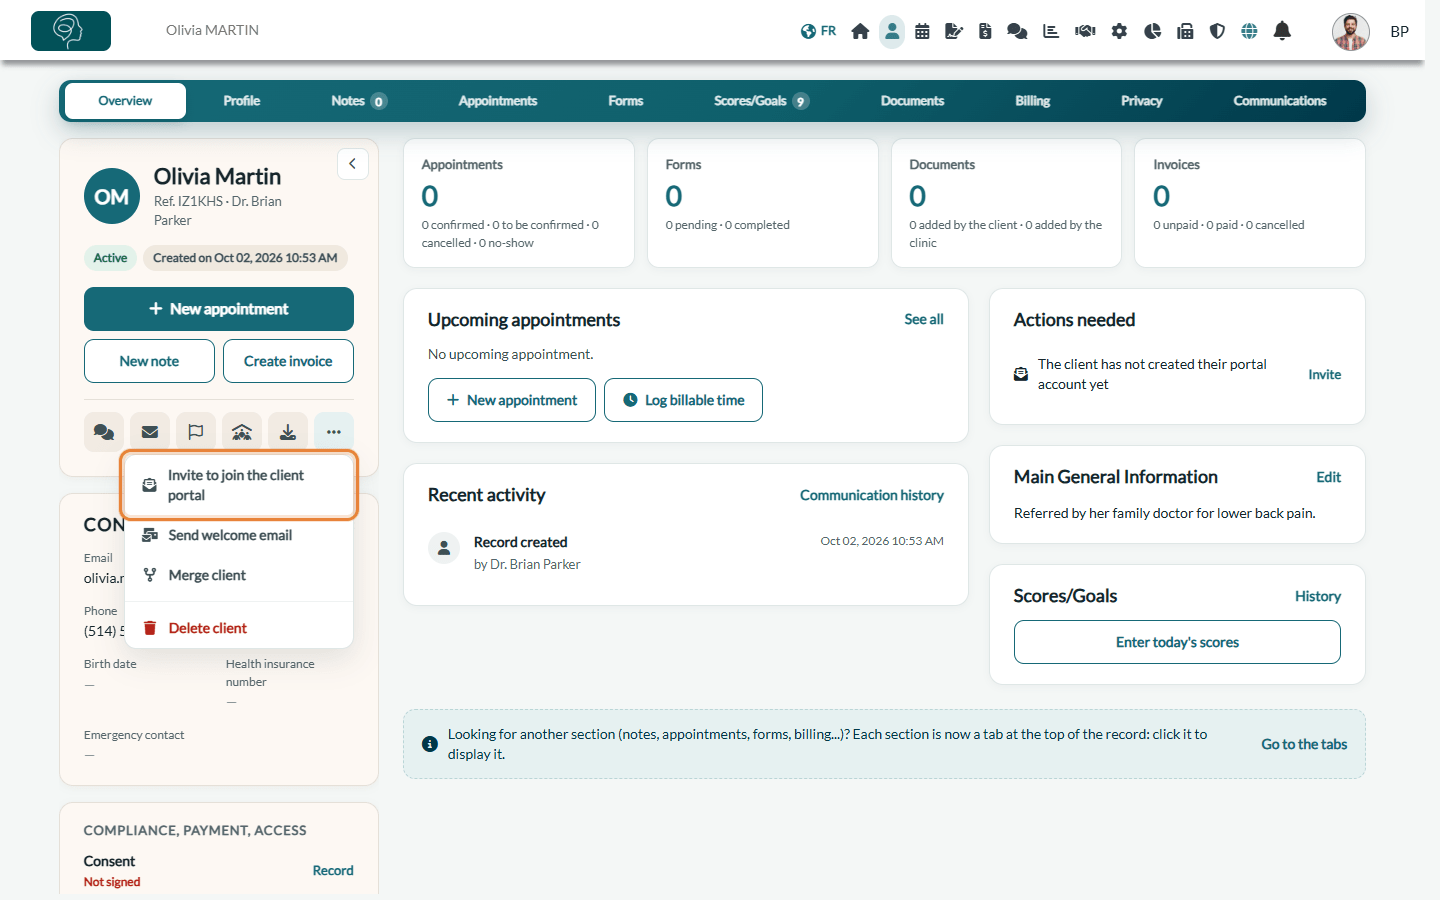
The client needs an email address in their record to be invited. Once they have created their account, the invitation option disappears. Learn more: What is the client portal?.
Good to know
- Error message when saving — First Name and Last Name are required. If the US/Canadian phone number control is turned on in Settings > Clients (www.colib.io/settings?show=clients), a phone number from another country is refused.
- Wrong email or phone number — correct it in the Profile tab of the client record and click Save.
- Created a duplicate? You can merge the two records: see Can I merge two client accounts?.
- Client who no longer consults — archive the record rather than deleting it: see How to archive a client.
- Children and families — group a child with the adult responsible for them: see How to communicate with child clients using client groups.
- Many clients to add — import them in one go: see How can I migrate my clients from my old system?.
Still have a question?
Write to us at support@colib.io, we will be happy to help.
Was this article helpful?
That’s Great!
Thank you for your feedback
Sorry! We couldn't be helpful
Thank you for your feedback
Feedback sent
We appreciate your effort and will try to fix the article