Who is this article for?
This article is for every Colib user: practice owners, practitioners and staff, as well as clinic administrators who want to protect the accounts of their team. It also explains how your clients turn the same protection on in their client portal.
With two-factor authentication (2FA), your password is no longer enough to open your account. After your email address and password, Colib sends you a 6-digit code by email or by text message, and you type it in to finish signing in. Even if someone learns your password, they cannot get into your account without this code.
Before you start: two-factor authentication is a personal setting. Each user turns it on for their own account in Settings > Security, in the Personal section (www.colib.io/settings?show=personalsecurity). To receive the code by text message, add your mobile number to your profile first (see Step 2).
1Turn on two-factor authentication
- Go to www.colib.io/settings?show=personalsecurity. You can also click the Settings icon (gear) in the top bar, then Security in the Personal menu on the left.
- In the Multi-factor authentication section, turn on Enable 2 factor authentication (2FA).
- The change is saved right away: the message The modifications have been successfully saved. appears. There is no button to click.
For your security, Colib sends you a confirmation email when you turn two-factor authentication on or off, or change the way you receive the code. If you receive one of these emails without having made the change, write to us right away.
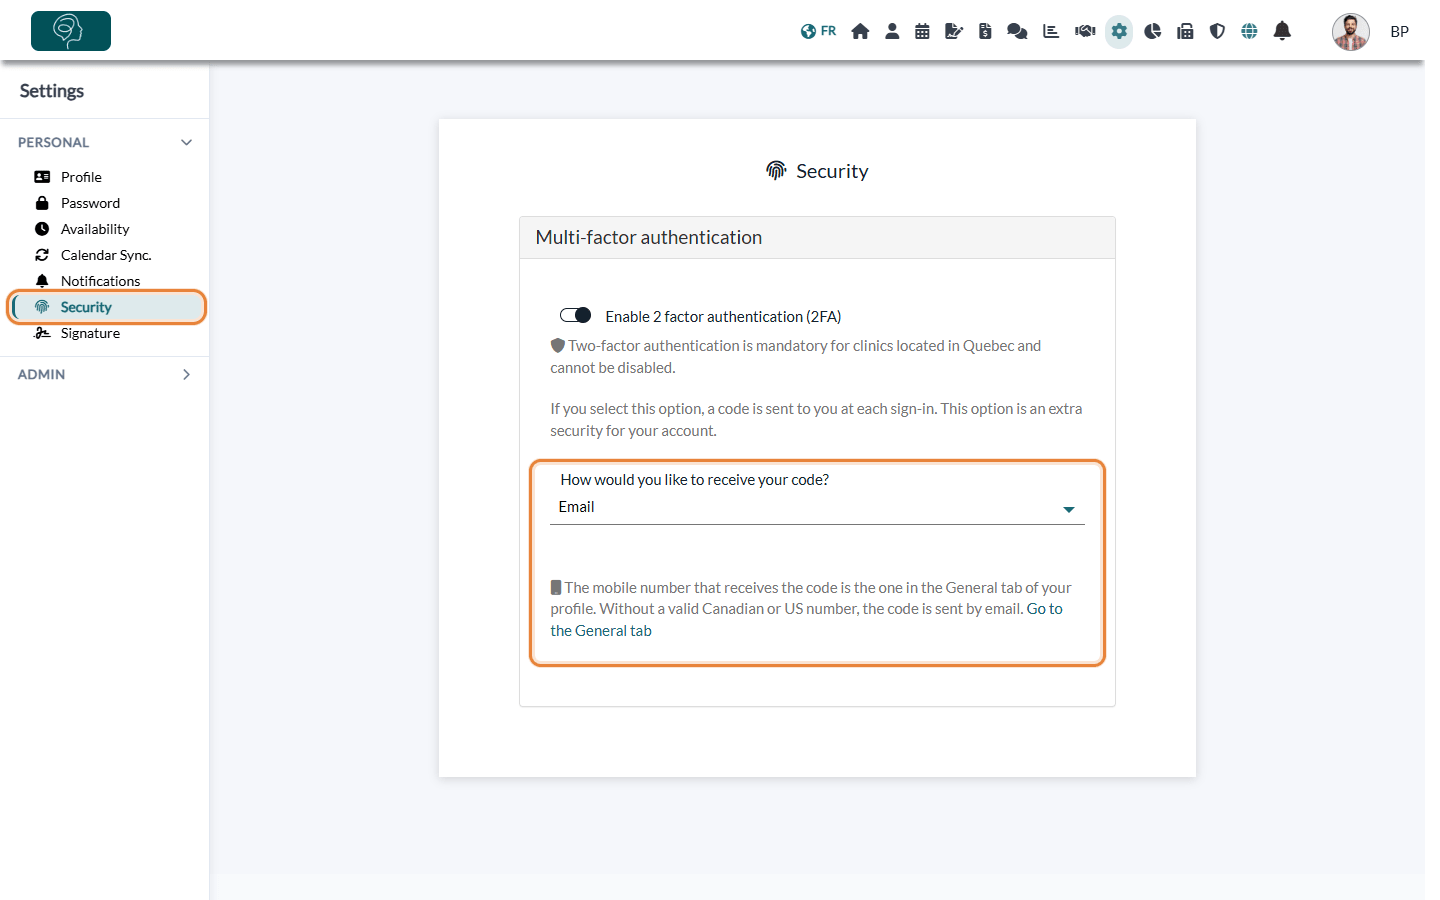
Clinics located in Quebec: two-factor authentication is mandatory for everyone (practitioners, staff and clients, in Colib and in the client portal). The switch is already on and greyed out, with the message Two-factor authentication is mandatory for clinics located in Quebec and cannot be disabled. You can still choose how you receive the code.
2Choose how you receive the code
Once two-factor authentication is on, the list How would you like to receive your code? appears under the switch.
- Choose Email to receive the code at the email address of your account, or Text message (SMS) to receive it on your mobile phone.
- The choice is saved right away.
The text message goes to the mobile number entered in the Profile tab of your personal settings (www.colib.io/settings?show=personalgeneral). The Go to the General tab link under the list takes you there. Only Canadian and US mobile numbers can receive the code. Without a valid number, Colib shows the message Add a valid mobile number in the General tab of your profile to receive the code by text message. Until then, the code is sent by email. and keeps sending the code by email.
3Sign in with the code
From now on, every time you sign in successfully:
- Enter your email address and password as usual, then click Log in.
- The Multi Factor Authentication page opens. It tells you where the code was sent: your email address, or the last 4 digits of your mobile number.
- Open the email or the text message and type the 6-digit code in the boxes. You are then signed in to Colib.
- The code expires after 10 minutes and can be used only once.
- Did not receive it, or took too long? Under Didn't receive the code?, click Click here to request a new one. When a mobile number is available, the page also offers Receive a new code via SMS (or Receive a new code by email if the code went by text message): handy if you do not have access to your mailbox or your phone at that moment.
- Only the most recent code works: a new code sent by email replaces the previous one. A text message requested while your last code is still valid contains that same code.
- Wrong code: Colib shows The code is incorrect. A wrong code counts as a failed sign-in attempt, just like a wrong password: after several failed attempts in a row, the account is temporarily locked. Please see the article titled "My account is locked after several sign-in attempts: what should I do?".
- Google sign-in: when two-factor authentication is mandatory (clinics located in Quebec), signing in with Google also asks for the code.
4Turn it on for a team member (administrators)
As a clinic administrator, you can also turn two-factor authentication on for the members of your team.
- Go to Settings > Team (www.colib.io/settings?show=team).
- Click the pencil icon of the member to open the Team Member Edition window.
- In the Security section, turn on Enable 2 factor authentication (2FA).
- Click Save at the bottom of the window.
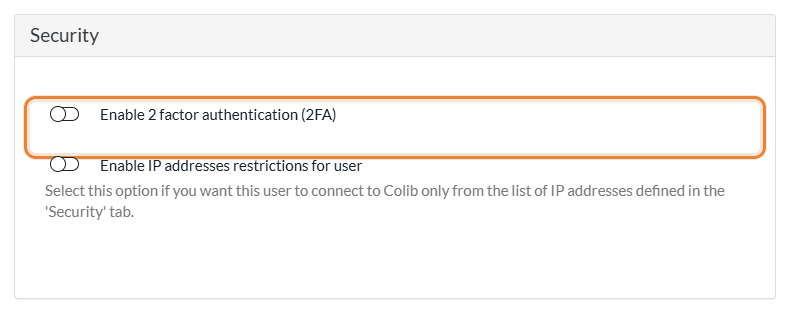
The member receives the code by email, unless they have chosen text messages in their own Security tab. The same section lets you limit a member to your clinic's internet connections: see What are the different levels of rights/options for the members of my practice? and the article titled "How to restrict access to Colib to specific IP addresses".
Two-factor authentication for your clients
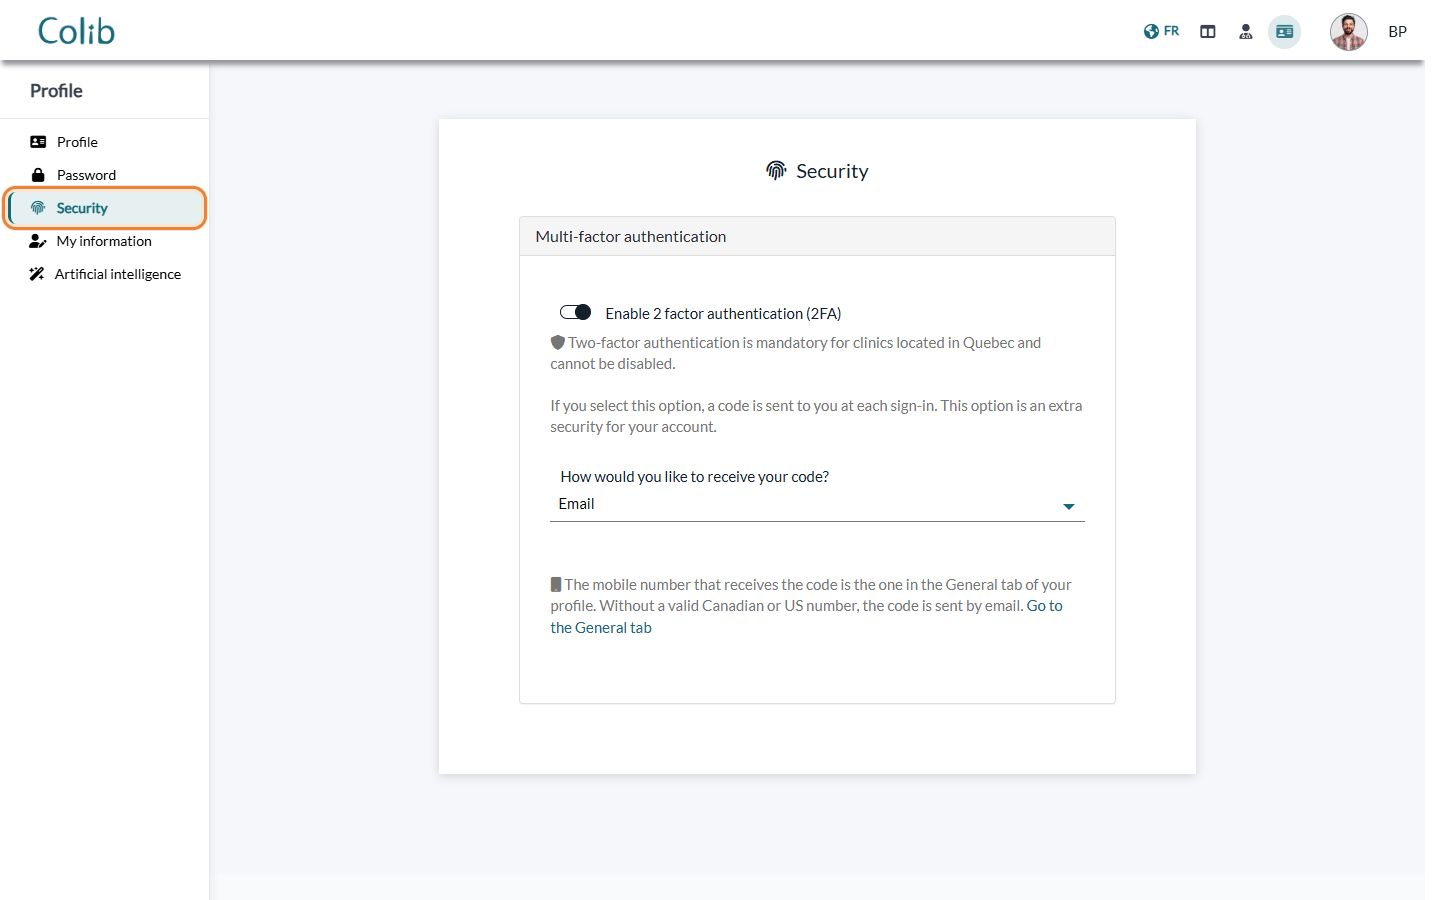
Your clients can also enable this feature in their client portal (portal.colib.io/MyProfile/personalsecurity): in their profile, they open the Security tab and turn on Enable 2 factor authentication (2FA), then choose Email or Text message (SMS), exactly like you. For clients of a clinic located in Quebec, it is always on.
Good to know
- Turn it off — turn the switch off in the same Security tab (not possible for clinics located in Quebec). You receive a confirmation email.
- Changed phone? — update your mobile number in the Profile tab, or switch back to Email, before your next sign-in.
- A sign-in from a new device — Colib also emails you when your account is used from a device it has never seen. Please see the article titled "I received a "new sign-in from an unknown device" email: what should I do?".
- Other protections for your clinic — please see the article titled "How to set automatic sign-out after a period of inactivity" and the article What data security and compliance measures does Colib offer?
Still have a question?
Write to us at support@colib.io, we will be happy to help.
Was this article helpful?
That’s Great!
Thank you for your feedback
Sorry! We couldn't be helpful
Thank you for your feedback
Feedback sent
We appreciate your effort and will try to fix the article