Who is this article for?
An appointment can be cancelled by your team from the scheduler, or by the client themselves if you allow it. This article explains both ways, what happens after a cancellation, and the difference between cancelling and deleting an appointment.
1Cancel an appointment from your scheduler
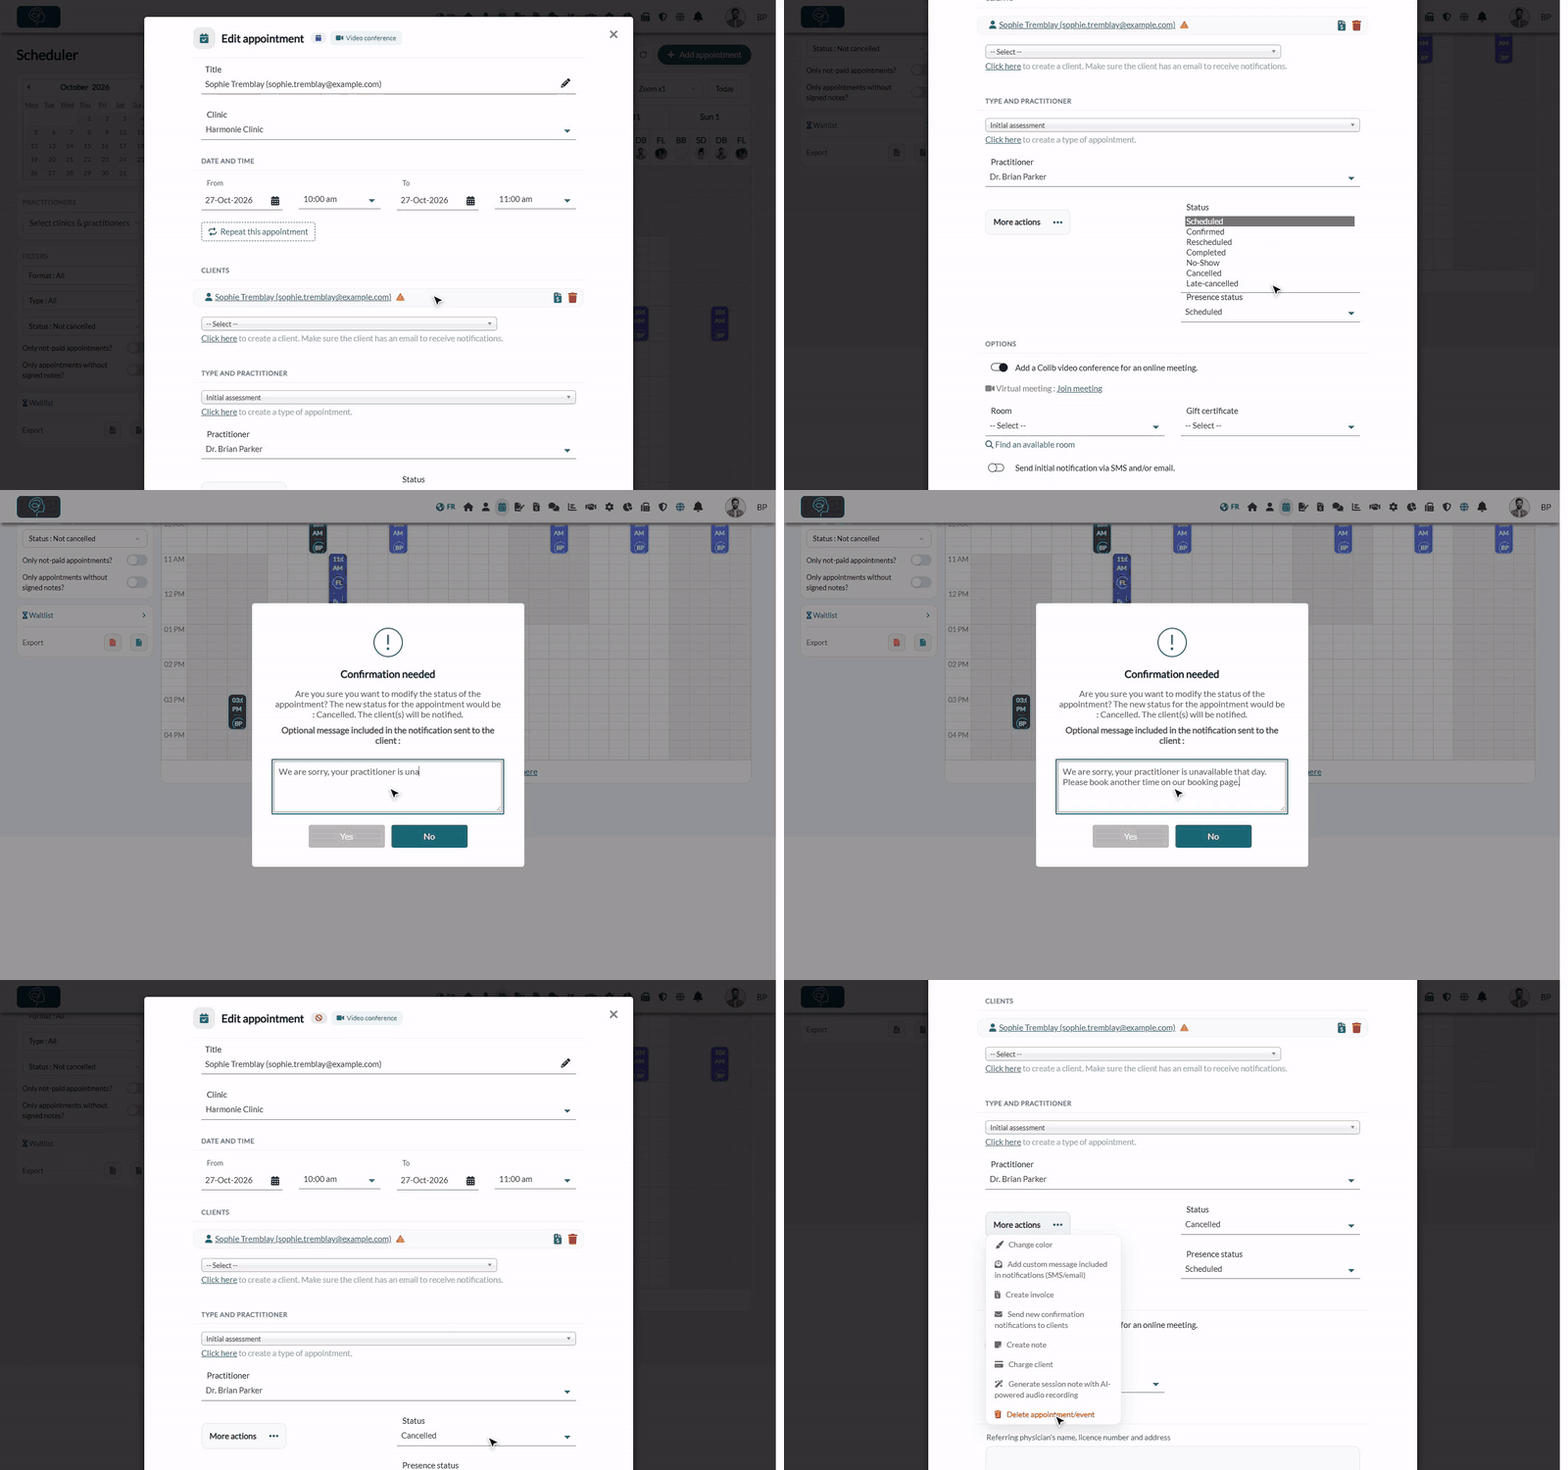
- Open your scheduler (www.colib.io/scheduler) and click the appointment.
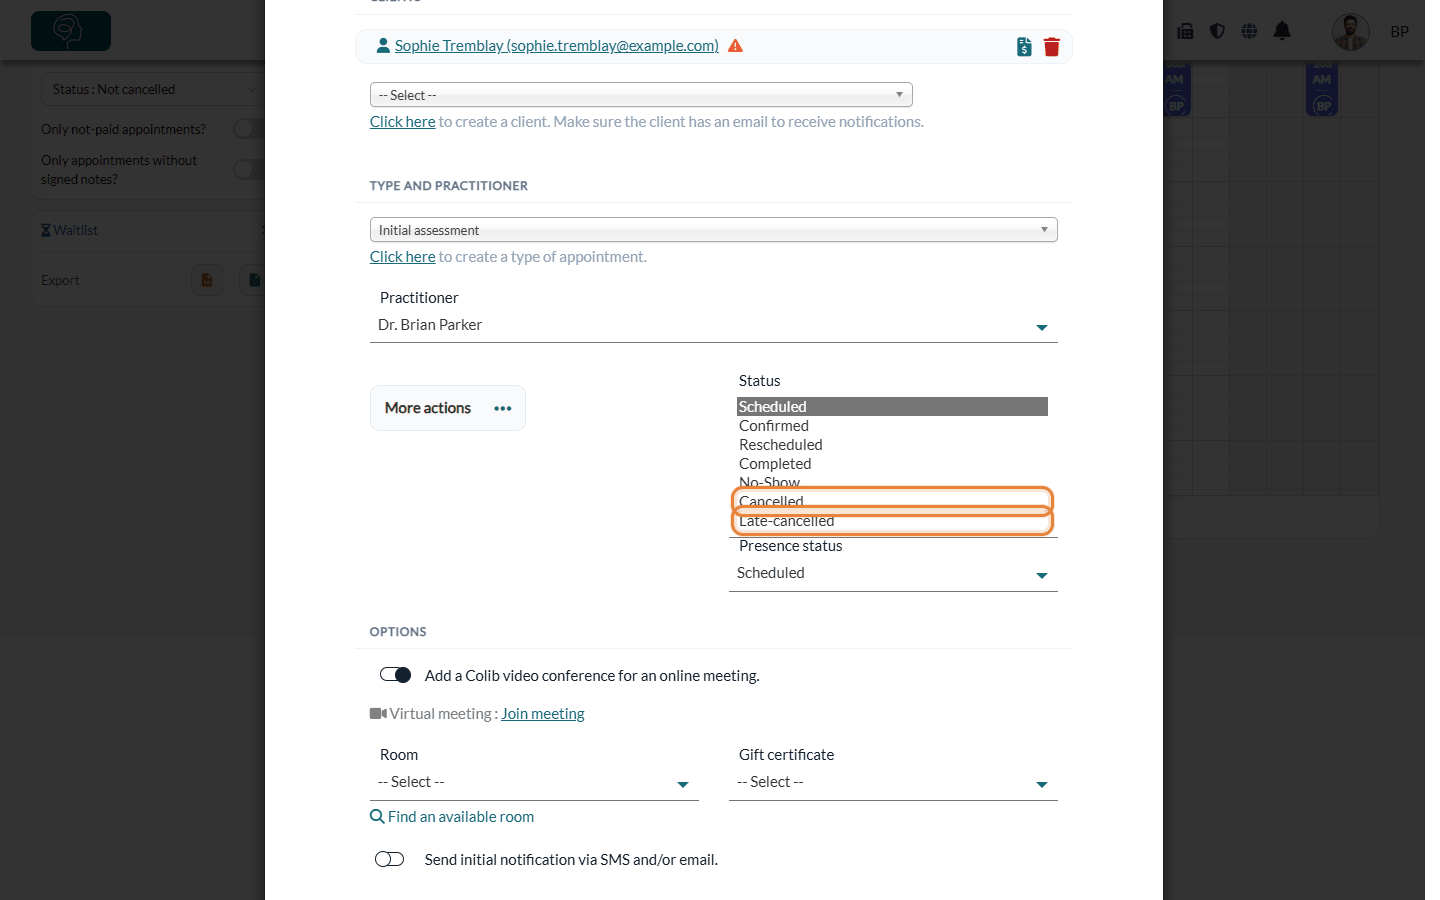
- In the appointment window, open the Status list and choose Cancelled, or Late-cancelled if the client cancelled too late according to your policy.
- A confirmation window opens. If you wish, type a message for the client in Optional message included in the notification sent to the client (for example, an invitation to book another time).
- Click Yes to confirm (No keeps the previous status).
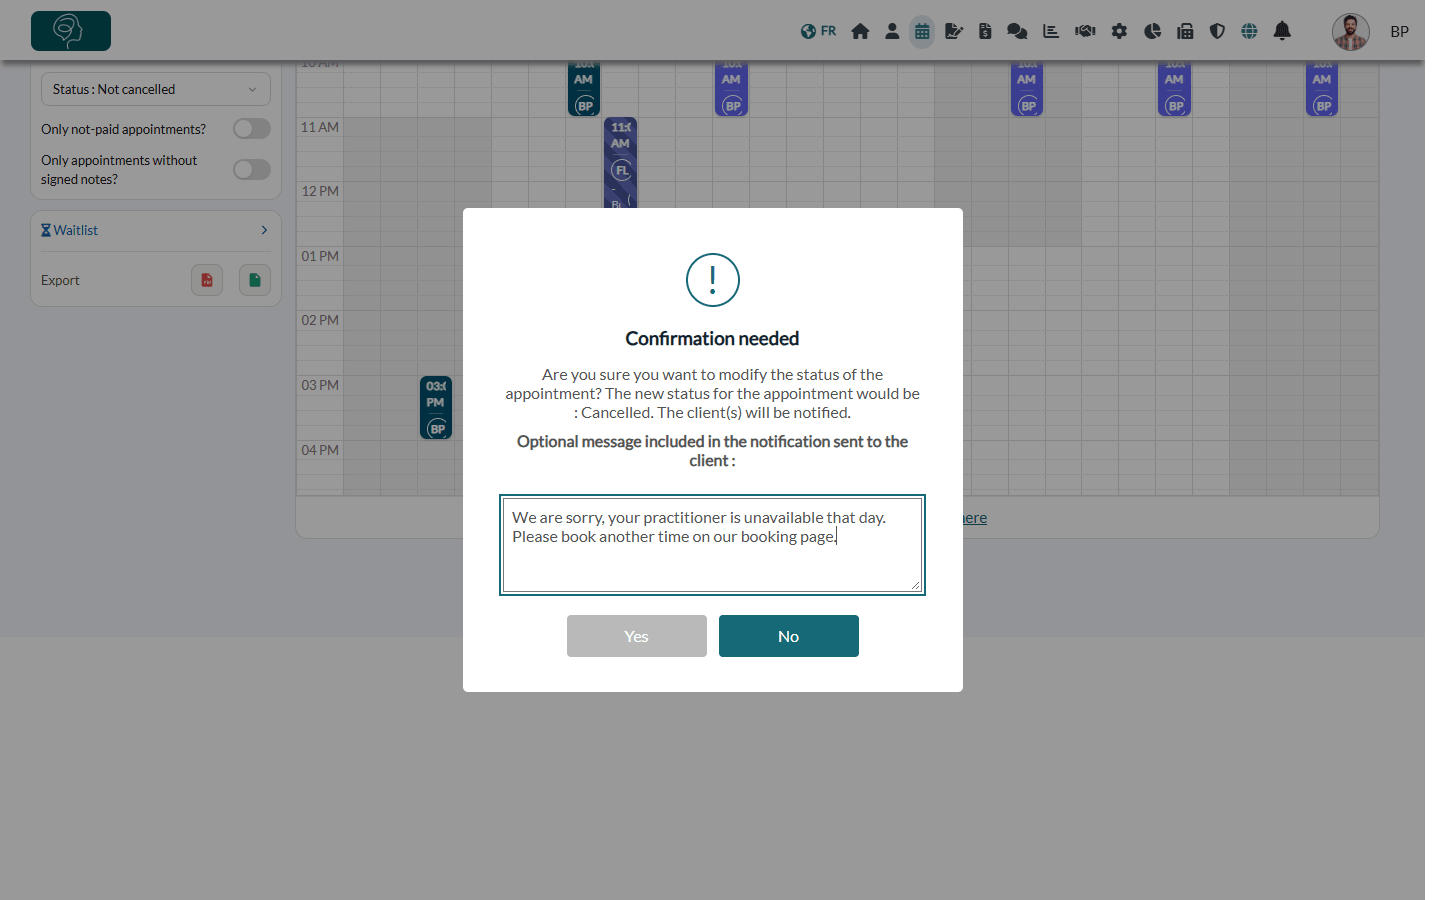
The status is changed right away: you do not need to click Save in the appointment window.
2What happens after a cancellation
- The client is notified by email and/or SMS, with your optional message, if the appointment has not passed yet and the option Send initial notification via SMS and/or email is turned on for this appointment. The reminders planned for the appointment are cancelled.
- The time slot is freed: it becomes available again on your booking page, the room is released and, if your waitlist sends notifications, clients on the waitlist can be told about the opening.
- Your calendars are updated: if you sync Colib with Google Calendar or Outlook, the event is removed from it.
- Gift certificates are released: a gift certificate used for the appointment is detached from it and can be used again.
- Late cancellation fees: with the Late-cancelled status, the client can be charged automatically if you set up fees for late cancellations. See how to charge no-shows and late cancellations.
- The appointment is kept in the client record and in your scheduler. Cancelled appointments are hidden by default: on the left of the scheduler, change the Status : Not cancelled filter to Status : Cancelled or Status : All to see them.
3Cancel or delete?
Cancelling keeps a trace of the appointment. Deleting removes it completely from Colib, which cannot be undone. Only delete an appointment created by mistake.
- Open the appointment and click More actions.
- Click Delete appointment/event and confirm.
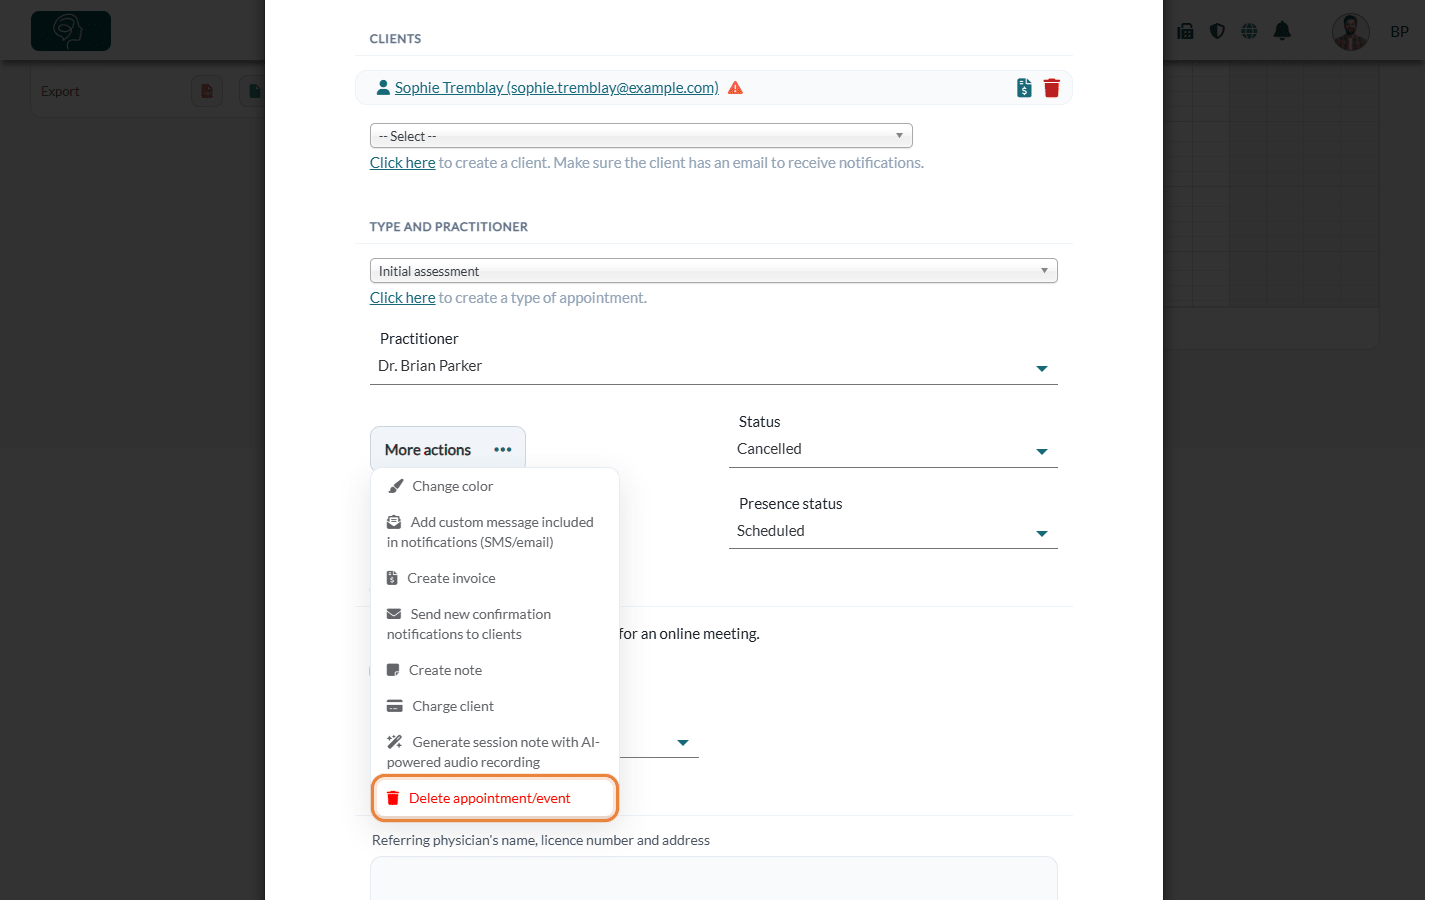
An appointment that has payments cannot be deleted. If it was not already cancelled, the client receives a cancellation notice under the same conditions as above. See also how to delete an appointment. For a recurring appointment, use the series card of the appointment window to stop the series: see how to create recurring appointments.
4Let your clients cancel their appointments
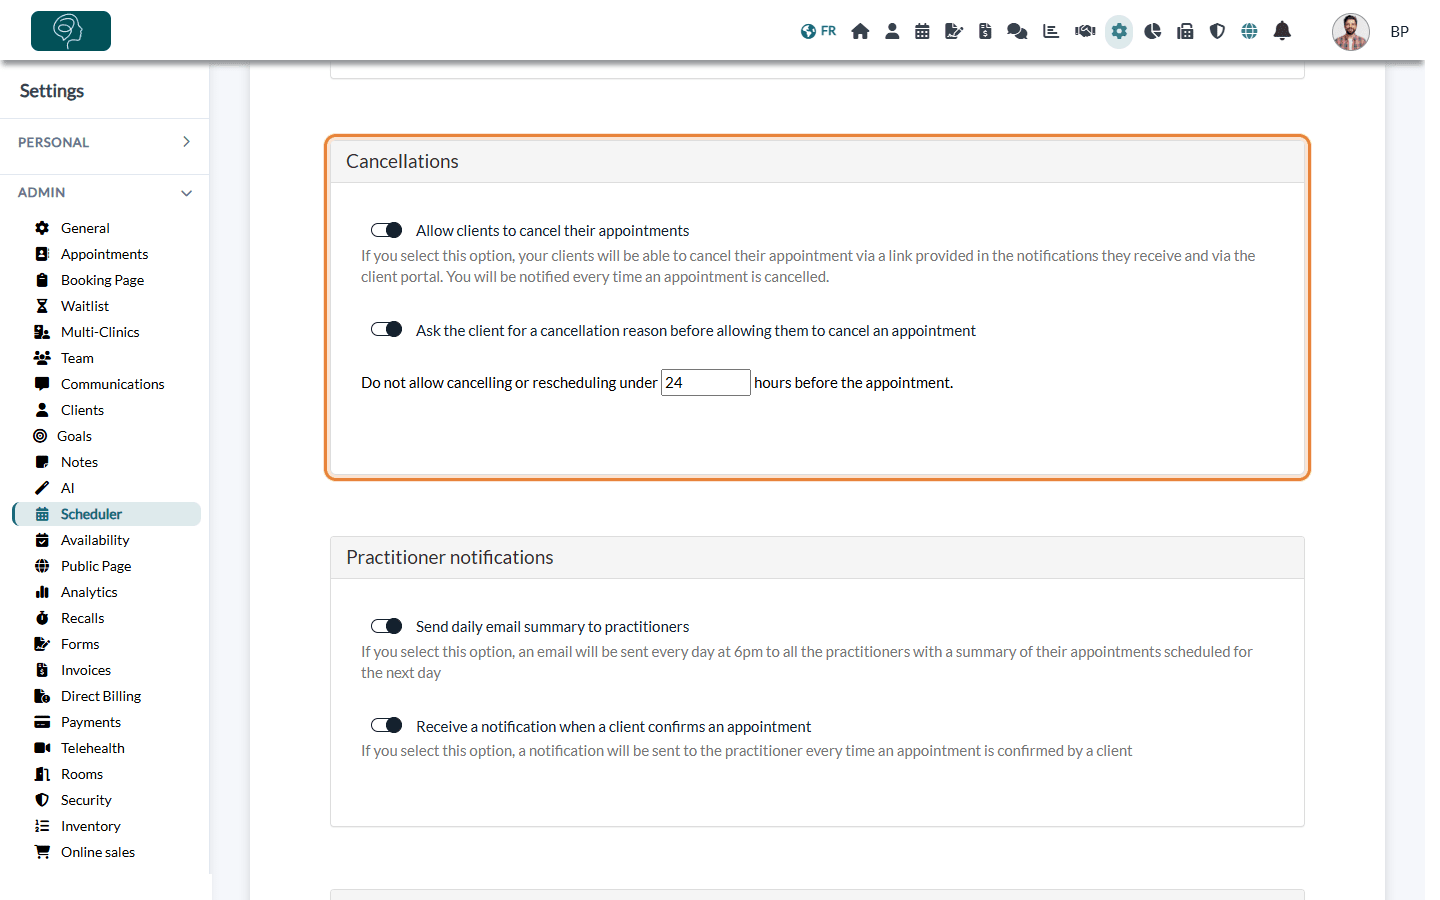
- Go to Settings > Scheduler (www.colib.io/settings?show=scheduler) and open the Cancellations section.
- Turn on Allow clients to cancel their appointments.
- Optionally, turn on Ask the client for a cancellation reason before allowing them to cancel an appointment.
- In Do not allow cancelling or rescheduling under … hours before the appointment, enter your deadline (for example 24).
- Click Save at the bottom of the page.
5How your clients cancel
Once the option is turned on, your clients can cancel in two ways:
- with the cancellation link included in the notifications they receive (confirmation and reminder emails and SMS);
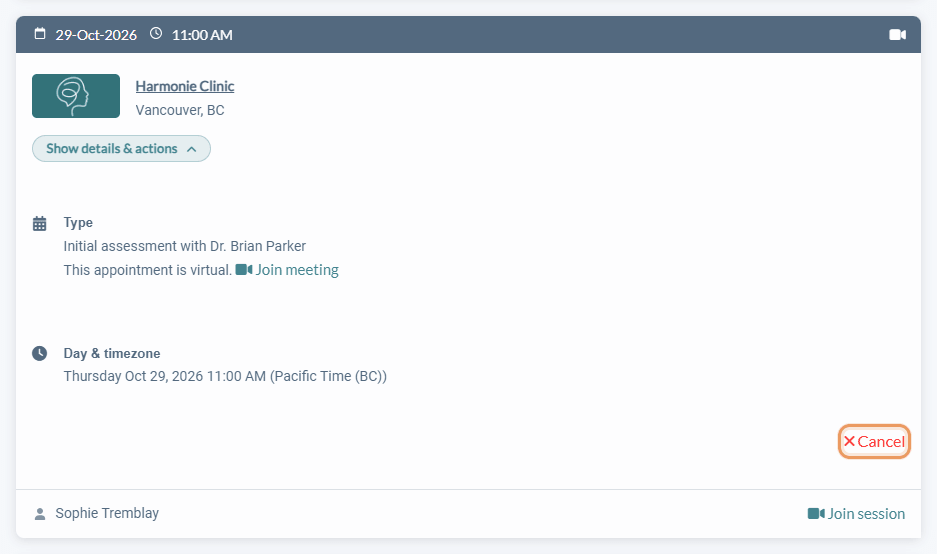
- from the client portal (https://portal.colib.io): in their Appointments, they click Show details & actions on the appointment, then Cancel.
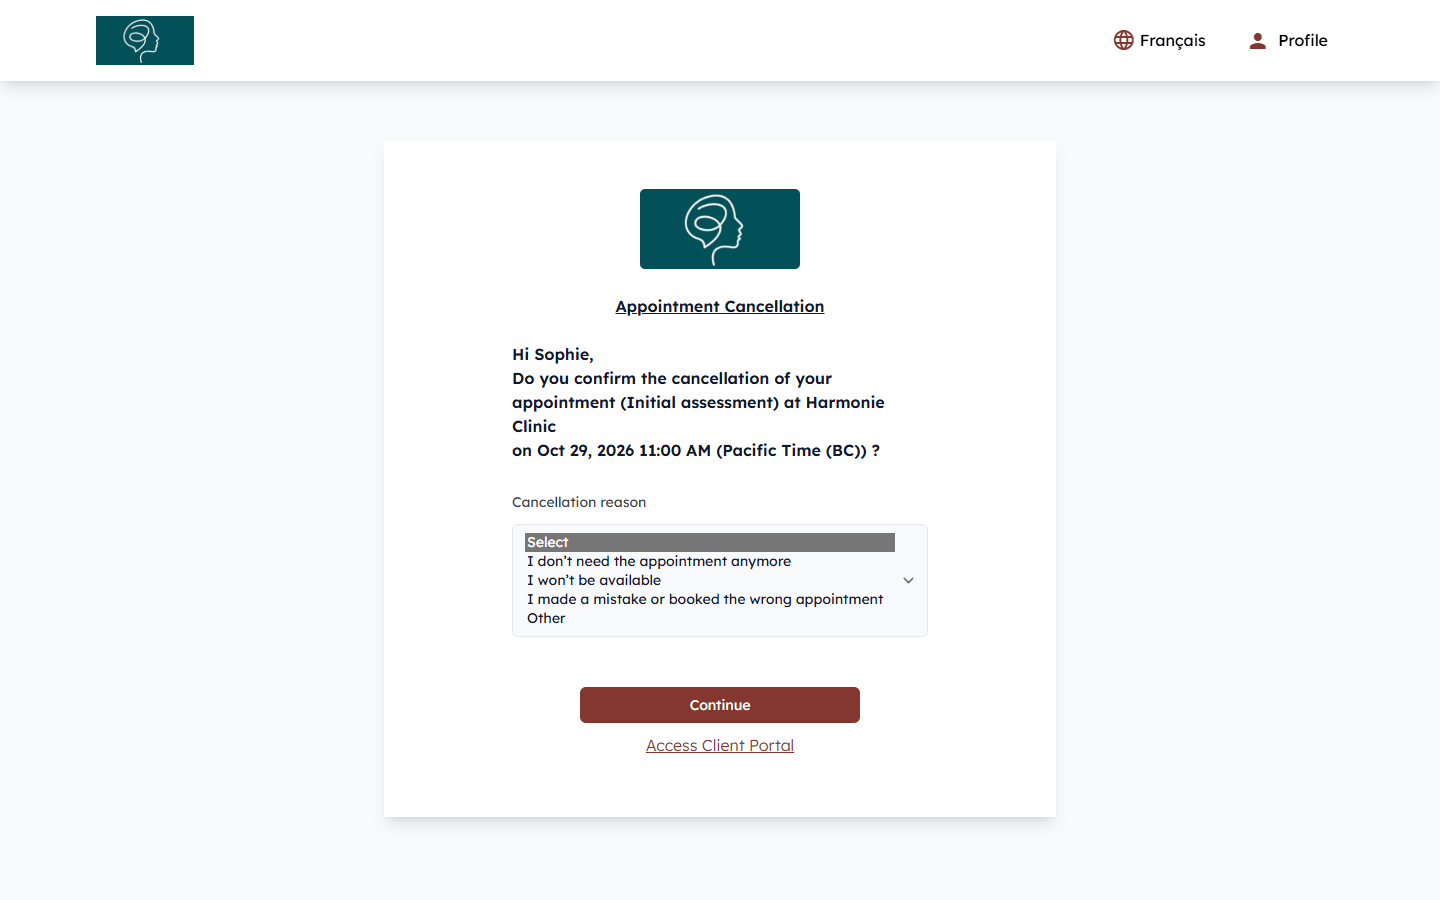
A page then asks them to confirm. If you require a reason, they choose one in the Cancellation reason list (or Other with details), then click Continue. After the cancellation, they can book a new appointment if your online booking is turned on.
- Too late? — inside your deadline, the client cannot cancel online anymore: Colib tells them to contact your practice and shows your email address and phone number.
- You are notified — each cancellation by a client creates a Colib notification, and an email is sent according to the Appointment cancellation setting of Settings > Communications (www.colib.io/settings?show=communications). See how to configure event notification recipients. The reason given by the client appears in the appointment window (Cancellation reason).
- Group appointments — when a participant cancels, they are only removed from the appointment; the appointment is kept for the other participants.
Good to know
- Already paid? — cancelling an appointment never refunds the client automatically. If the client paid online, refund the payment from the invoice if your policy allows it: see how to refund a payment. The invoice keeps its status until you change it.
- Same deadline for changes — the number of hours you set also stops clients from rescheduling online inside that deadline. See how to let clients edit appointments created by practitioners.
- Show your policy at booking — in Settings > Booking Page (www.colib.io/settings?show=bookingpage), the Cancellation policy section displays your terms on the summary step of the booking page, just before the client confirms.
- Avoid last-minute bookings — see how to control how far in advance clients can book.
Still have a question?
Write to us at support@colib.io, we will be happy to help.
Was this article helpful?
That’s Great!
Thank you for your feedback
Sorry! We couldn't be helpful
Thank you for your feedback
Feedback sent
We appreciate your effort and will try to fix the article