Who is this article for?
Do you often send the same message: a confirmation that you received documents, a reminder of your cancellation policy, a welcome note? With chat templates, you save these messages once and insert them in a conversation in one click.
Templates are shared by the whole practice. The inserted text stays fully editable before you send it: nothing is ever sent automatically.
Before you start: private messaging must be turned on (How to activate the private secure messaging feature). Templates are created in Settings > Communications (www.colib.io/settings?show=communications), which requires access to the practice settings. Every practitioner can then use them.
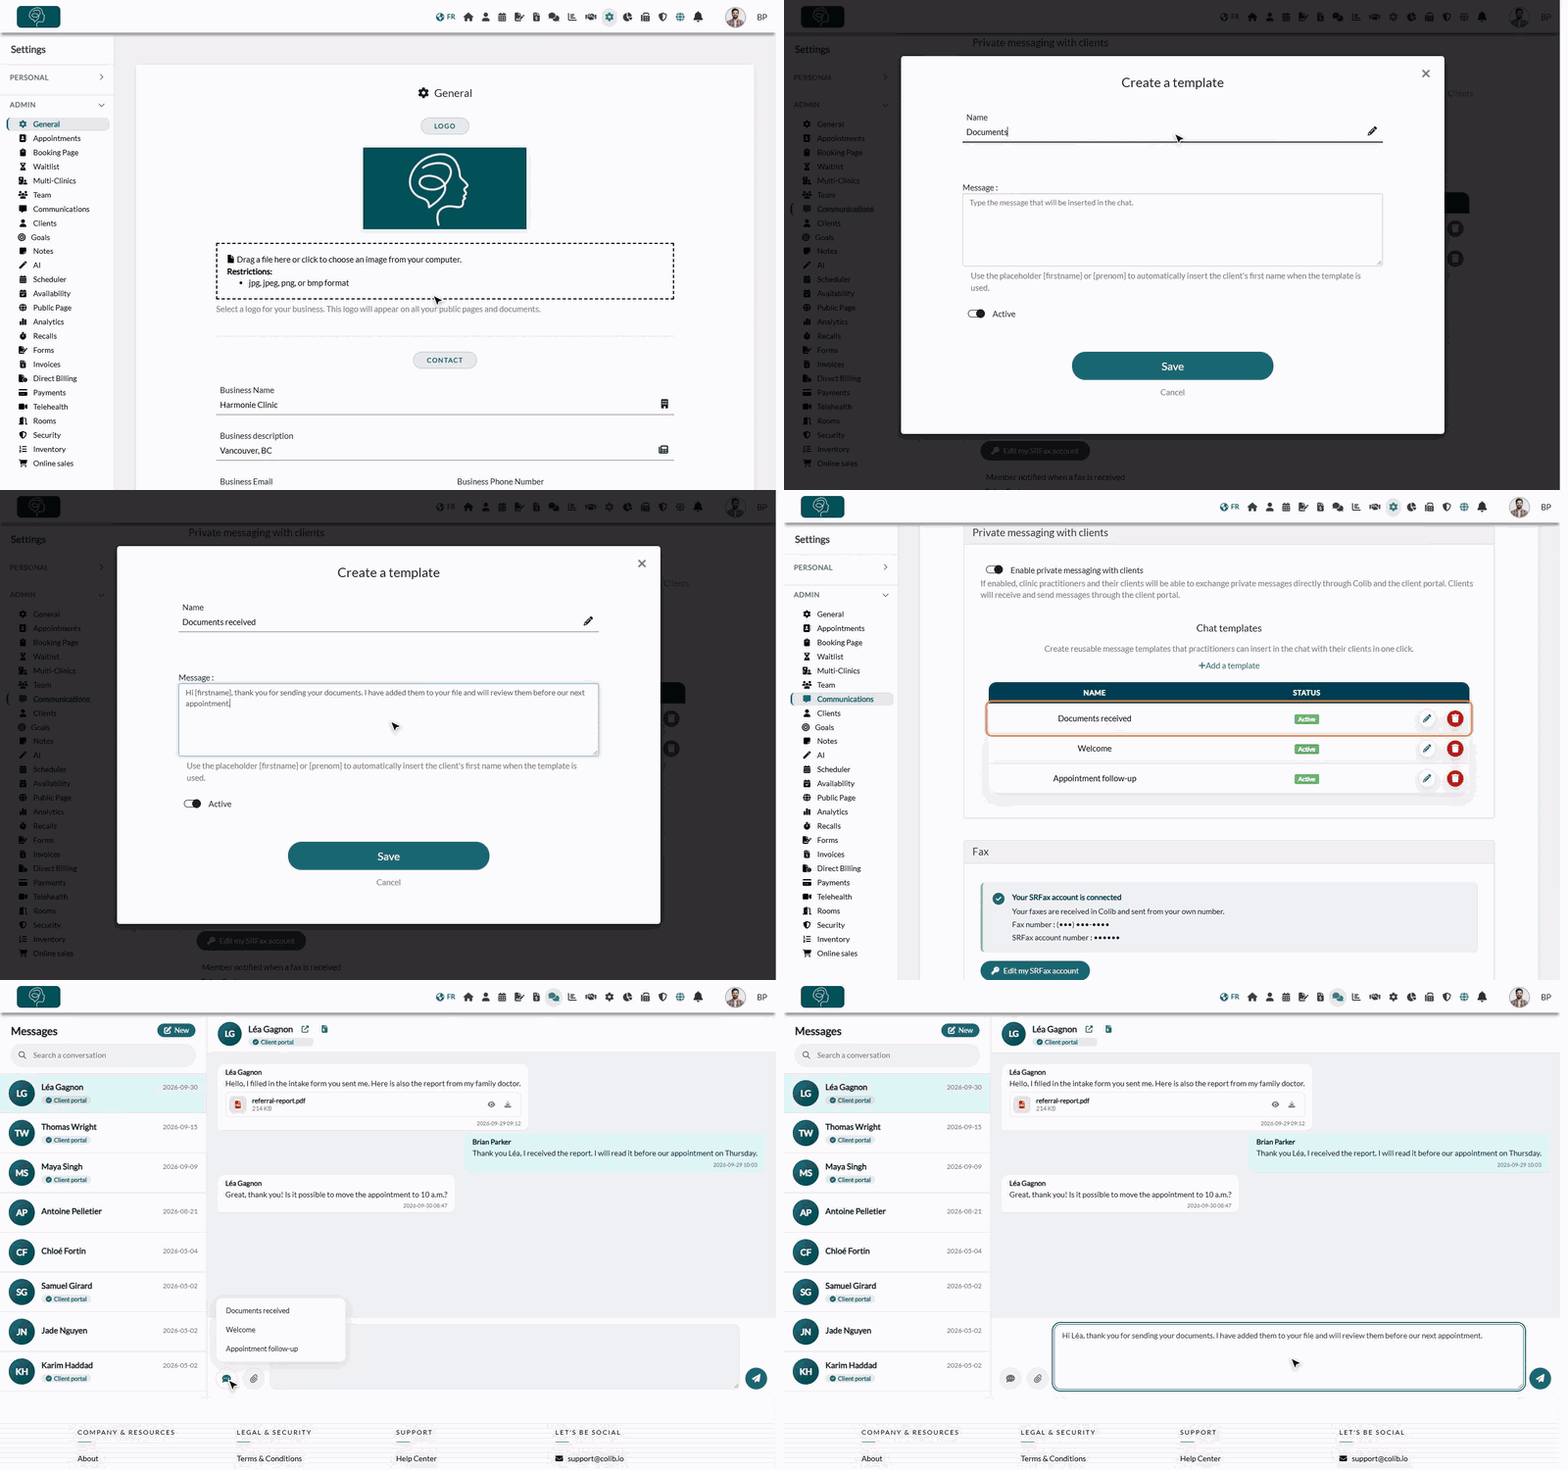
1Open the chat templates
- Go to www.colib.io/settings?show=communications. You can also click the Settings icon (gear) in the top bar, then Communications in the Admin menu on the left.
- In the Private messaging with clients section, find Chat templates. This area only appears when Enable private messaging with clients is on.
2Create a template
- Click Add a template.
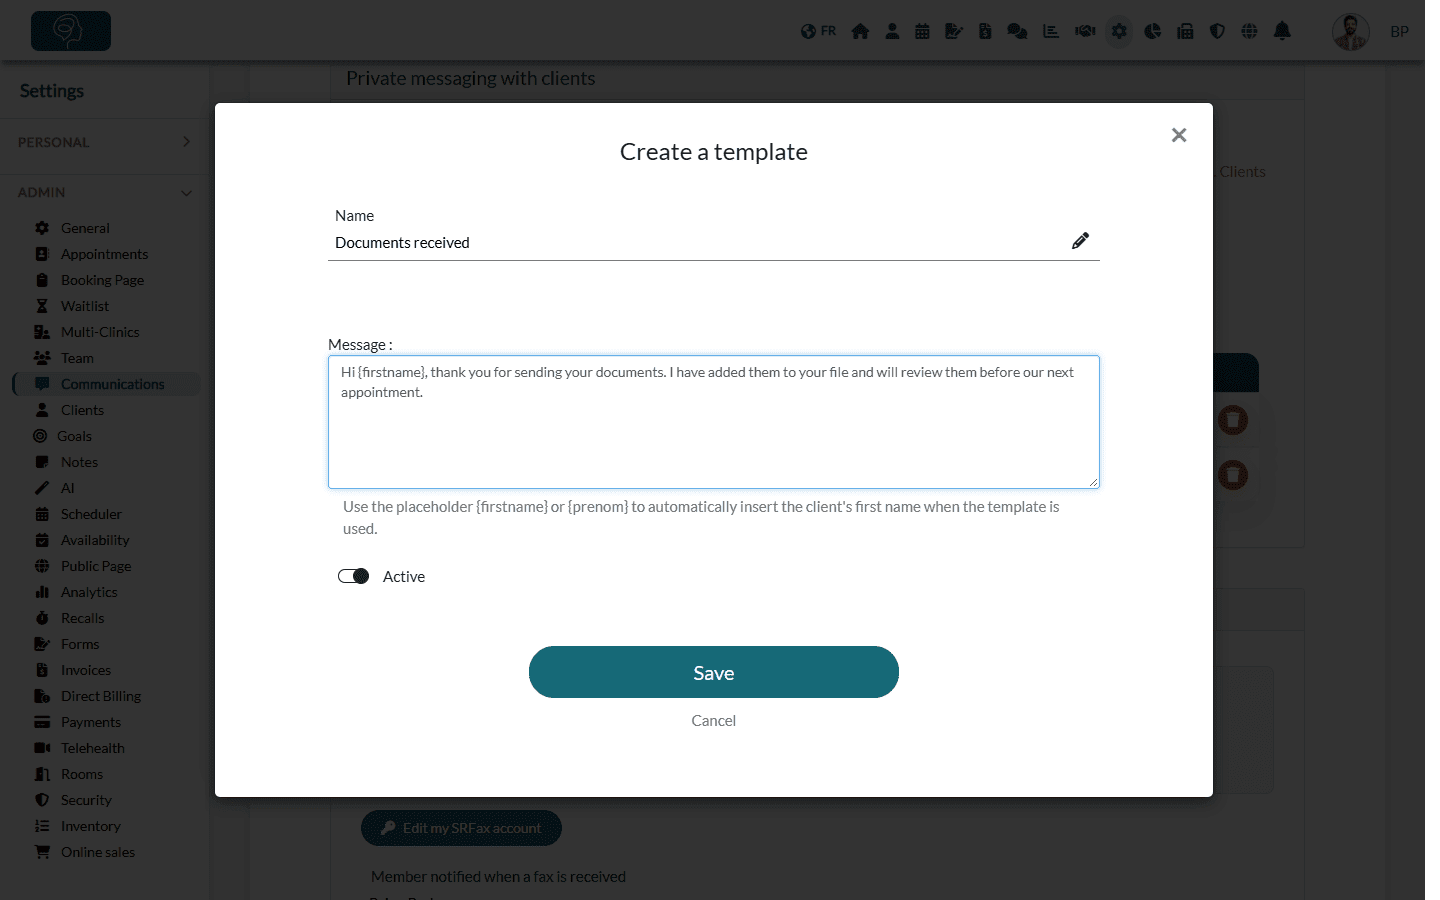
- Enter a Name: this is the label your team sees in the list of templates (for example, Documents received). Two templates of the practice cannot have the same name.
- Type the Message: the text that will be inserted in the conversation.
- To address the client by name, type {firstname} (or {prenom}) where the first name should appear.
- Leave Active turned on so the template is offered in the conversations.
- Click Save. The template appears in the list.
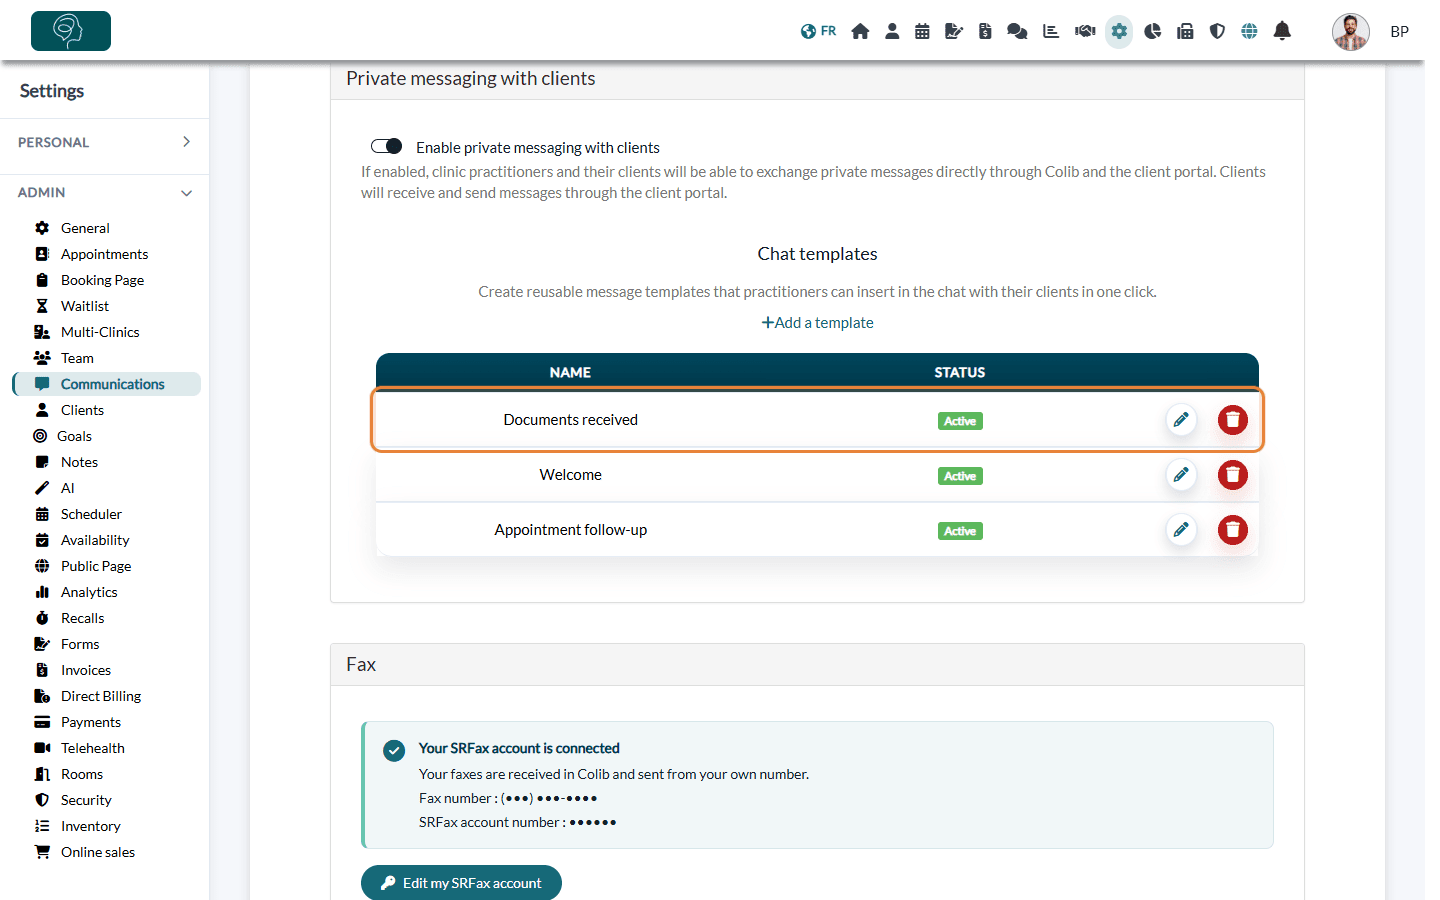
Important: a message sent in a conversation is limited to 800 characters. A longer template is cut at 800 characters when it is inserted.
3Use a template in a conversation
- Click Messaging in the top bar (www.colib.io/messaging) and open a conversation (or start a new one).
- Click the templates button (speech bubble icon, Insert a message template) at the bottom left of the conversation.
- Click the template of your choice. Its text is inserted in the message box, with the client's first name in place of the placeholder.
- Edit the text if needed, then click Send.
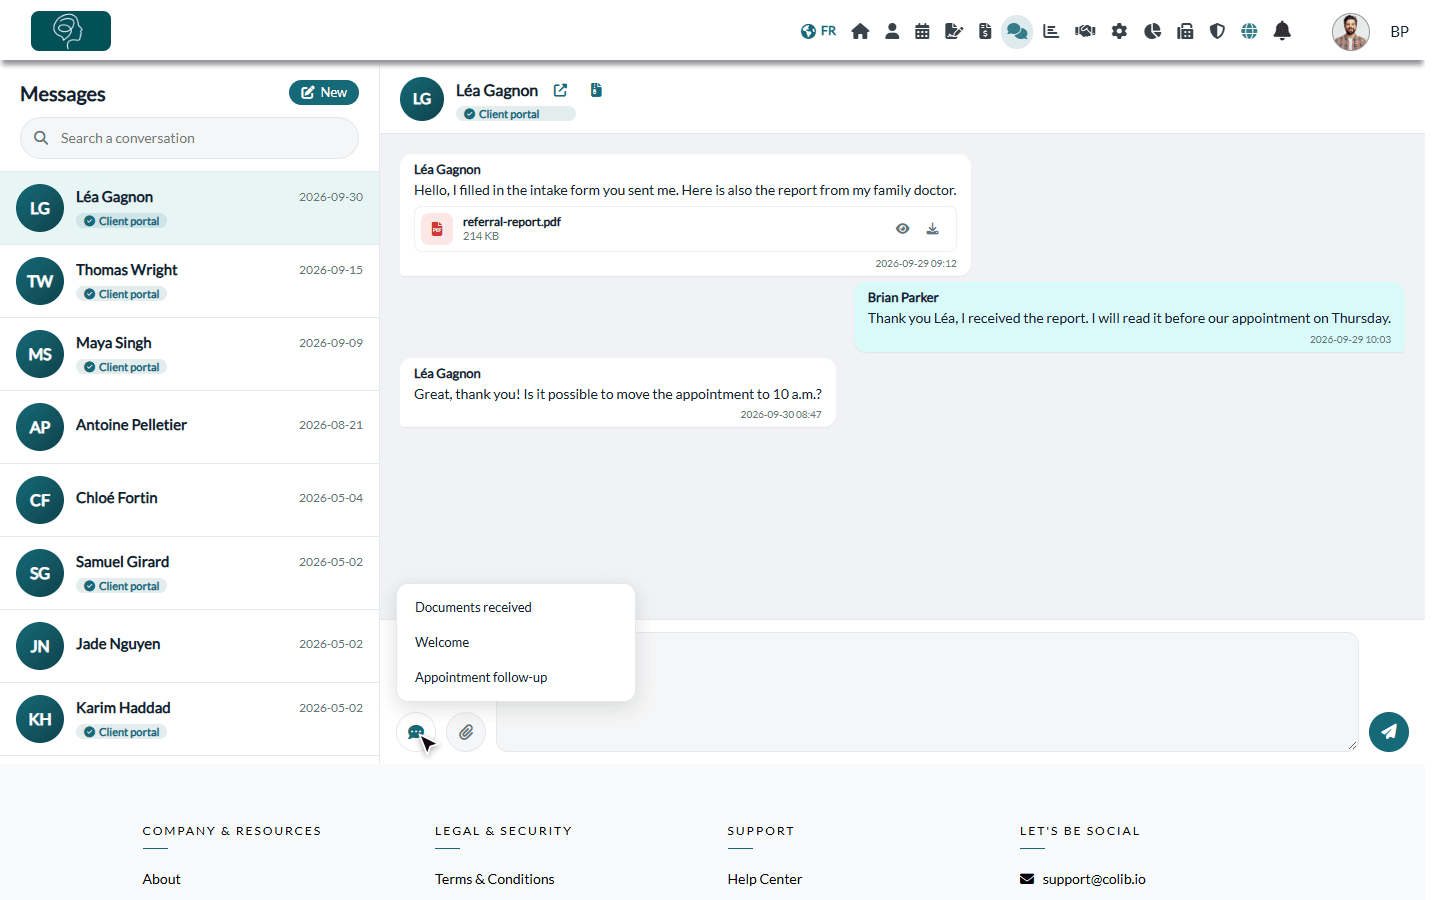
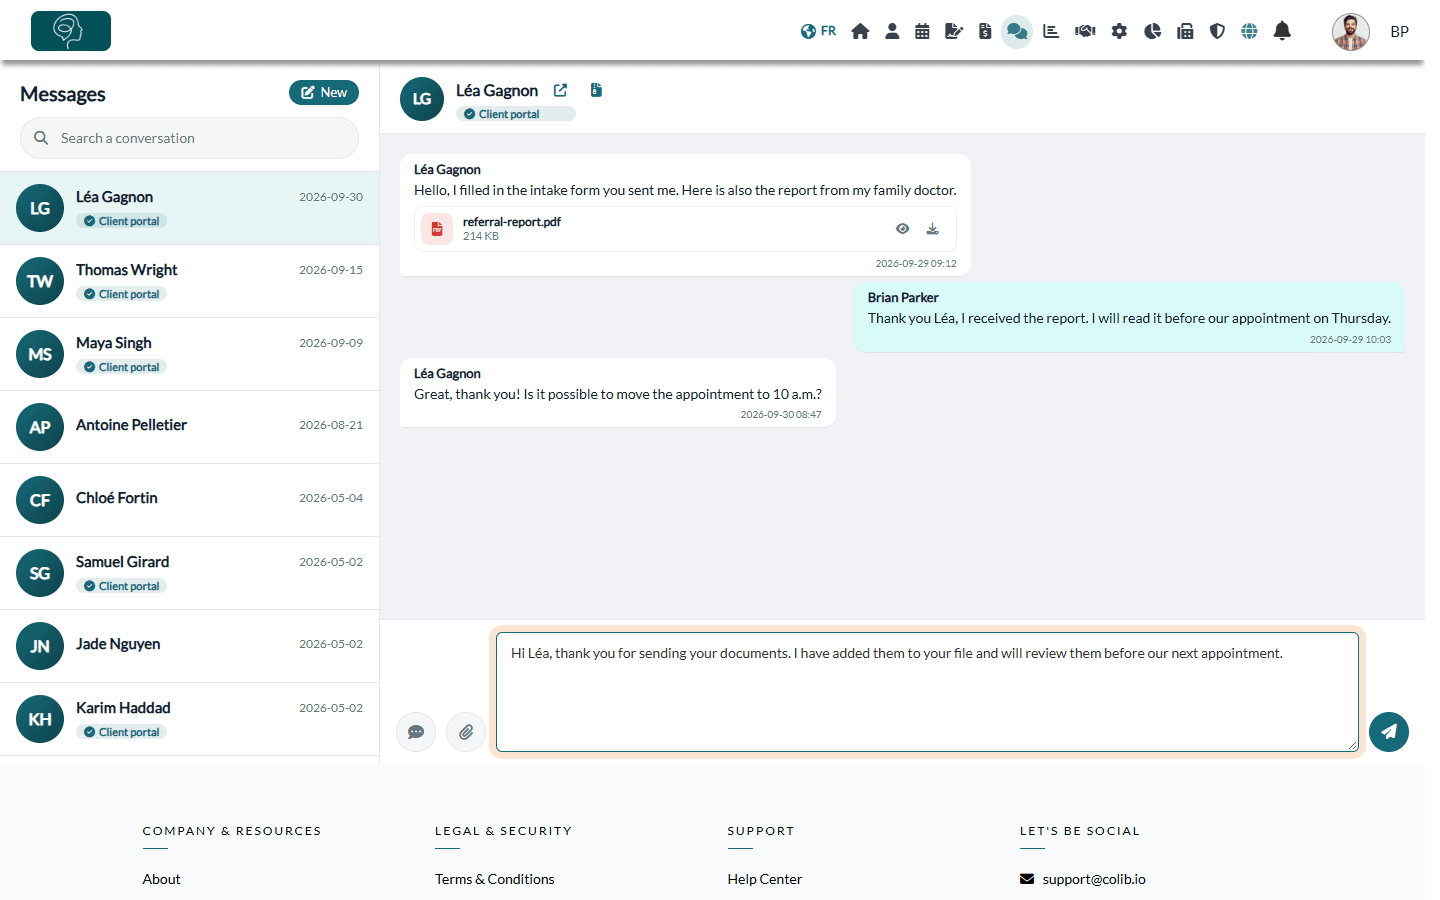
The list shows the active templates of the practice, in alphabetical order. The templates button only appears when at least one active template exists.
Manage your templates
- Edit a template — click the pencil icon on its row, make your changes and click Save.
- Hide a template without deleting it — edit it and turn off Active. Its status becomes Inactive and it is no longer offered in the conversations.
- Delete a template — click the trash icon on its row and confirm. Messages already sent are not affected.
- See your changes in Messaging — if the Messaging page was already open, refresh it to see your changes.
Good to know
- Shared by the practice — every practitioner who has access to messaging sees the same list of templates.
- Always in control — a template is only inserted, never sent on its own. You can insert several templates in the same message, or type before and after.
Still have a question?
Write to us at support@colib.io, we will be happy to help.
Was this article helpful?
That’s Great!
Thank you for your feedback
Sorry! We couldn't be helpful
Thank you for your feedback
Feedback sent
We appreciate your effort and will try to fix the article