Who is this article for?
Sometimes a client needs specific instructions for one appointment: bring a document, arrive early, use another entrance, prepare something before the session. With a custom message, you attach this text to the appointment and Colib adds it to the notifications sent to the client.
This article explains how to add the message, where your clients see it, and how to change or remove it.
Where the message appears: in the appointment confirmation and reminders, by email and by SMS, and on the appointment in the client portal. It is shown to every client of the appointment.
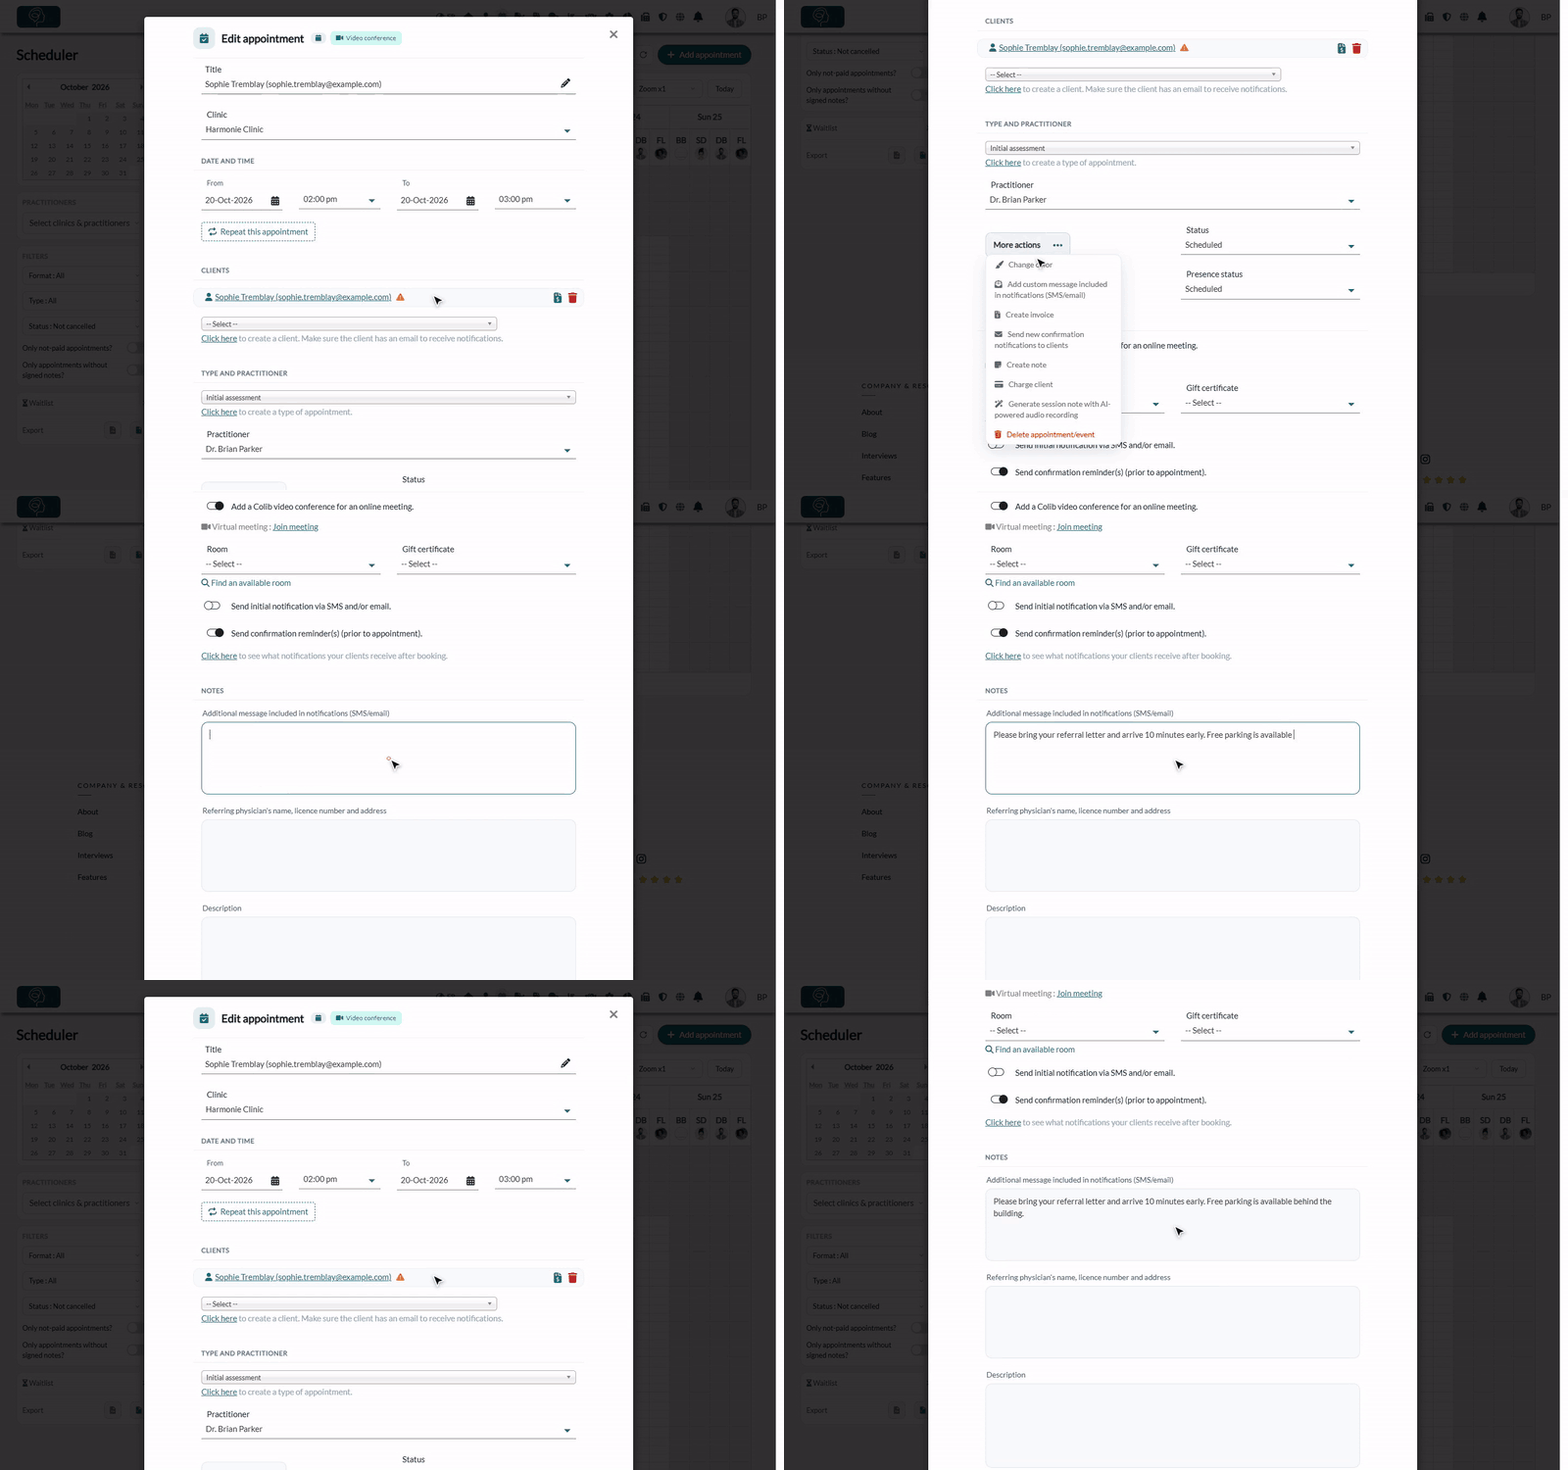
1Open the appointment
- Go to your scheduler: www.colib.io/scheduler.
- Click an existing appointment to open it, or create a new appointment.
2Show the custom message field
- Under Type and practitioner, click More actions (the three dots).
- Click Add custom message included in notifications (SMS/email).
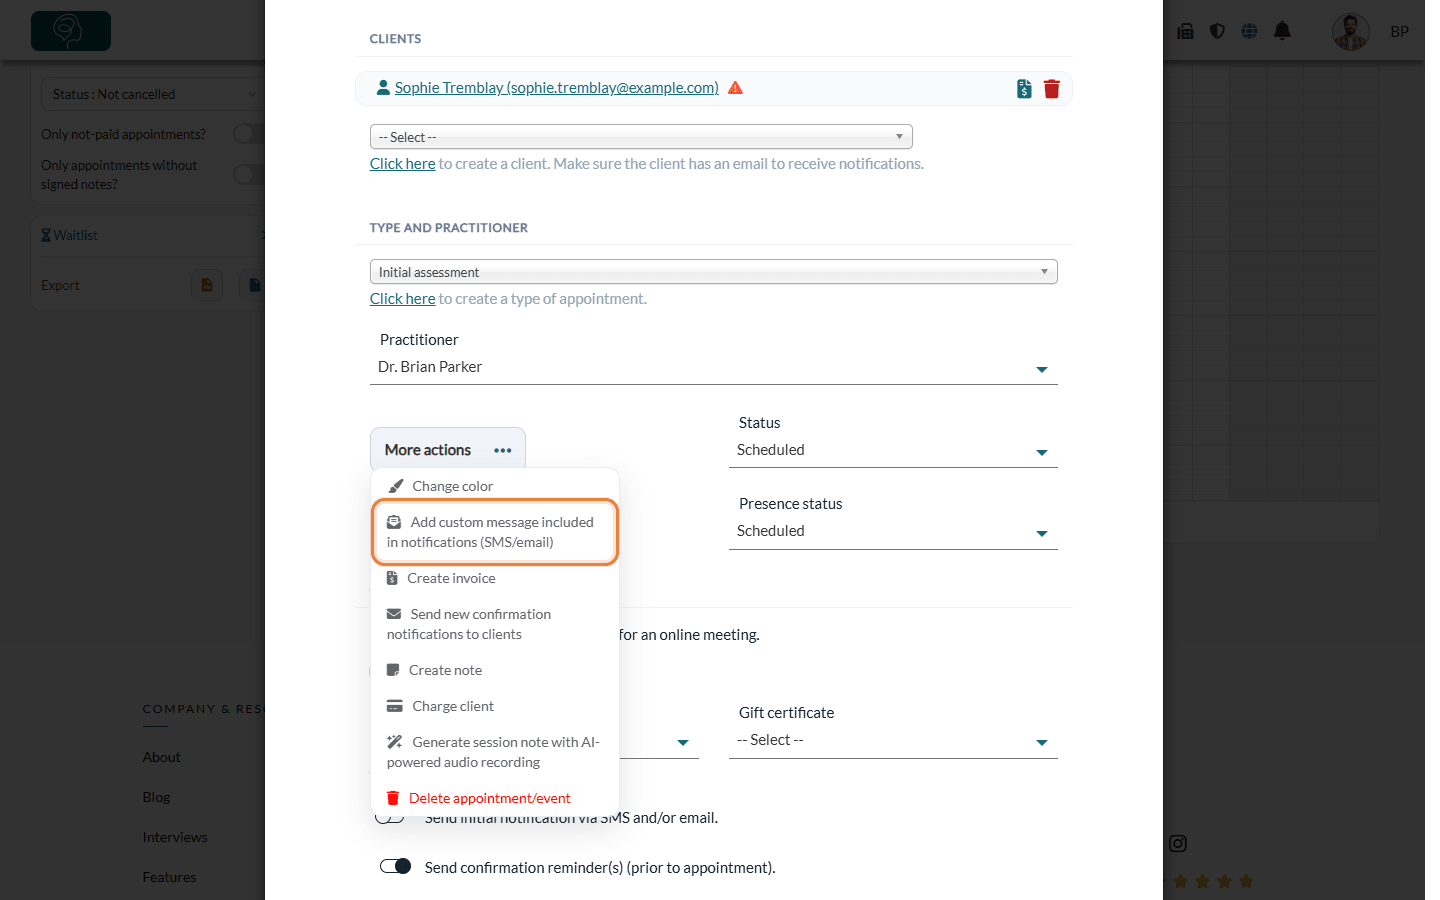
The Additional message included in notifications (SMS/email) field appears in the Notes section of the appointment window.
3Write your message and save
- Type your message in Additional message included in notifications (SMS/email). You can write up to 400 characters, in plain text.
- Click Save at the bottom of the window.
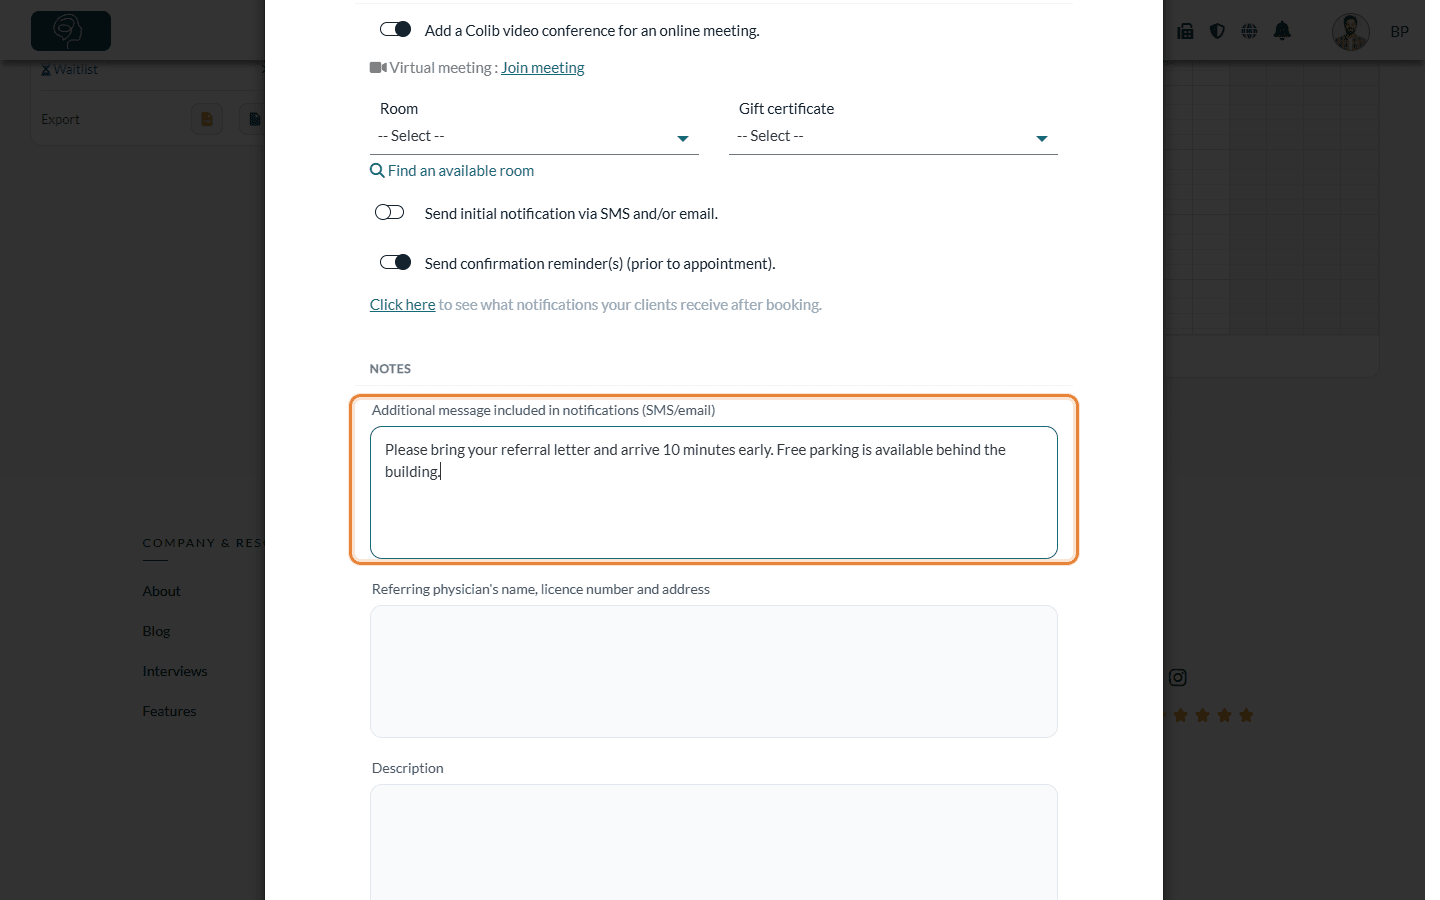
The message is saved with the appointment. When you open the appointment again, the field is displayed directly with its text.
4What your clients see
- Email — the confirmation and reminder emails show your text in a box titled Note added by your practitioner.
- SMS — your text is added at the end of the confirmation and reminder SMS.
- Client portal — in the Appointments section, the message appears under Note added by your practitioner when the client opens the appointment details.
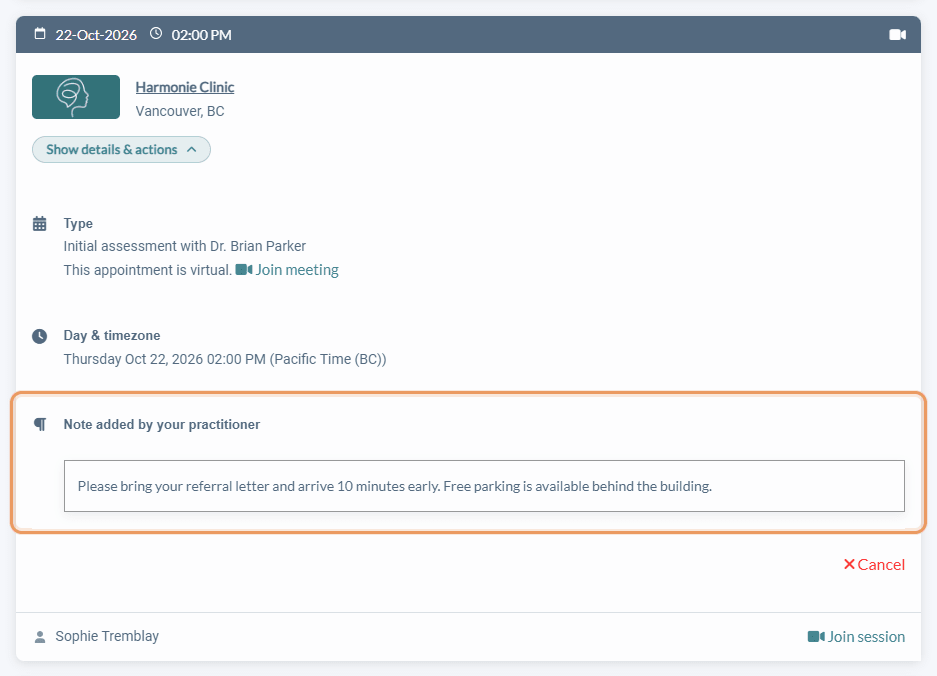
Important: the message is only included in notifications sent after you save it. If the confirmation was already sent, your clients will see the message in the next reminders and in the portal. To send it right away, open the appointment, click More actions > Send new confirmation notifications to clients (see How to resend a confirmation notification).
Good to know
- Change the message — open the appointment, edit the text and click Save. The following notifications use the new text.
- Remove the message — empty the field and click Save.
- Notifications must be on — the message travels with the confirmation and the reminders. If Send initial notification via SMS and/or email or Send confirmation reminder(s) (prior to appointment) is turned off for the appointment, the corresponding notification is not sent, and neither is the message. The client portal still shows it.
- Not in cancellations — the custom message is not added to the cancellation notification.
- Group appointments — every client of the appointment receives the same message.
- Recurring appointments — when the series is created or updated from this appointment, its occurrences get the same message (see How to create recurring appointments).
- Access rights — the More actions menu is only shown to users who are allowed to edit appointments.
- Appointments only — the option is not available for events such as busy time or tasks, which send no notifications to clients.
- Message for every appointment of a type — to add the same text to all appointments of a type, customize the emails of the appointment type instead (see How to customize the emails sent before and after an appointment).
Still have a question?
Write to us at support@colib.io, we will be happy to help.
Was this article helpful?
That’s Great!
Thank you for your feedback
Sorry! We couldn't be helpful
Thank you for your feedback
Feedback sent
We appreciate your effort and will try to fix the article