Who is this article for?
When your schedule is full, some clients cannot find a time that suits them. With the waitlist, they leave their contact details, the days and times that suit them and the services they want. You then manage these requests in Colib, and Colib can even alert them automatically when a matching opening appears.
This article explains how to turn on the waitlist, which options to choose, and where your clients will find it.
Before you start: the waitlist is managed in Settings > Waitlist (www.colib.io/settings?show=waitlist). You need access to the practice settings to turn it on.
1Turn on the waitlist
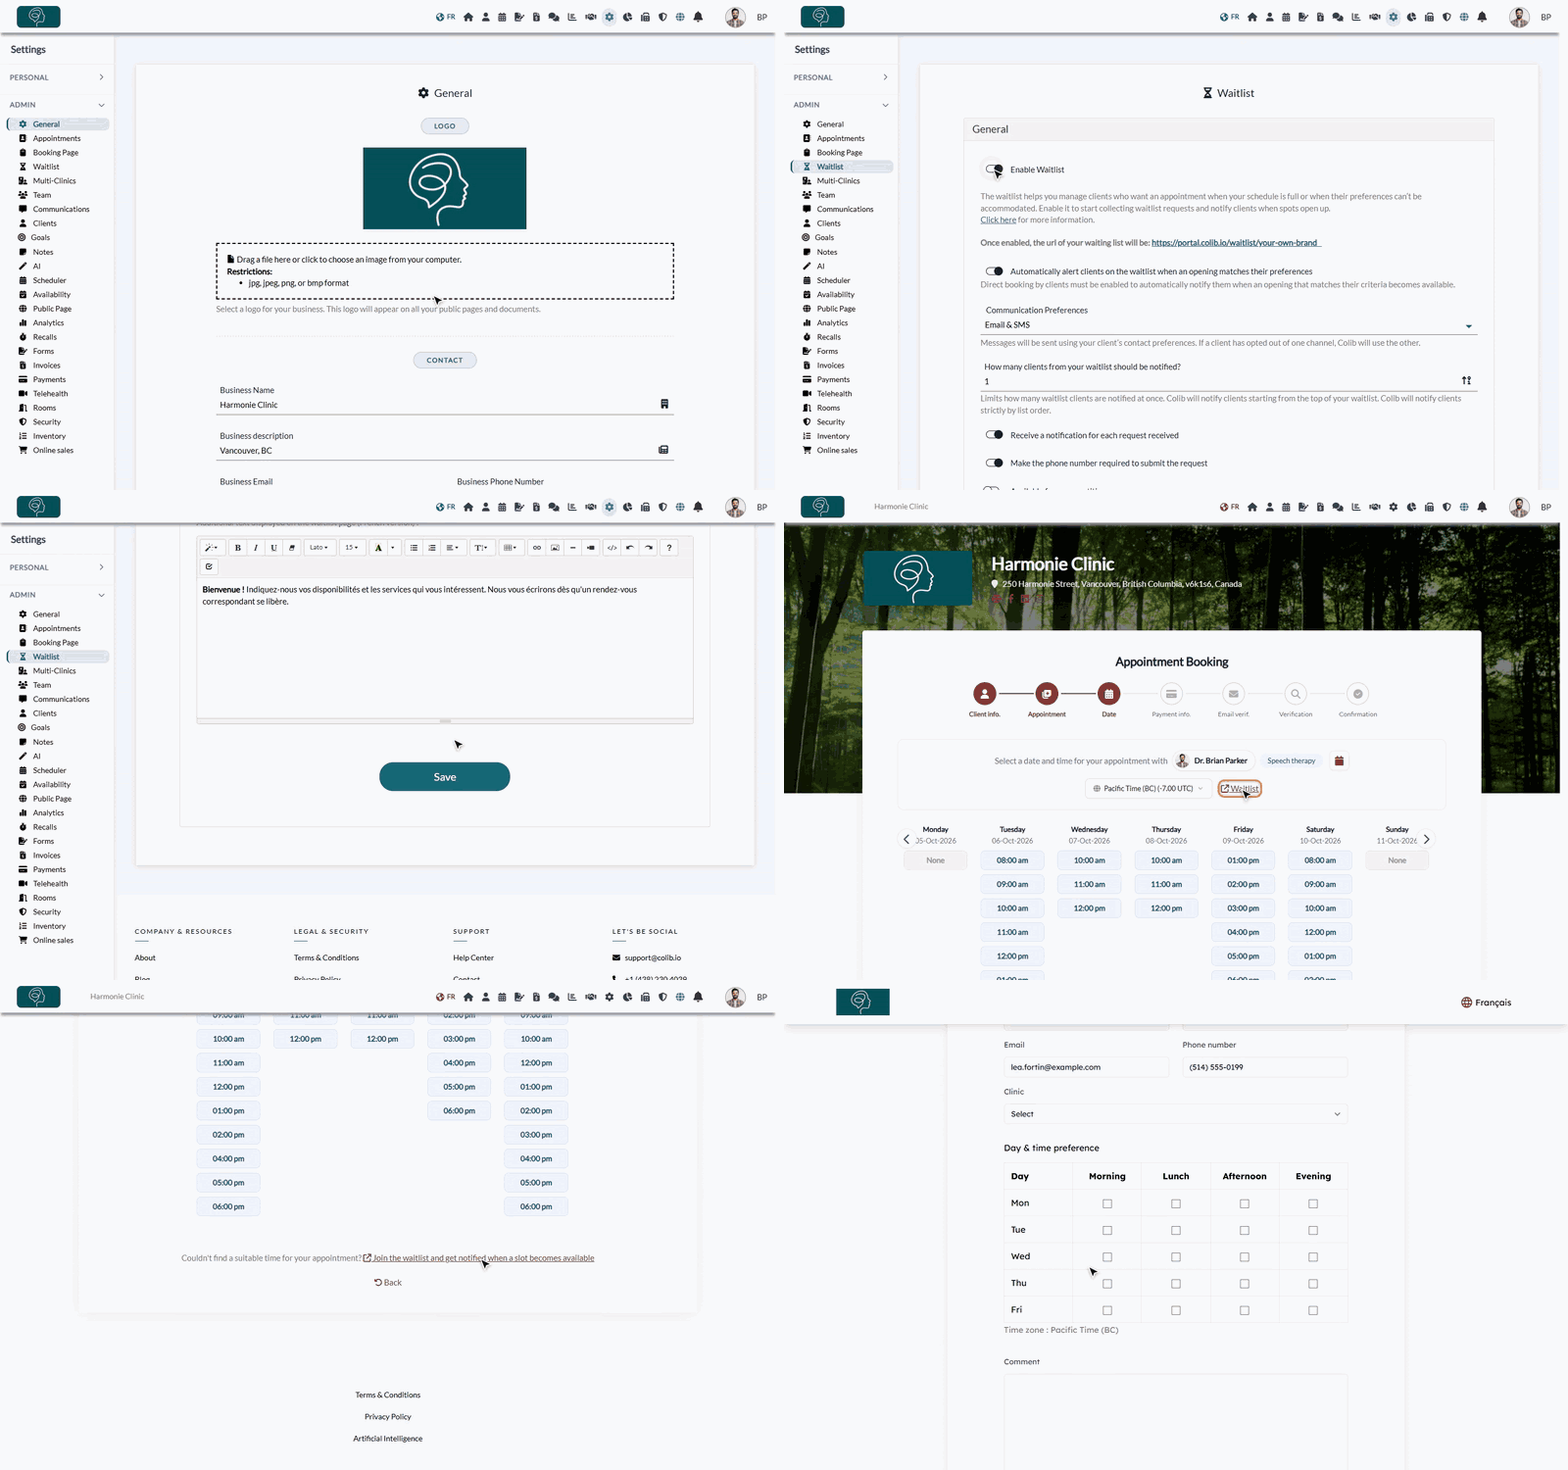
- Go to www.colib.io/settings?show=waitlist. You can also click the Settings icon (gear) in the top bar, then Waitlist in the Admin menu on the left.
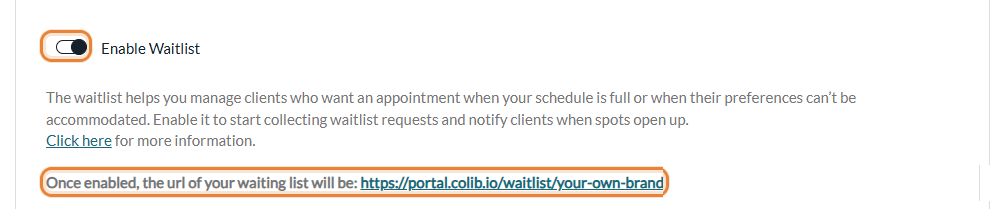
- In the General section, turn on Enable Waitlist.
- The options of the waitlist appear, with the address of your waitlist page (https://portal.colib.io/waitlist/ followed by the name of your practice page).
- Choose your options (see Step 2), then click Save at the bottom of the page.
2Choose your options
Once the waitlist is on, the same page offers these options:
| Option | What it does |
|---|---|
| Automatically alert clients on the waitlist when an opening matches their preferences | Colib sends an email and/or a text message to the clients on the waitlist when a time that matches their preferences becomes free. You then choose the Communication Preferences and How many clients from your waitlist should be notified? See How to automatically notify clients of new openings that match their preferences. |
| Receive a notification for each request received | You receive a notification in Colib (bell icon in the top bar) each time a client joins the waitlist. See Step 4 to choose who receives it. |
| Make the phone number required to submit the request | Clients cannot send their request without a phone number. Useful if you want to call them, or to alert them by text message. |
| Available for any practitioner | When it is on, clients can ask for any practitioner who accepts online booking. When it is off, choose the practitioners offered on the waitlist in Applicable practitioners. |
| Additional text displayed on the waitlist page (English and French versions) | A message shown at the top of your waitlist page, in the language of the visitor. See How to modify my waitlist page. |
3Let your clients find the waitlist
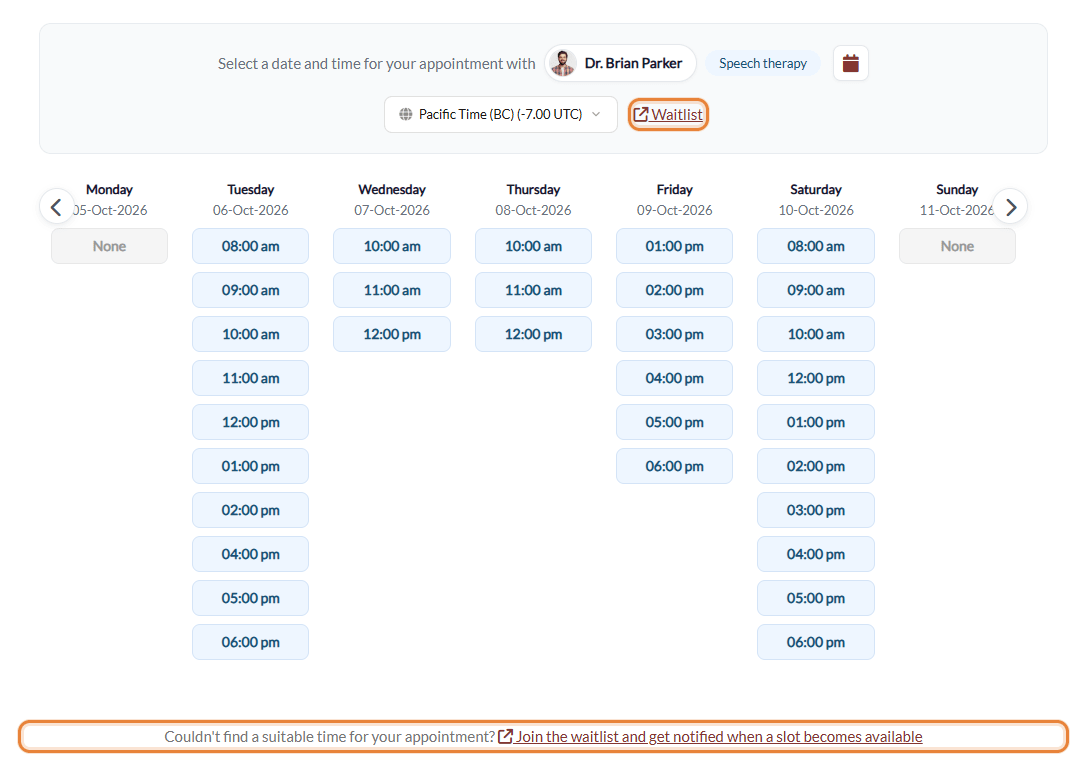
Once the waitlist is on, links to join it automatically appear on your booking page, at the step where clients choose a date and time:
- a Waitlist link next to the time zone, at the top;
- the sentence Couldn't find a suitable time for your appointment? Join the waitlist and get notified when a slot becomes available, under the available times.
When a client follows one of these links, the waitlist form is already filled in with what they entered on the booking page (name, email, phone number, practitioner and type of appointment chosen). They only have to add the days and times that suit them.
No online booking? No problem. You do not need to enable online booking by clients to use the waitlist. Your waitlist page has its own address (shown under Enable Waitlist): share it on your website, in your emails or on social media, and manage the requests without offering online booking. Only the automatic alerts require online booking by clients.
4Choose who is notified of new requests (optional)
If Receive a notification for each request received is on, you choose who receives the notification:
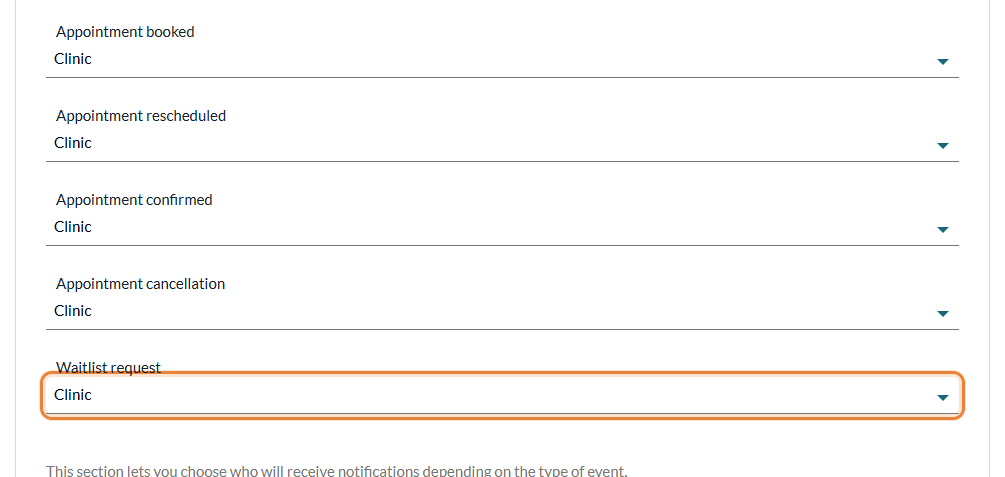
- Go to Settings > Communications (www.colib.io/settings?show=communications).
- In the Event notification recipient section, choose a recipient in Waitlist request: Clinic (the main account of the practice), Practitioner (the client's practitioner or the practitioner requested), Clinic and practitioner, or None.
- Save your settings.
What happens next?
- After sending the form, the client sees a confirmation message: your practice has received the request and they will be notified when an opening becomes available.
- If the email address entered matches one of your clients, the request is linked to their client record.
- The requests appear on the Waitlist page (www.colib.io/waitlist), which you can also open from the Waitlist link on the left of your scheduler. See How to consult my waitlist requests.
- New requests go to the bottom of the list. To change their order, see How to update waitlist request priorities.
Good to know
- Turning the waitlist off — the links disappear from your booking page, your waitlist page is no longer available to clients, and the Waitlist page disappears from Colib. The requests already received are not deleted: you find them again if you turn the waitlist back on.
- Who can see the requests — team members with access to appointments can view the waitlist; only those with full access to appointments can modify or delete requests.
- Practitioners and types of appointment offered — your waitlist page only offers the practitioners and types of appointment available for online booking and the waitlist. See How to modify my waitlist page.
Still have a question?
Write to us at support@colib.io, we will be happy to help.
Was this article helpful?
That’s Great!
Thank you for your feedback
Sorry! We couldn't be helpful
Thank you for your feedback
Feedback sent
We appreciate your effort and will try to fix the article