Who is this article for?
An invoice created from an appointment starts with one line: the appointment. You may need to add other lines: a report, a product sold at the clinic, a tip, a material fee, and so on.
There are two ways to do it: define lines that are added automatically to every invoice of an appointment type (A), or add lines by hand on a given invoice (B).
AItems specific to an appointment type
If you want to add extra lines specifically for a certain type of appointment, you can define these lines directly in the appointment type settings:
- Go to Settings > Appointments (www.colib.io/settings?show=appointments).
- Click the pencil icon of the appointment type to edit it.
- Open the Invoicing section and scroll down to Additional Rows on the invoice.
- Enter the Description, the Price and the Quantity of the line, then click the green + icon. Repeat for each line. The trash icon removes a line.
- Save the appointment type.

Every time an invoice is created for this type of appointment, these additional lines are automatically added to the invoice, with the same taxes as the appointment. Invoices that already exist are not changed.
BOther items on an invoice
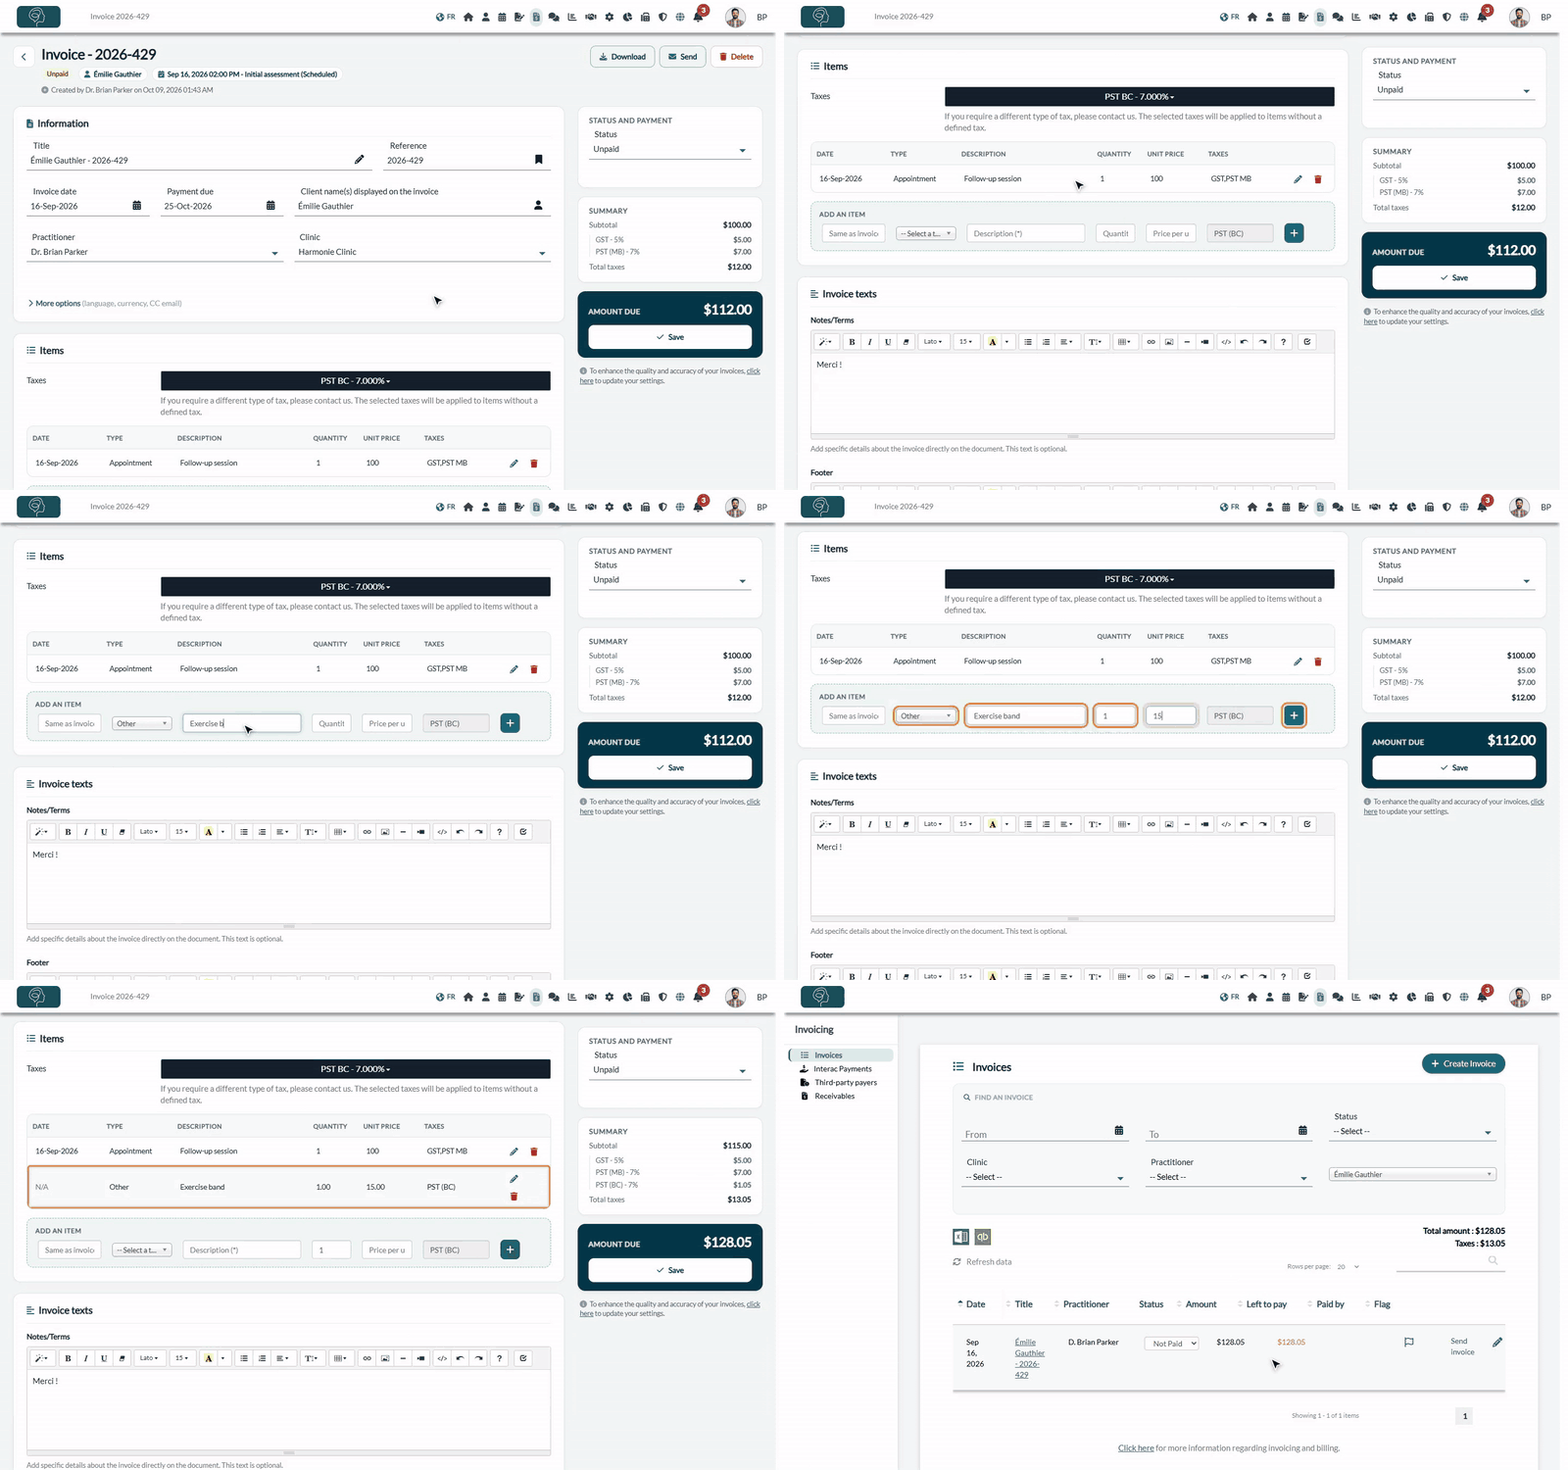
If you want to add custom lines to an invoice, use the Add an item line under the table of the Items card, on the invoice page:
- Open the invoice: from the appointment, from the client's record (Billing tab) or from www.colib.io/invoices (click its title).
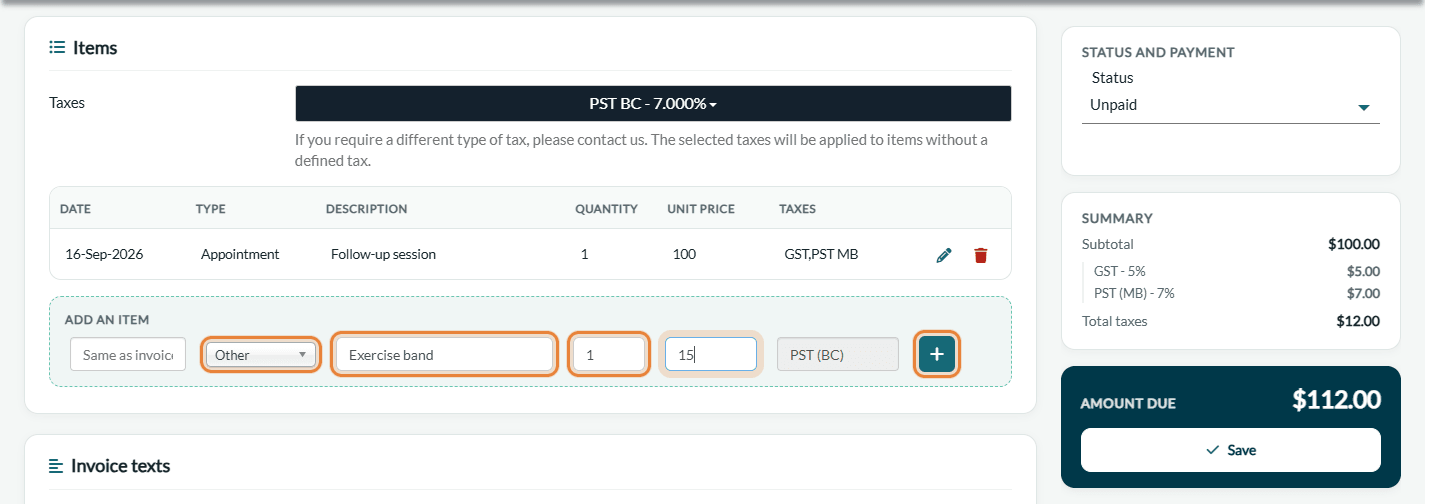
- In the Items card, under Add an item, choose the type of the line in -- Select a type -- (see the table below).
- Fill in the line. By selecting Other in the list of types, you define the description, the quantity and the price per unit. The date is optional: without a date, the line takes the date of the invoice.
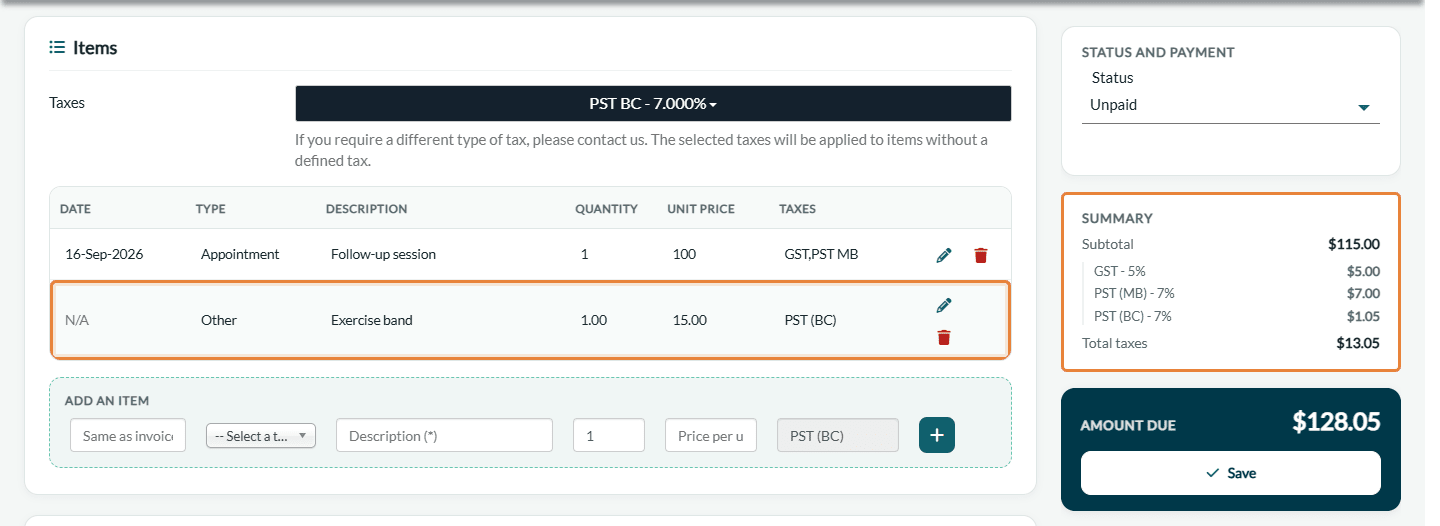
- Click the green + icon to add the new item to the invoice. Do not forget this step: a line that is only typed is not added.
- Check the totals in the Summary and the Amount due in the panel on the right, then click Save just below (on a narrower screen, in the bar at the bottom of the screen).
| Type | How it works |
|---|---|
| Appointment | Choose an appointment type: its invoice name and its taxes are used. Enter the quantity and the price per unit. |
| Product | Choose a product of your inventory: its price and its taxes are filled in, and the stock is updated when you save. The Edit products link opens your inventory. |
| Tip | Enter the amount only: a tip has no taxes and a quantity of 1. |
| Billable time | Time worked outside an appointment: enter a description, a quantity (for example, the number of hours) and a price per unit. |
| Other | Any other line: enter the description, the quantity and the price per unit. The taxes selected in the Taxes field at the top of the Items card are applied. |
Edit or remove a line
- Click the pencil icon of a line to change it, then the check mark to validate.
- Click the trash icon to remove a line.
- Click Save in the panel on the right, under Amount due (on a narrower screen, in the bar at the bottom of the screen) to keep your changes.
Good to know
- Required fields — every line needs a type, a description, a quantity greater than 0 and a valid price. An invoice needs at least one line.
- Receipts paid by card — the lines of an invoice paid by card through Colib can no longer be changed. See How to edit a receipt (invoice already paid).
- Default taxes — see How to update the default taxes for my invoices.
- Send the invoice — saving does not send the invoice, unless its appointment is already Completed, the invoice was never sent and the option Automatically send an invoice to the client. is on in your invoice settings. See How to create and send an invoice or a receipt.
Still have a question?
Write to us at support@colib.io, we will be happy to help.
Was this article helpful?
That’s Great!
Thank you for your feedback
Sorry! We couldn't be helpful
Thank you for your feedback
Feedback sent
We appreciate your effort and will try to fix the article