Who is this article for?
When a new client joins your practice, you may want to send them a first email with practical information: how to prepare for the first visit, where to park, your policies, a link to their client portal... and the forms to fill out before the appointment. In Colib, this is the welcome email.
This article explains how to write it, how to send it automatically to every new client, and how to send it by hand from a client record.
Before you start: the welcome email is configured in Settings > Communications (www.colib.io/settings?show=communications). You need access to the practice settings, and your own email address must be confirmed to turn the welcome email on.
1Turn on the welcome email
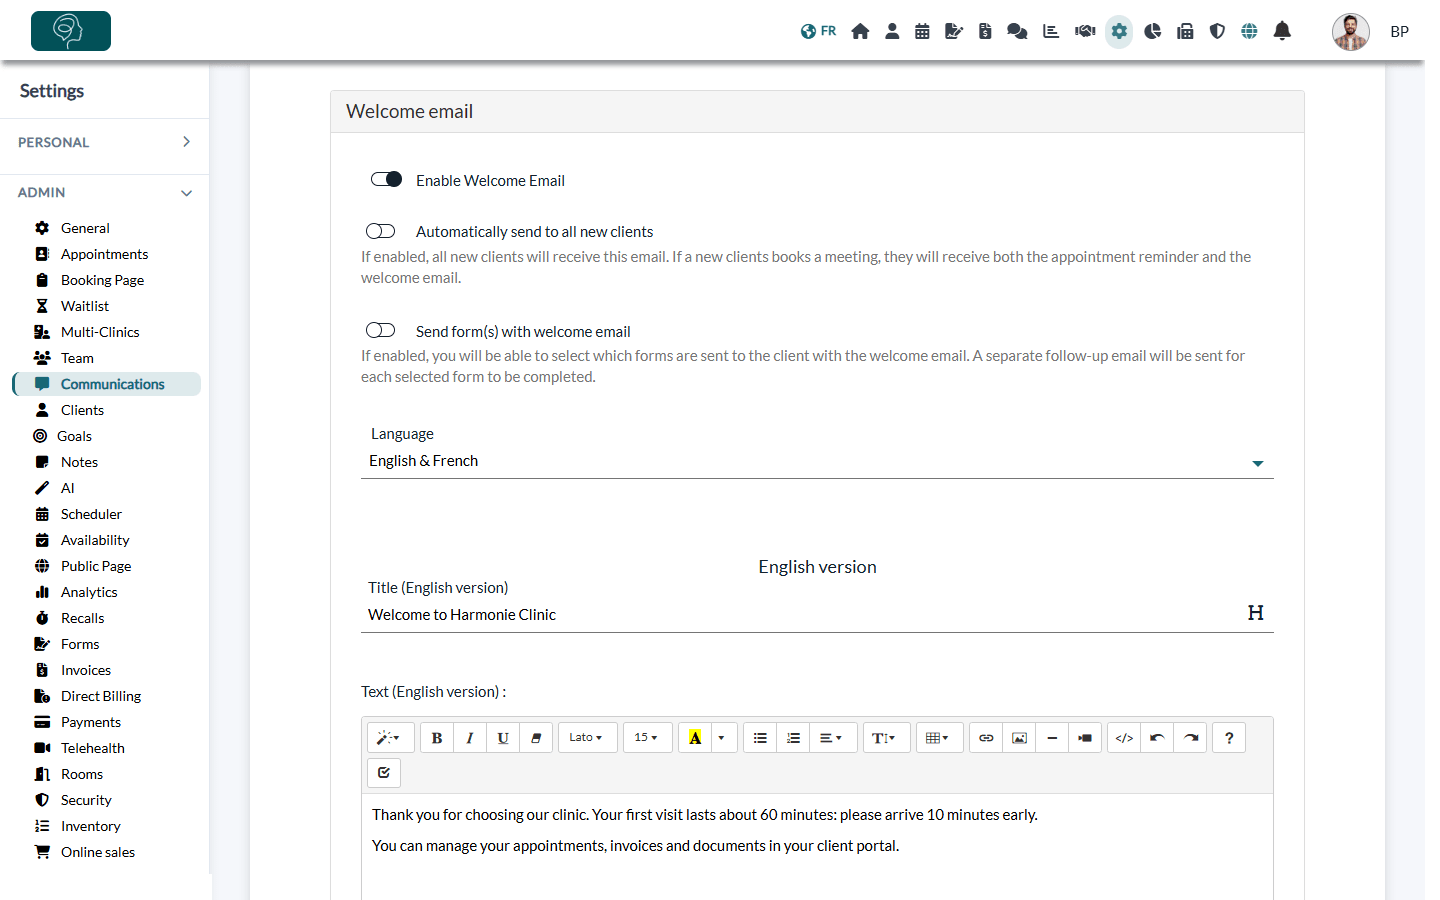
- Go to www.colib.io/settings?show=communications. You can also click the Settings icon (gear) in the top bar, then Communications in the Admin menu on the left.
- Scroll down to the Welcome email section.
- Turn on Enable Welcome Email. The options of the welcome email appear.
2Choose how it is sent
| Option | What it does |
|---|---|
| Automatically send to all new clients | Every new client receives the welcome email, however the client record was created: by your team, through online booking, through a form, an import, etc. A new client who books an appointment receives both the appointment confirmation and the welcome email. Leave it off to send the welcome email only by hand (step 5). |
| Send form(s) with welcome email | Select in Forms the forms to send with the welcome email. Each selected form is sent in a separate email, with a link to fill it out. See also How can I send the form to my clients?. |
| Language | English & French, English or French: the versions of the email you want to write. Each client receives the version in the language of their record; if only one version exists, it is used for everyone. |
3Write the email
- For each language, enter the Title: it is the subject of the email.
- Write the Text in the editor. You can format it and add links and images.
- Click Save at the bottom of the page.
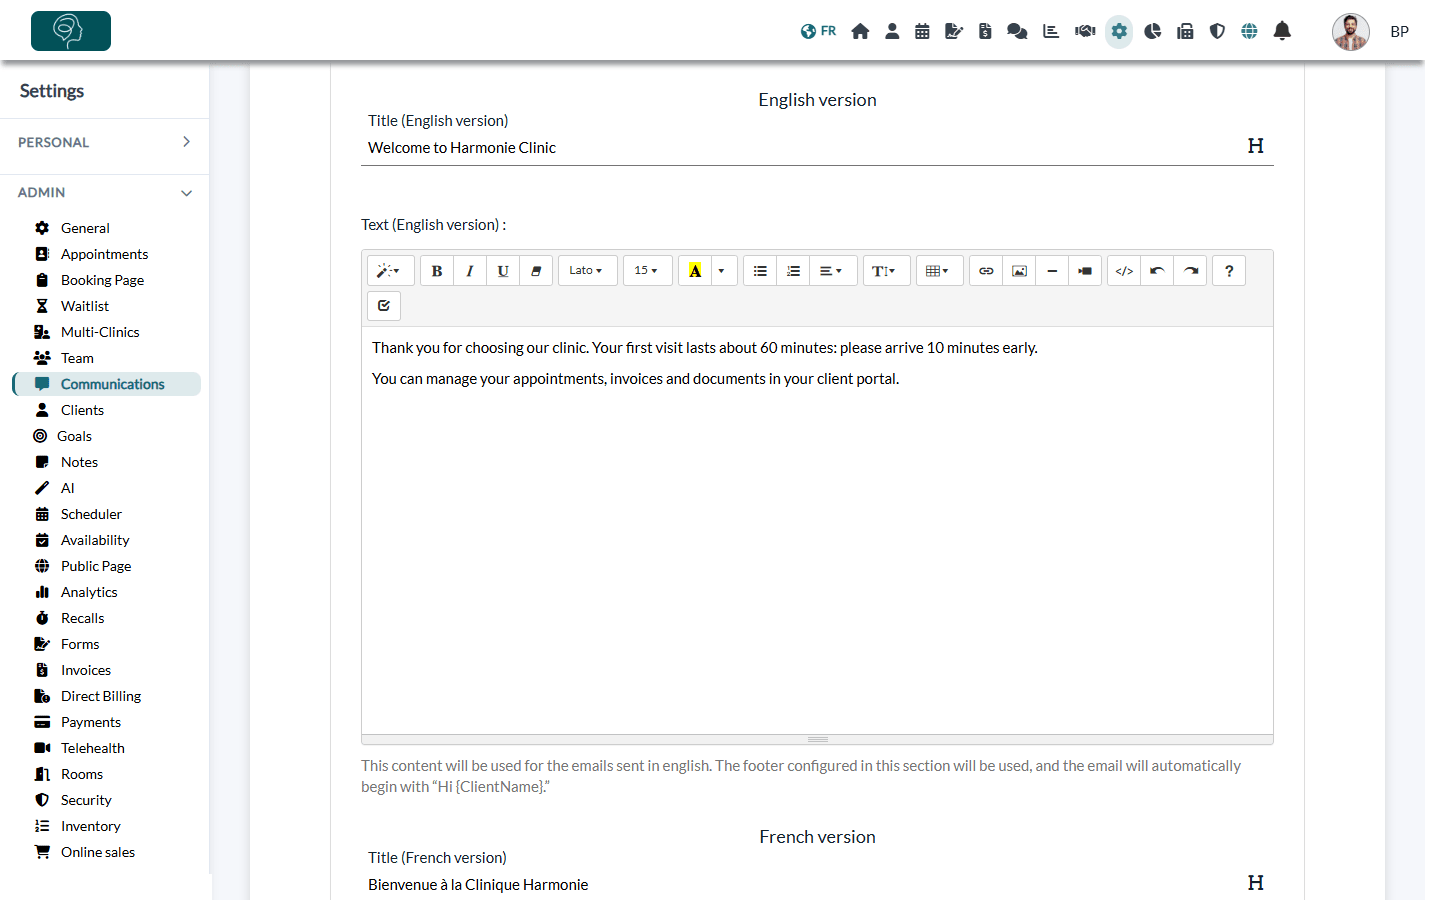
You do not need to write the greeting or the signature: the email automatically starts with a greeting and the client's name, and ends with the email footer configured in the same Communications settings. It also includes a link to the client portal, to create an account or log in.
Important: a version without a title or a text cannot be sent. If neither version is complete when you save, the welcome email is turned off; if only one is complete, the Language is changed to that version.
4What the client receives
- The email is sent to the email address of the client record, a few moments after the record is created (automatic sending) or after your request (manual sending). The additional emails of the record are copied.
- For a client who is part of a client group whose responsible holder receives the notifications, the email is addressed to the responsible holder (How to manage client group notifications).
- When the client replies, the reply goes to the email address of your clinic.
- If you selected forms, the client then receives one email per form to fill out.
5Send the welcome email by hand
Once the welcome email is turned on, you can send it at any time to a client, for example a client created before you turned on the automatic sending.
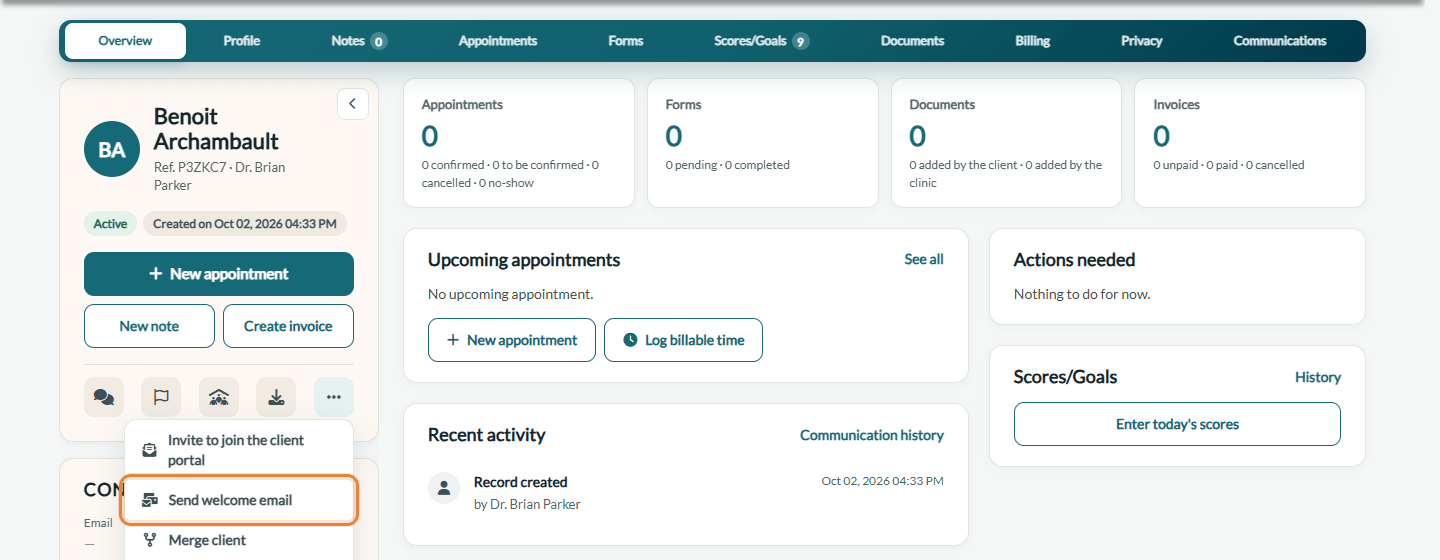
- Open the client record from your client list (www.colib.io/clients).
- Under the client's name, click the More actions icon (three dots), then Send welcome email.
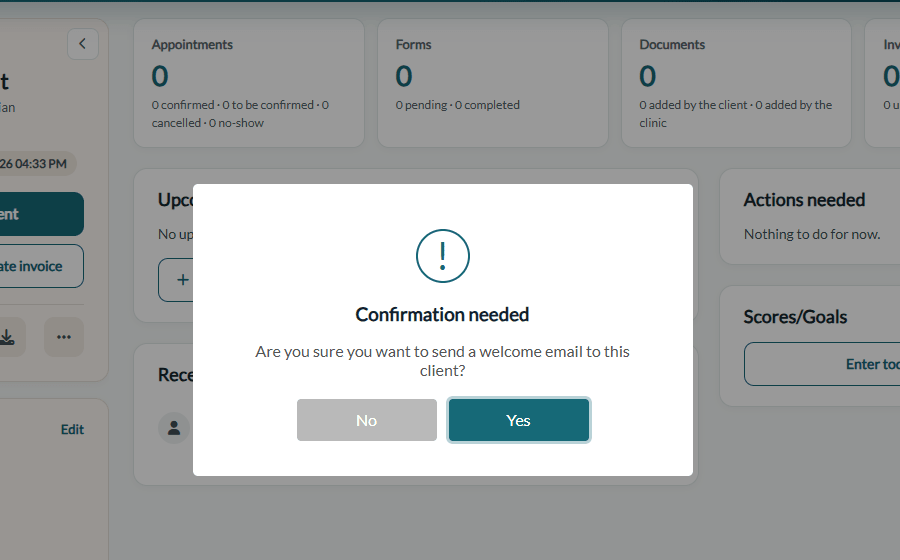
- Confirm with Yes. The message A welcome email has been sent to the client. confirms the sending.
Good to know
- No email address — the welcome email cannot be sent to a client without an email address (An email is required for this client.).
- Menu entry missing? — Send welcome email only appears in the client record when the welcome email is turned on in the settings.
- Check what was sent — the Communications tab of the client record lists the emails sent to the client, with their status: see How to view client communications: emails and SMS delivery status.
- Client portal — to learn more about what your clients find in their portal, see What is the client portal?.
Still have a question?
Write to us at support@colib.io, we will be happy to help.
Was this article helpful?
That’s Great!
Thank you for your feedback
Sorry! We couldn't be helpful
Thank you for your feedback
Feedback sent
We appreciate your effort and will try to fix the article