Who is this article for?
A drawing often says more than a paragraph: the area of pain on a body chart, a muscle to work on, a quick diagram for a client. Colib's note editor includes a drawing tool: you draw on an anatomical template (body, muscles, bones, nervous system), on your own image or on a blank page, and the drawing is added to your note as an image.
This article explains how to draw a sketch, how to write by hand on a blank page and how to add your own templates.
Before you start: the drawing tool is under the editor of a note that is not signed yet: a new note, or a draft opened with the pencil icon. To learn how to write a note, see How to work efficiently with notes on Colib?
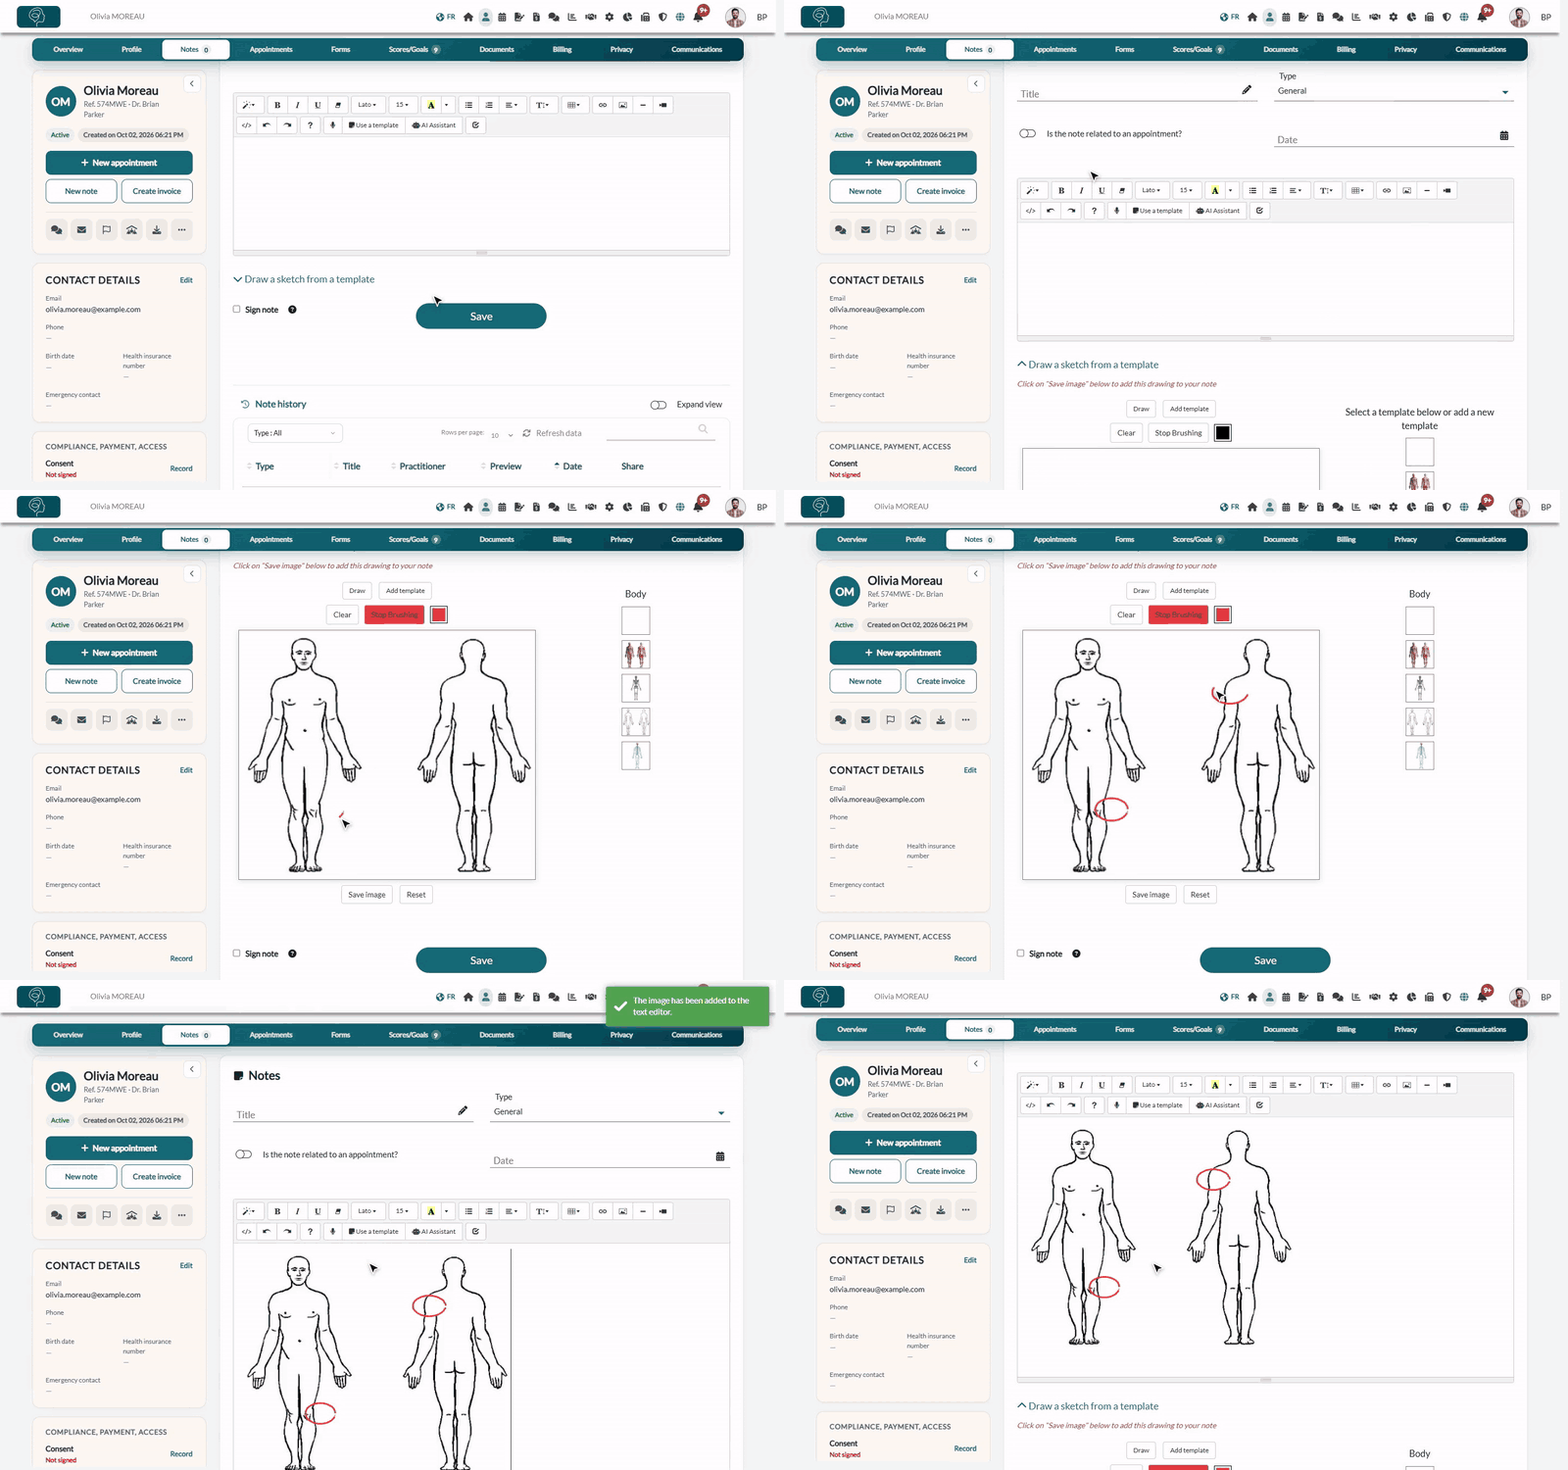
1Open the drawing tool
- Open the client's record from your client list (www.colib.io/clients), then click New note or the Notes tab.
- Under the note editor, click Draw a sketch from a template. The drawing area opens, with the list of templates on the right.
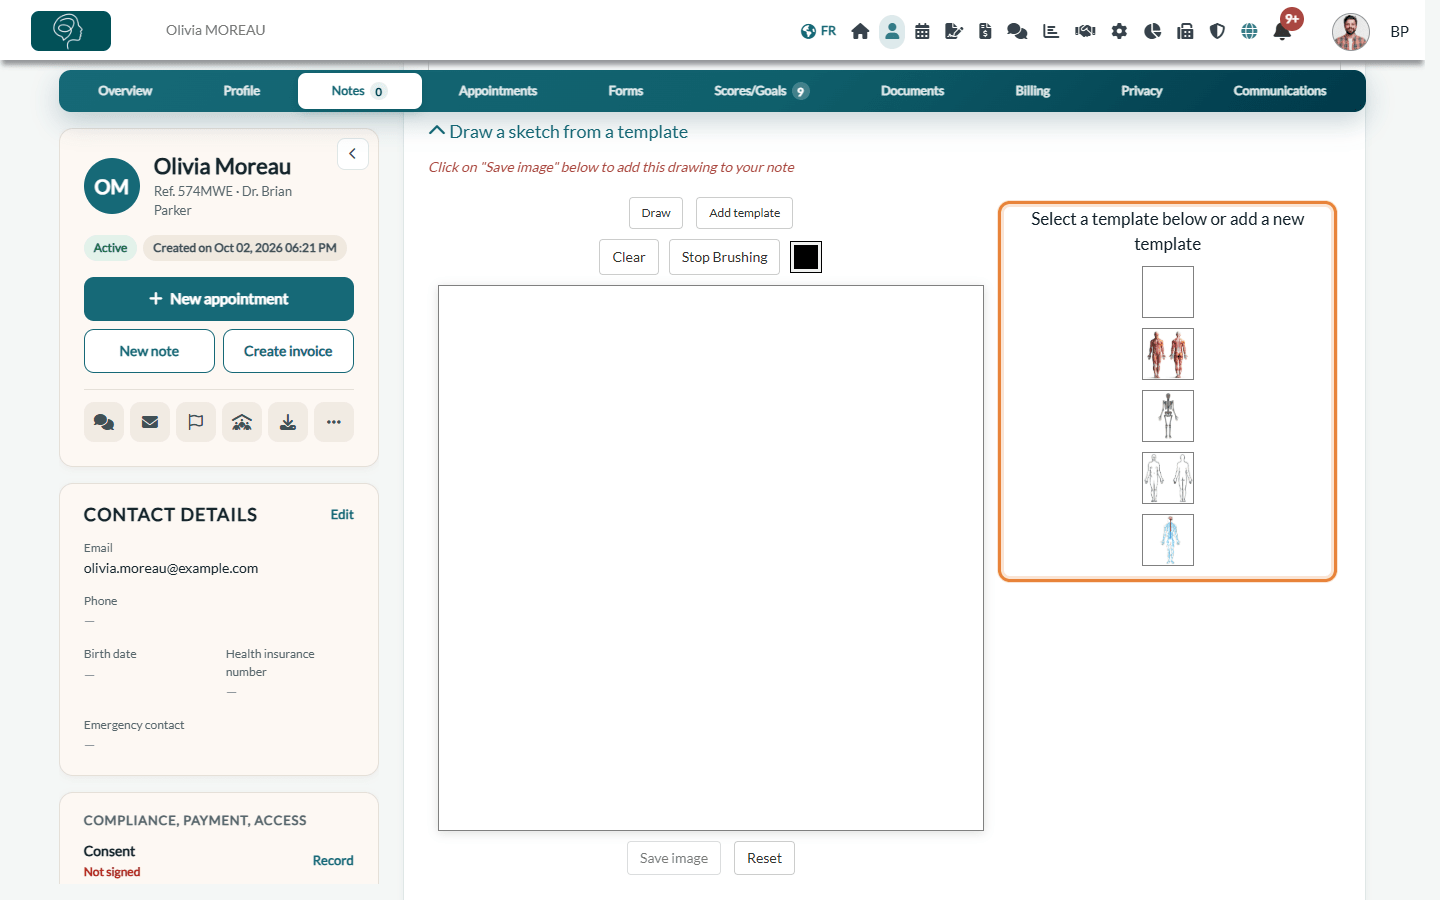
2Choose a template and draw
- Click a template on the right: Muscles schema, Bones schema, Body (front and back) or Nervous system. The first thumbnail, all white, is a blank page. Hover over a thumbnail to see its name.
- Choose a colour with the colour square next to Stop Brushing.
- Draw directly on the image with your mouse or trackpad. On a tablet or a touch screen, draw with your finger or a stylus.
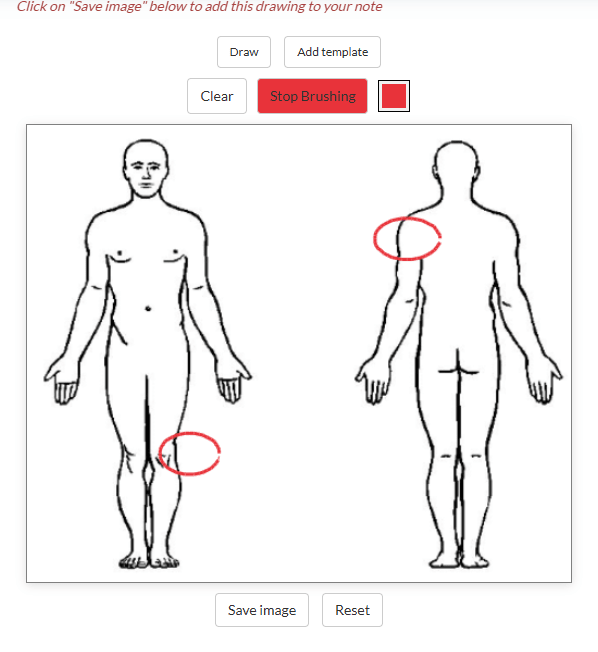
| Button | What it does |
|---|---|
| Draw / Stop Brushing | Turns the pen on or off. The pen is on when the tool opens (Stop Brushing turns red while you draw). |
| Colour square | Changes the colour of the pen. |
| Clear / Reset | Erase your drawing so you can start over. The template stays. |
| Add template | Adds one of your own images as a template (see below). |
| Save image | Adds the drawing to your note. |
3Add the drawing to your note
- Click Save image, under the drawing area. The message The image has been added to the text editor. confirms it.
- Scroll back up to the editor: the drawing is in your note. You can write around it, like any other image.
- Finish your note and click Save, as usual.
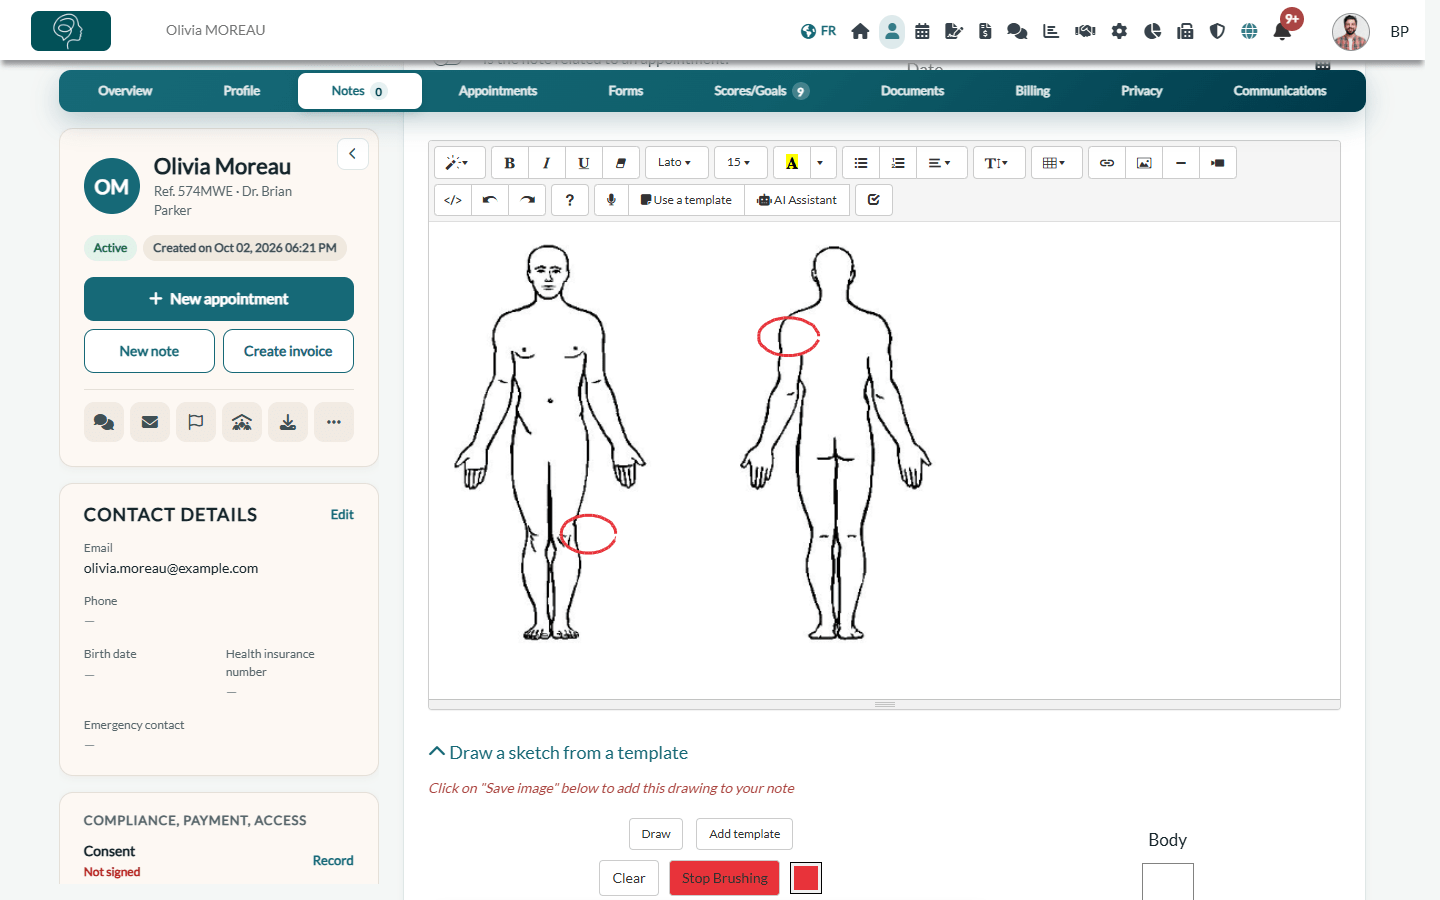
Important: only Save image adds the drawing to the note. If you leave the page before clicking it, your drawing is lost.
Write by hand
To write a few words by hand (for example with a stylus on a tablet), choose the blank template, the first white thumbnail of the list, then write on it as you would draw. Click Save image: your handwriting is added to the note as an image.
Handwriting stays an image: it cannot be searched or edited as text. To turn your voice into text instead, see How can I use the voice recognition tool to create a note?
Add your own templates
- Click Add template and choose an image on your computer (for example a diagram of the hand or the spine).
- The image becomes the drawing background, and the message The template has been saved and will be offered next time. confirms that it was added to your list of templates.
- Your templates are personal: they are offered to you only, in all your notes.
- Accepted images: image files of up to 2,000 x 2,000 pixels. You can keep up to 30 templates.
- To remove one of your templates, click the × on its thumbnail, then confirm.
Good to know
- Several drawings — you can add several drawings to the same note: draw, click Save image, then start again with another template.
- Other images — to insert a photo or attach a document instead, see How to attach documents and images to client notes?
- Signed notes — the drawing tool is not available in a signed note. To complete a signed note, add an addendum.
Still have a question?
Write to us at support@colib.io, we will be happy to help.
Was this article helpful?
That’s Great!
Thank you for your feedback
Sorry! We couldn't be helpful
Thank you for your feedback
Feedback sent
We appreciate your effort and will try to fix the article