Who is this article for?
This article is for practitioners and their teams who want to give their clients access to the client portal (portal.colib.io), and for clients who want to create their account.
Any client who has an email address in their client record can access the portal. The client creates the account themselves, with that email address and a password of their choice: your team never creates the account and never knows the password. Creating an account is optional: clients who do not create one can keep managing their appointments with the links in the emails and text messages they receive.
Before you start: check that the client's email address is filled in and correct in their record (tab Profile). Without an email address, no invitation can be sent.
1Clients are invited automatically
Most emails your clients receive from your practice (appointment emails, invoices and receipts, shared documents, new messages) contain a link to the client portal. As long as the client has no account, this link opens the account creation page. Once the account exists, the same link opens their dashboard.
You have nothing to do: a client who books online, receives an invoice or a document can create their account at any time. To learn more about online booking, read Do my clients need to create a Colib account before booking?
2Invite a client yourself
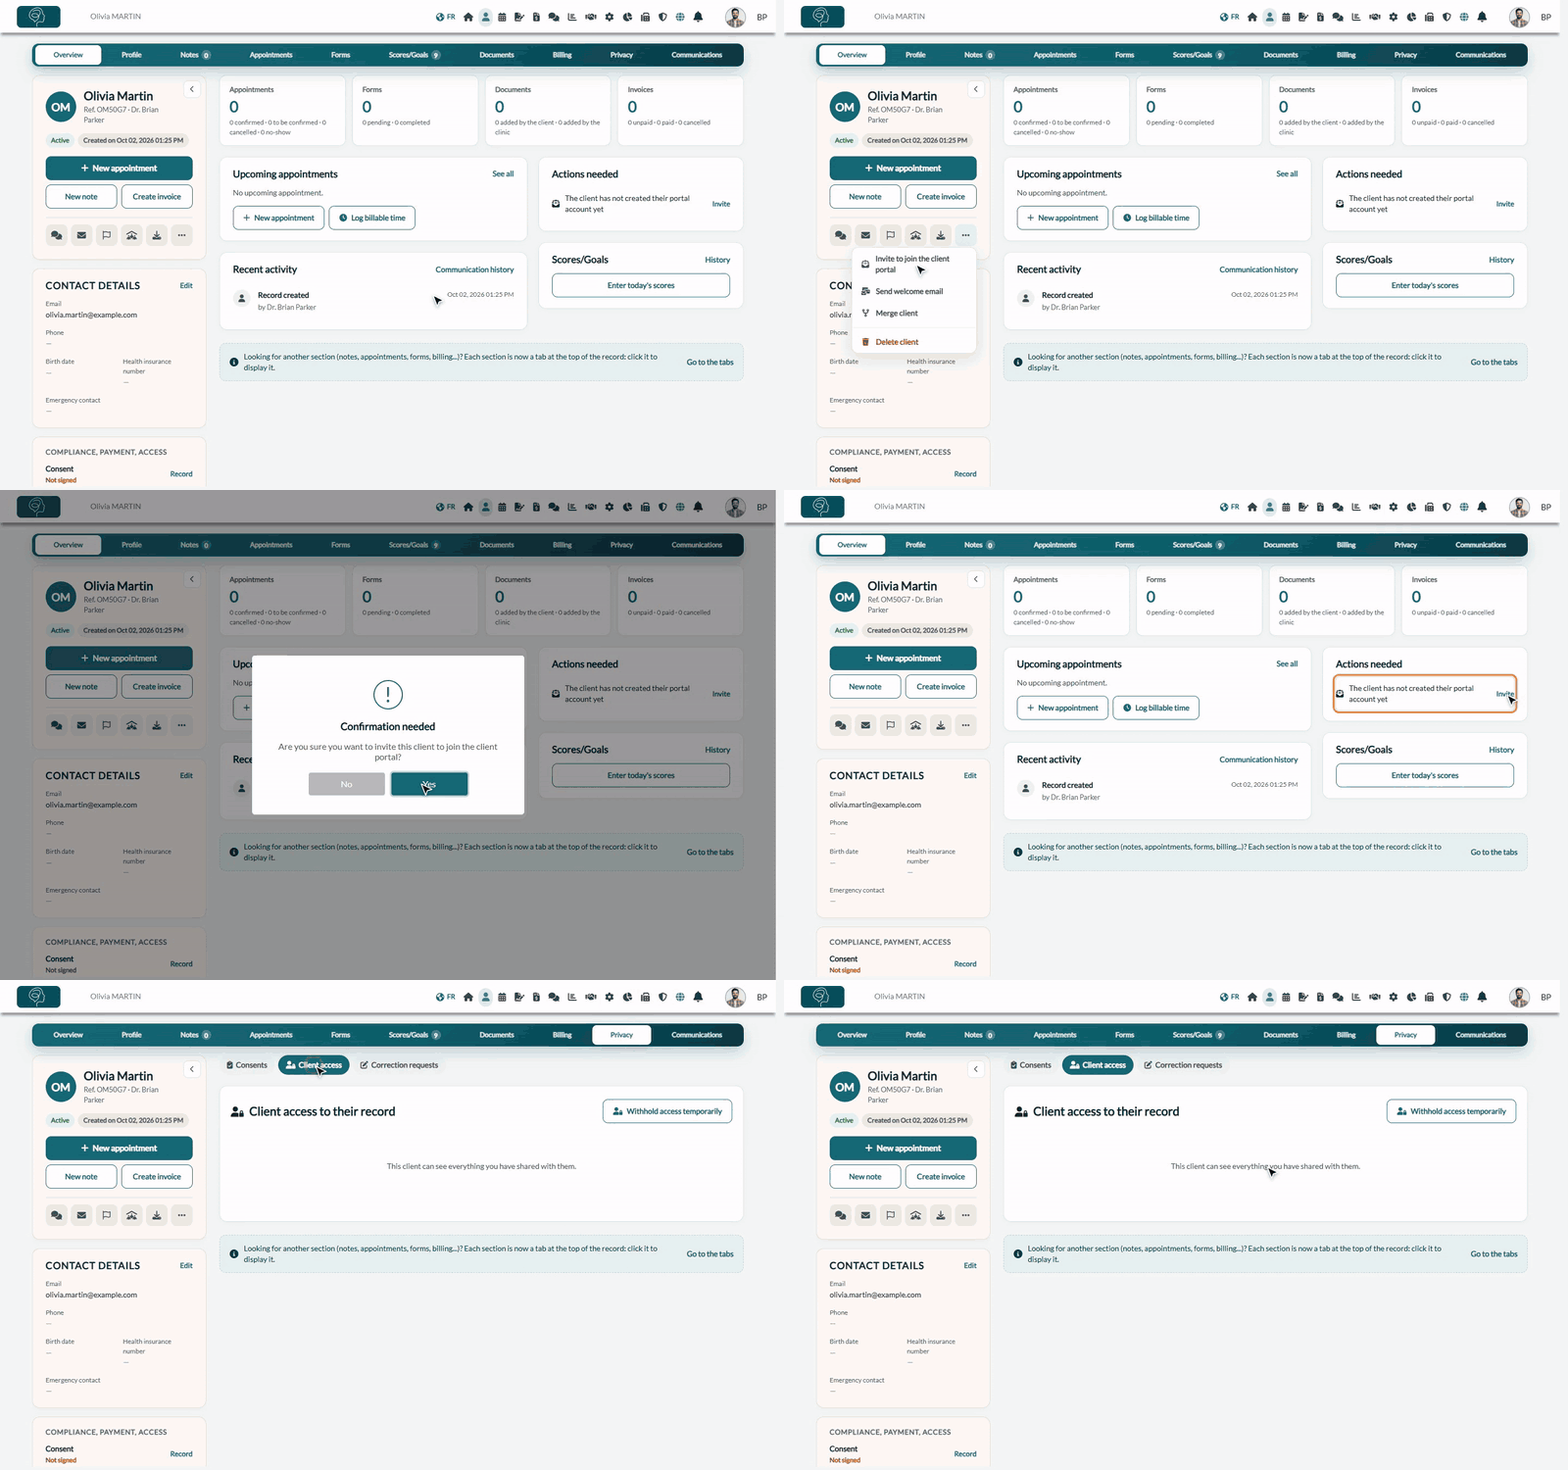
- Open the client's record from your client list (www.colib.io/clients).
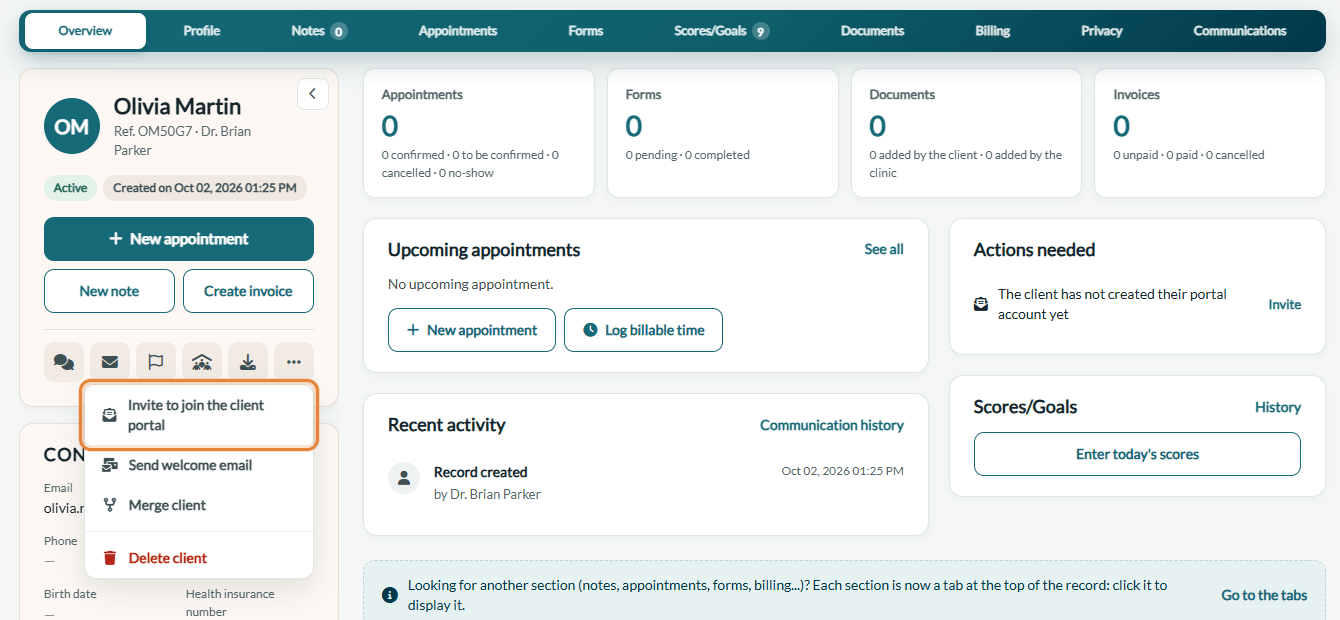
- In the panel on the left, click the ... button, then Invite to join the client portal. You can also click Invite next to The client has not created their portal account yet, in the Actions needed box of the Overview tab.
- Confirm with Yes. The message An invitation has been sent to the client via email. appears.
The client receives an email in their language, with your practice's logo and a button to create their account. If the client replies to this email, the reply goes to your practice's email address.
If the option is not displayed, the client already has a portal account. The Compliance, payment, access box of the record shows Portal account active or No portal account yet.
3The client creates their account
- The client clicks the button in the invitation email (or the portal link in any email from your practice).
- On the Account Creation page, they enter their First Name, Last Name and a Password that meets the rules shown. The Email field is already filled in with the address in their record and cannot be changed.
- They accept the terms of service and the privacy policy, then click Continue. They are signed in right away.
- They confirm their email address with the link they receive. Their appointments, invoices, documents and other information are displayed once the address is confirmed.
4Sign in, or create an account without an invitation
To sign in later, the client goes to portal.colib.io and enters their email address and password. If two-factor authentication is on, a verification code is sent to them by email or text message at each sign-in (it is mandatory for clients of clinics located in Quebec).
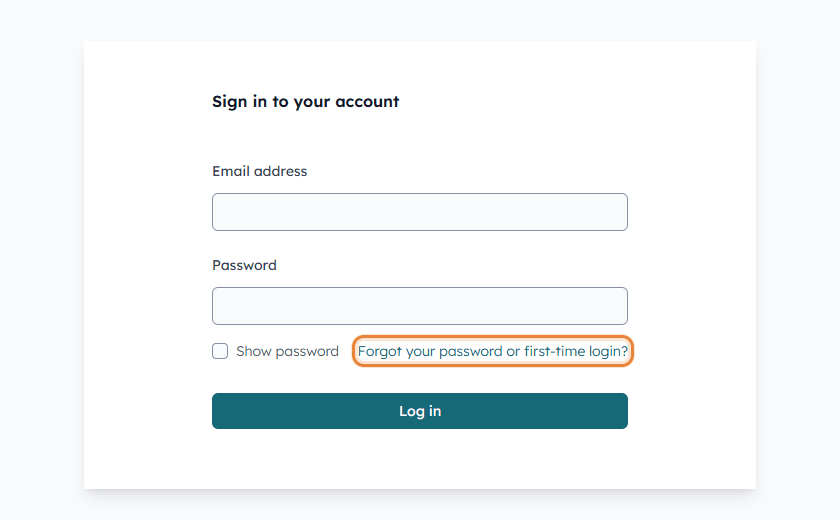
A client who has lost the invitation does not need a new one:
- On the sign-in page, click Forgot your password or first-time login? (portal.colib.io/ForgotPassword).
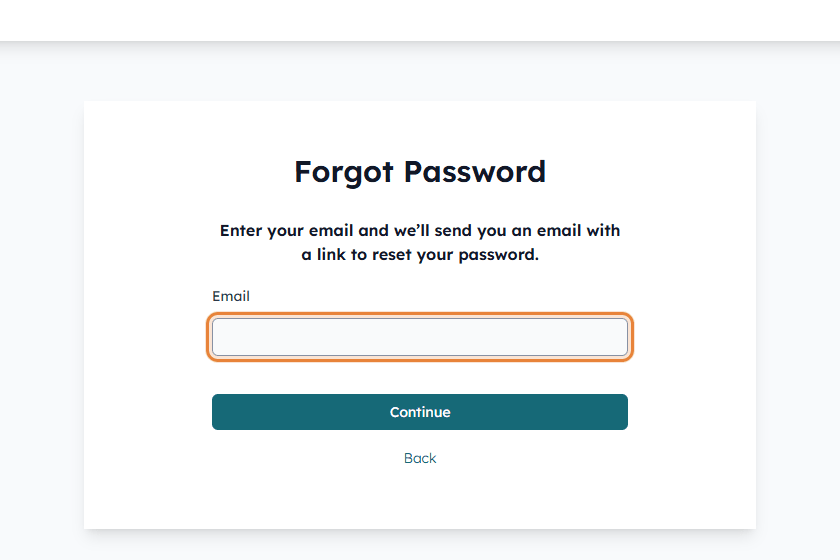
- Enter the email address the practice has on file, then click Continue.
- If the account already exists, the client receives a link to choose a new password. Otherwise, they receive the invitation to create their account.
If no email arrives, the client should check their junk mail folder, then contact the practice to make sure the address in their record is exactly the one they use.
Temporarily withhold a client's access
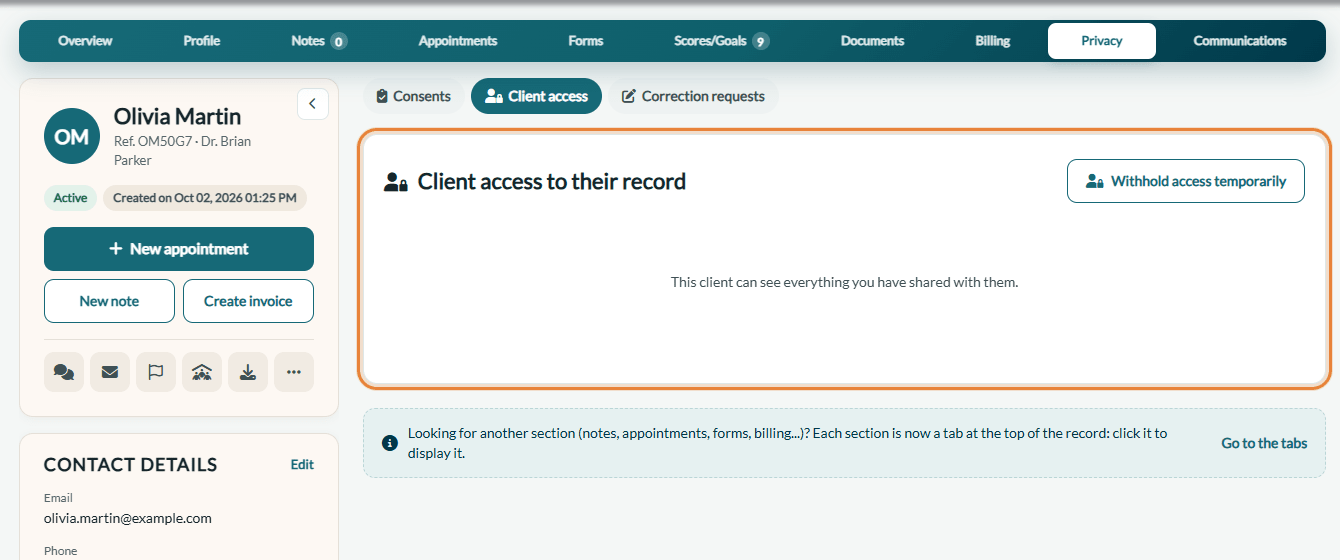
If a professional decides that a client should not see their record for a while, open the record, click the Privacy tab, then Client access, and click Withhold access temporarily. You enter the reason for the decision and the date until which access is withheld.
You also confirm that, in your professional judgement, giving access now would likely cause serious harm to the person's health. Until that date, the client no longer sees the notes, documents and completed forms of this record in the portal (details below). Click Restore access now to end the decision early. Past decisions stay in the history.
Can I turn off the portal completely for a client?
No. Colib has no option to deactivate the client portal permanently for a given client: any client who has an email address in their record can create their account and sign in. You decide, however, what this client can see:
- Share only what you want — notes and documents appear in the portal only when you share them with the client. Completed forms appear only if Share completed forms with clients is turned on in Settings > Forms (www.colib.io/settings?show=signature); this setting applies to all your clients.
- Withhold access temporarily (section above) — for a limited period, on a documented professional decision.
What withholding access hides, and what stays visible:
| Hidden in the portal until the chosen date | Still visible |
|---|---|
| The notes and documents shared with the client, and their completed forms. They are also left out of the Download all my data archive the client can download from the portal. | Appointments, invoices and receipts, messages, and the forms the client still has to fill in. |
Good to know: the decision ends by itself on the chosen date. To extend it, record a new decision. The client keeps their portal account during the whole period. For parents and guardians of a child client, see How to communicate with child clients using client groups.
Good to know
- One account per email address: the account sees every client record that has this email address, in every practice that uses Colib. A record created later with the same address is added to the existing account automatically.
- Families and client groups: when clients are grouped (for example, a parent and their children), the responsible holder sees the members' information in their own portal, and the invitation of a member is sent to the responsible holder. See How to effectively communicate with child clients using client groups.
- Changing the email address: the record is then linked to the portal account of the new address, if there is one.
- Deleting the account: the client can delete their portal account from their Profile. This does not delete their record in your practice.
- What the client sees: see What is the client portal?
Important: anyone who can read the mailbox of the email address in the record can create the portal account and see what you share with this client. Check the address before you invite a client or share information.
Still have a question?
Write to us at support@colib.io, we will be happy to help.
Was this article helpful?
That’s Great!
Thank you for your feedback
Sorry! We couldn't be helpful
Thank you for your feedback
Feedback sent
We appreciate your effort and will try to fix the article