Who is this article for?
This article is for anyone in your practice who keeps documents in a client record: referral letters, reports, imaging results, signed consent forms, audio recordings, etc. It explains how to add a document, organize documents in folders, and what you can do with them afterwards.
Before you start: you need access to documents in your user rights. If you do not see the Documents tab in the client record, or cannot add or edit a document, ask the administrator of your practice.
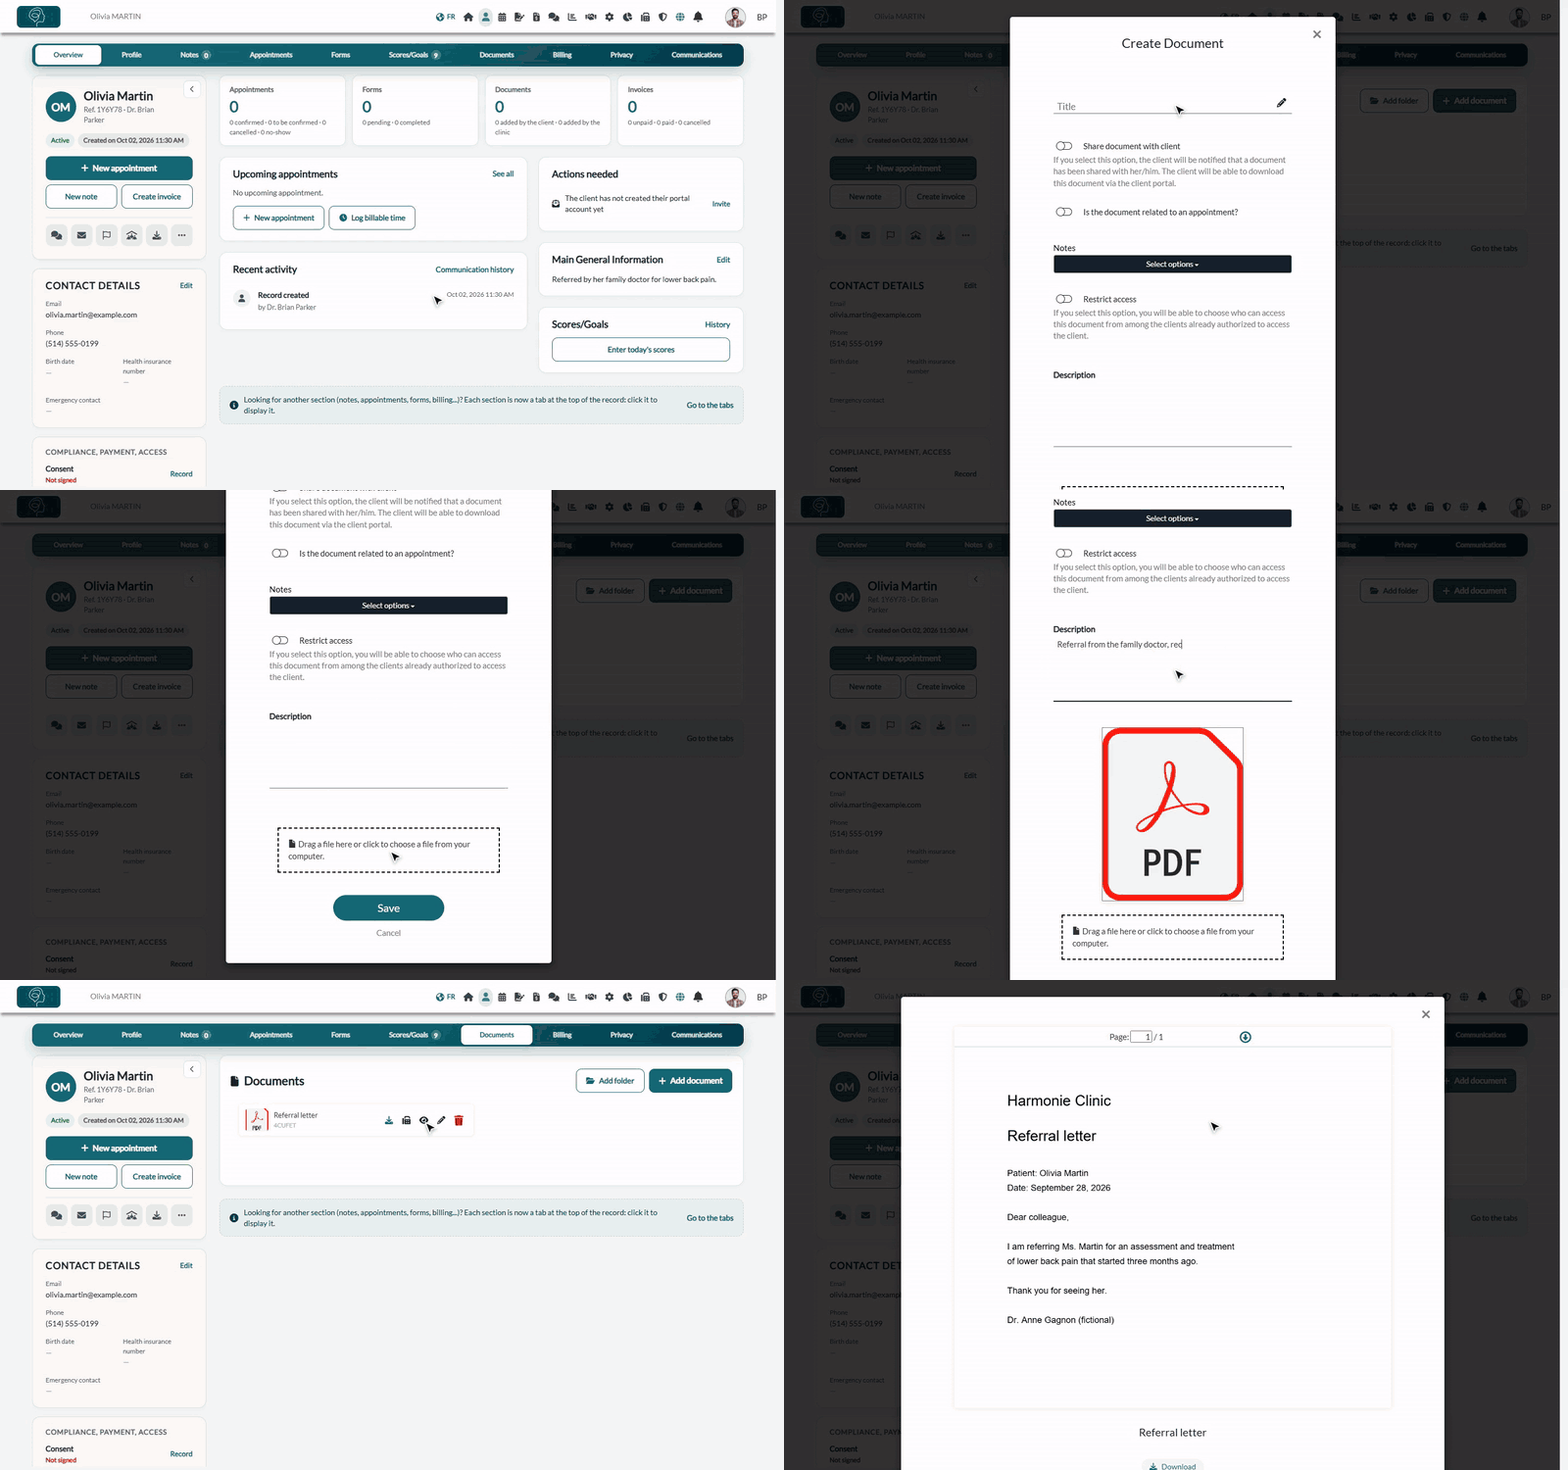
1Open the Documents tab
- Open the client record from your client list (www.colib.io/clients).
- Click the Documents tab at the top of the record. The number next to it is the number of documents in the record.
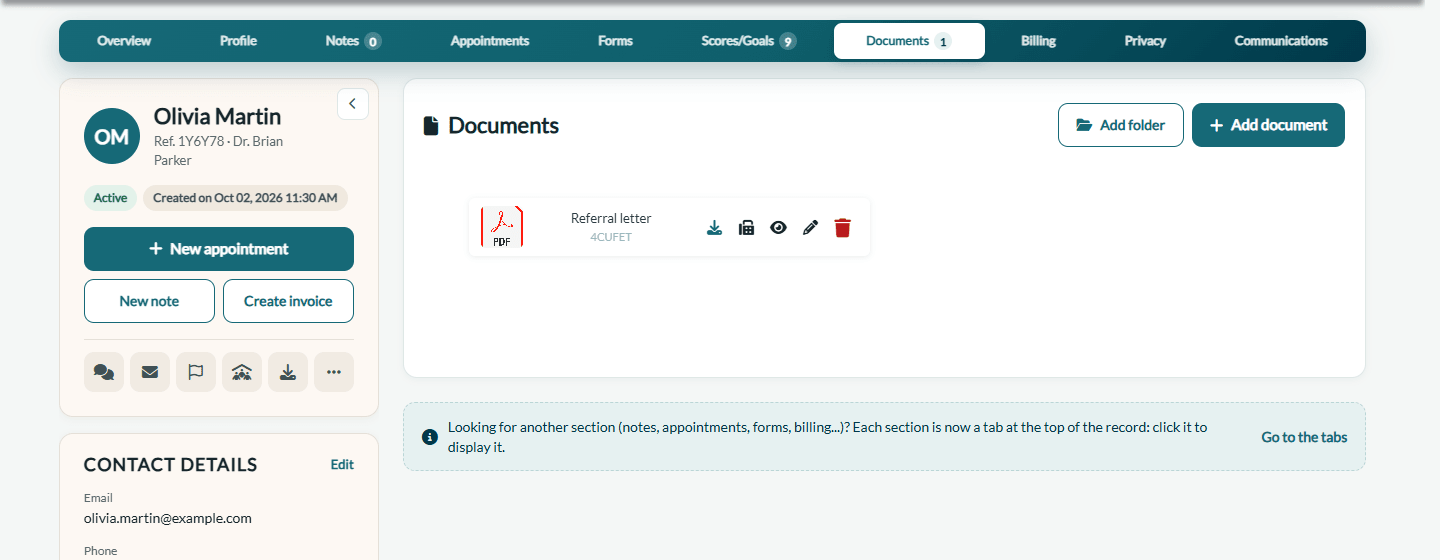
2Add a document
- Click Add document. The Create Document window opens.
- Enter a Title (required).
- At the bottom of the window, drag your file into the dotted area, or click it to choose a file on your computer. Wait for the preview to appear.
- Fill in the options you need (see the table below).
- Click Save. The document appears in the Documents tab.
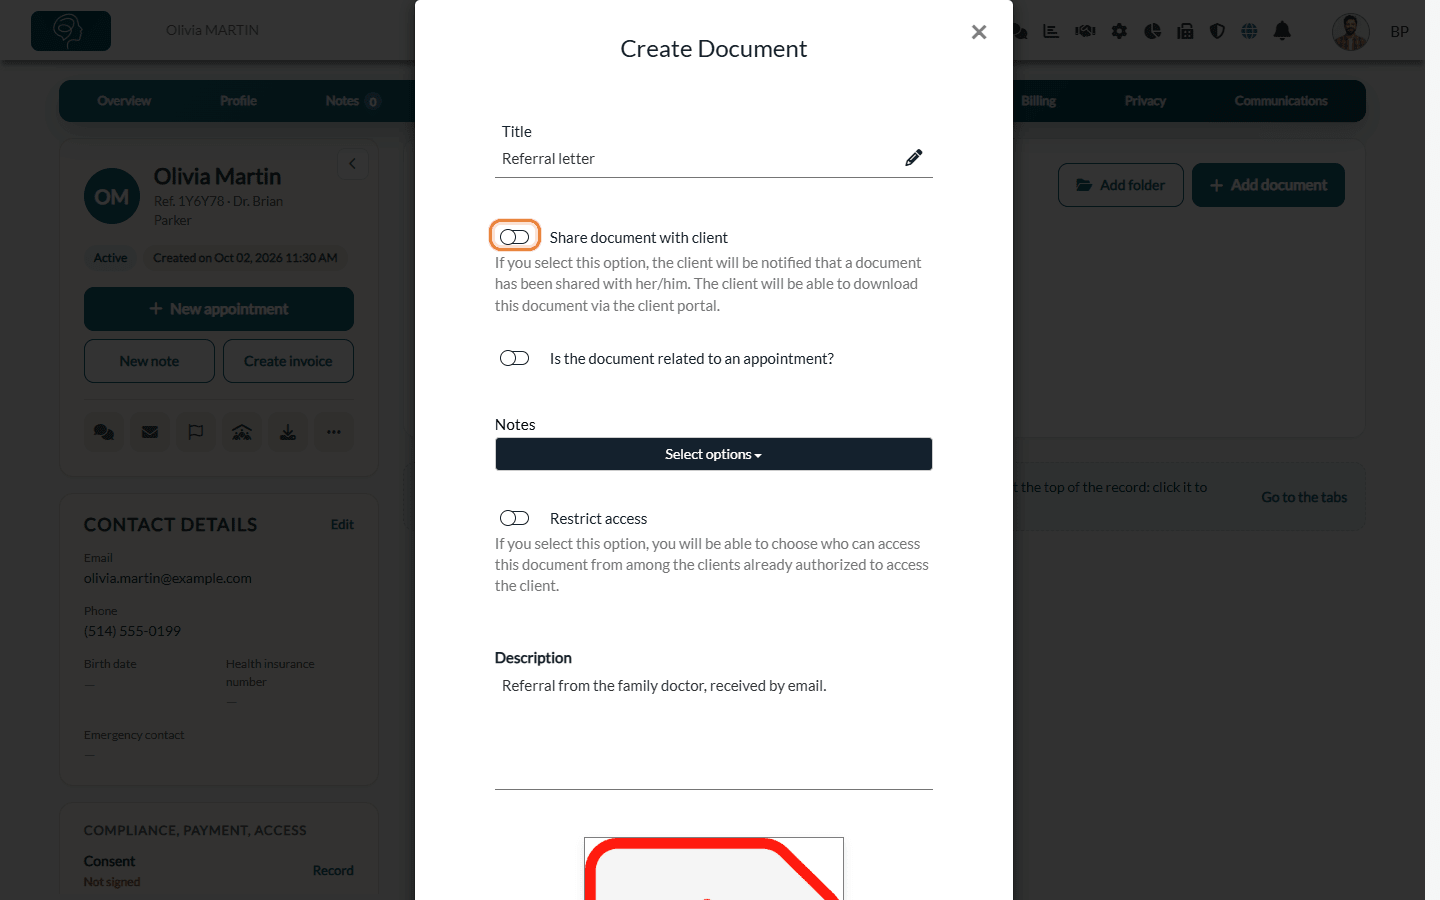
| Option | What it does |
|---|---|
| Share document with client | The client is notified that a document has been shared and can download it from the client portal. Leave it off for internal documents. See How to share a document with a client. |
| Folder | Shown when the record already has folders: choose the folder of the document. |
| Is the document related to an appointment? | Links the document to one of the client's appointments, chosen in Appointment. |
| Notes | Links the document to one or more notes of the client. See also How to attach documents and images to client notes. |
| Restrict access | Limits access to the document to the practitioners you choose in Authorized practitioners, among those who already have access to the client. |
| Description | A free comment about the document. |
Accepted files: PDF, images (JPG, PNG, GIF), Word, Excel and PowerPoint documents, audio (MP3, WAV, AIFF), video (MP4, MOV), text files and ZIP archives, up to 250 MB per file.
3View, download, edit or fax a document
Each document is shown as a card with its title, its reference and these icons:
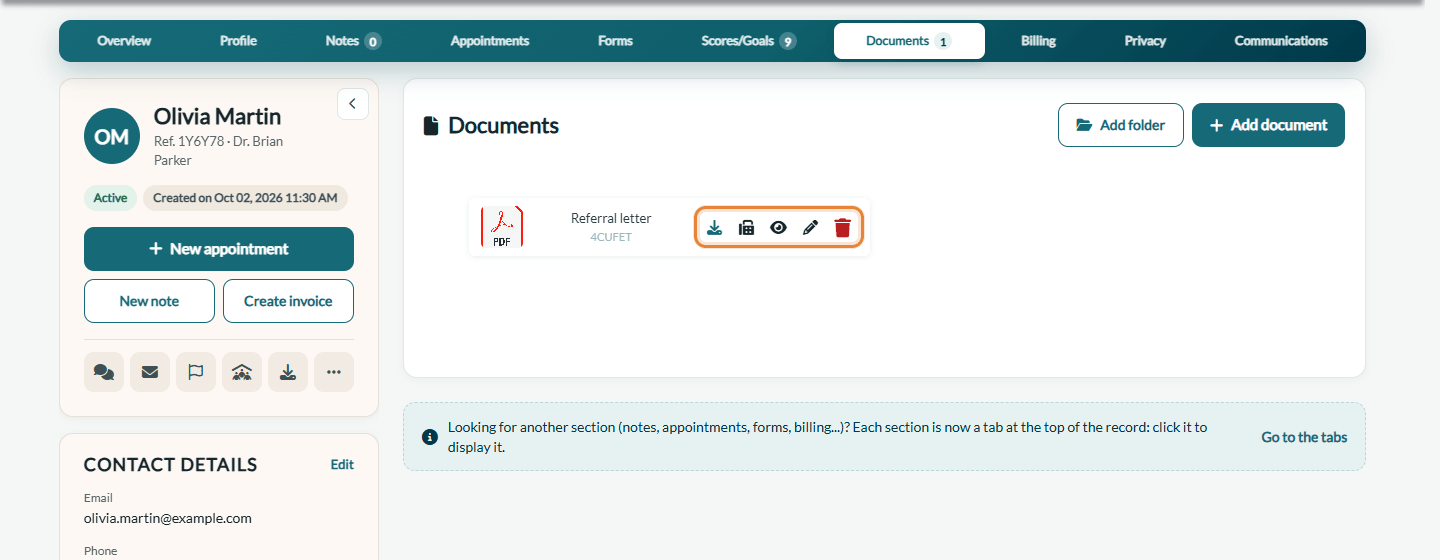
| Icon | What it does |
|---|---|
| Download | Downloads the file to your computer. |
| Send by fax | Sends the document by fax (PDF and images only). See How to send a fax from a client record. |
| View | Opens a preview of the document in Colib (PDF and images). |
| Edit | Opens the Edit Document window to change the title, sharing, folder, links and description. For an audio file, Play audio lets you listen to it. |
| Delete | Deletes the document, after confirmation. |
4Organize documents in folders (optional)
- In the Documents tab, click Add folder.
- Enter the folder Name and click Confirm.
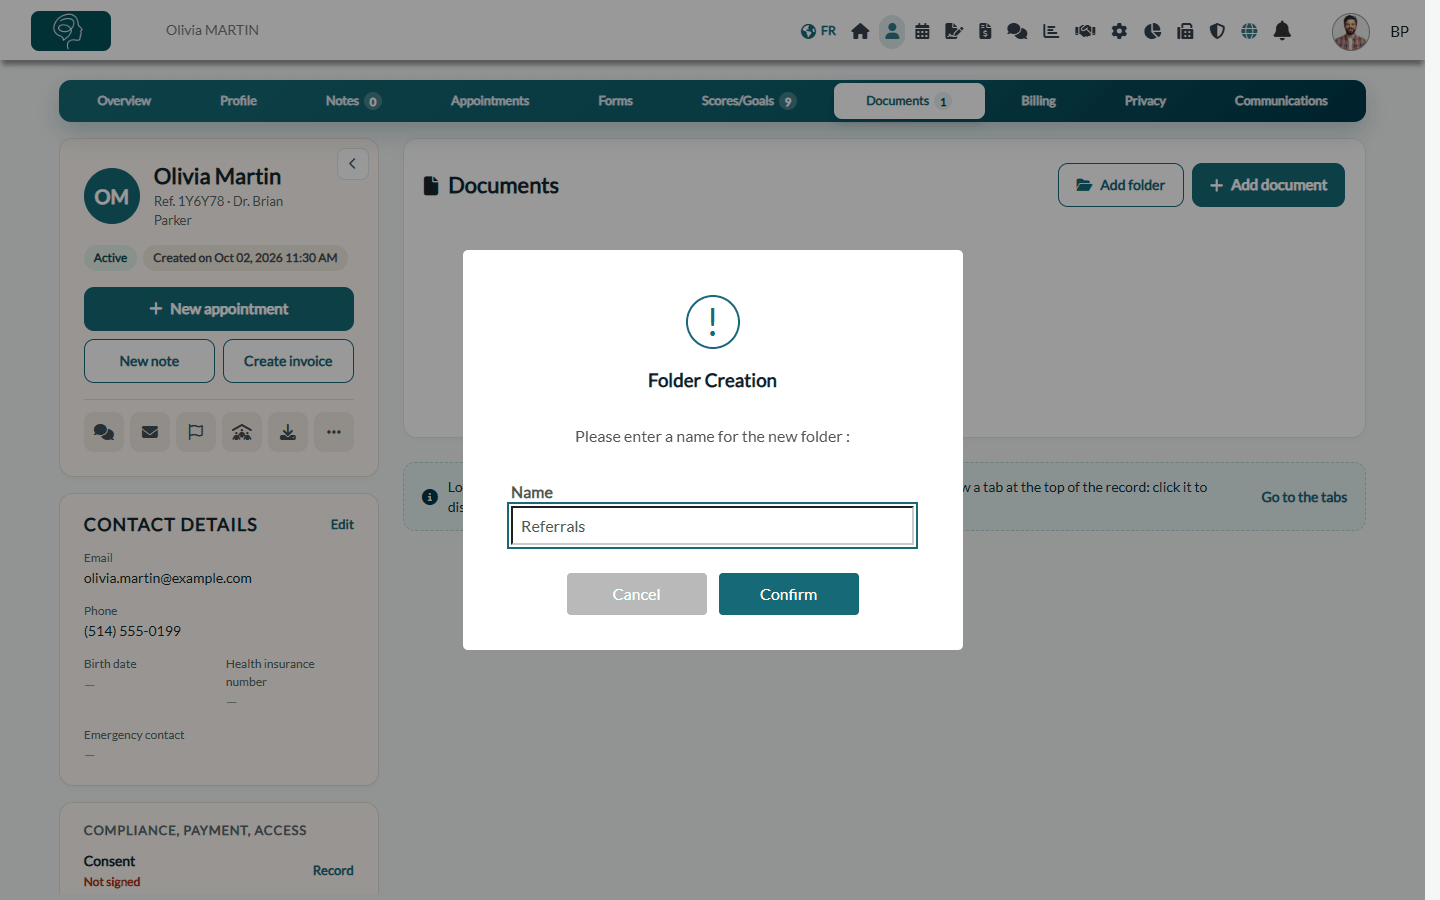
Once the record has folders, the Documents tab shows the folders: click a folder to see its documents, and Back to return to the list of folders. When you add a document, choose its Folder.
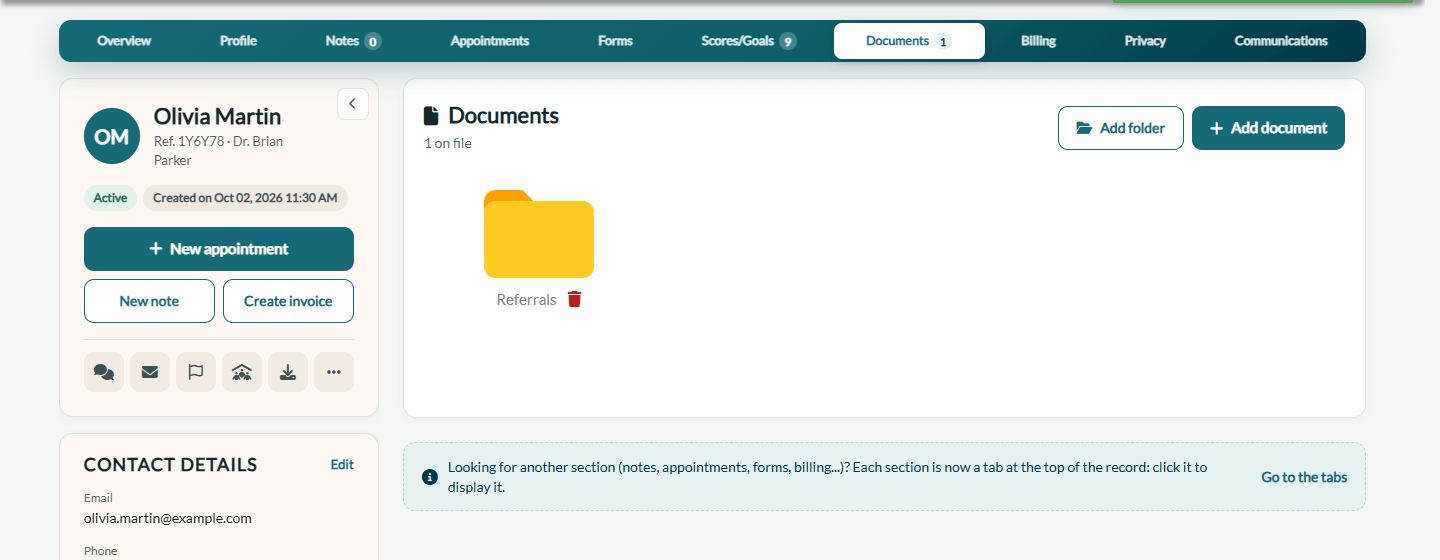
The documents of the record that are not yet in a folder are moved into the folder you create.
Important: deleting a folder (trash icon next to its name) also deletes all the documents it contains. Move the documents you want to keep to another folder first (Edit > Folder).
Documents sent by the client
Your clients can also send you documents from the Documents section of the client portal (Send document). You receive a notification in Colib and the document appears in the Documents tab of their record. The Overview tab of the record shows how many documents were added by the client. Learn more: What is the client portal?.
Good to know
- Download the whole record — the download icon under the client's name downloads a ZIP file of the client's record.
- Documents from your old system — you can import them with your clients: see How can I migrate my clients from my old system?.
- Forms — the forms completed by the client are not in the Documents tab: they are in the Forms tab of the record.
Still have a question?
Write to us at support@colib.io, we will be happy to help.
Was this article helpful?
That’s Great!
Thank you for your feedback
Sorry! We couldn't be helpful
Thank you for your feedback
Feedback sent
We appreciate your effort and will try to fix the article