Who is this article for?
Your client's credit card is saved in Colib and you want to charge an appointment to this card. You can do it in one click from the appointment, from any unpaid invoice, or let Colib charge the card automatically when you mark the appointment as completed. Each time, the client receives a receipt by email.
Before you start: online payments must be enabled (How do I activate the online payment system on Colib?), the client must have an active card in the Billing > Payment Cards tab of their record (How to ask a client for their payment information), and your appointment types should have a price in Settings > Appointments (www.colib.io/settings?show=appointments).
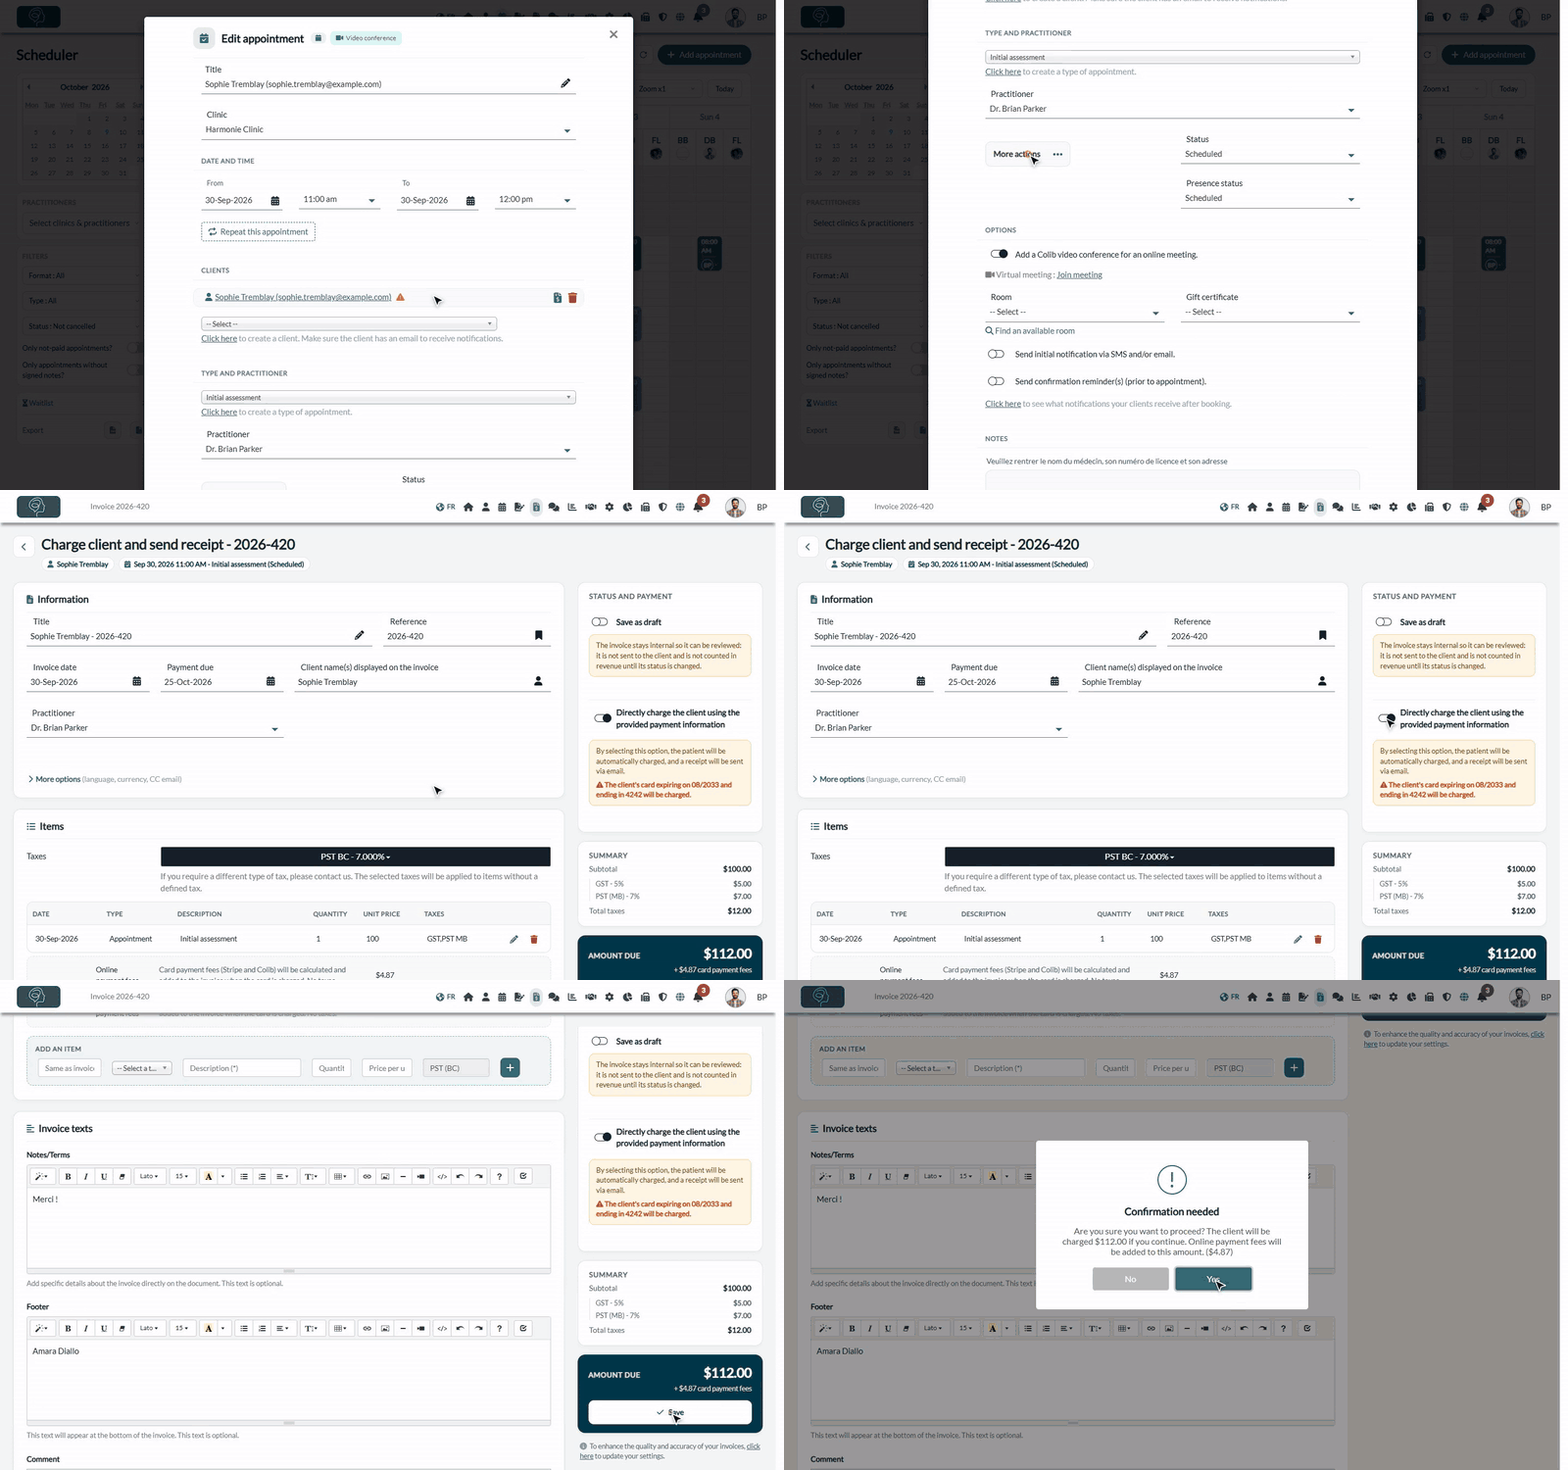
1Charge the client from the appointment
- Open the appointment in your Scheduler (www.colib.io/scheduler).
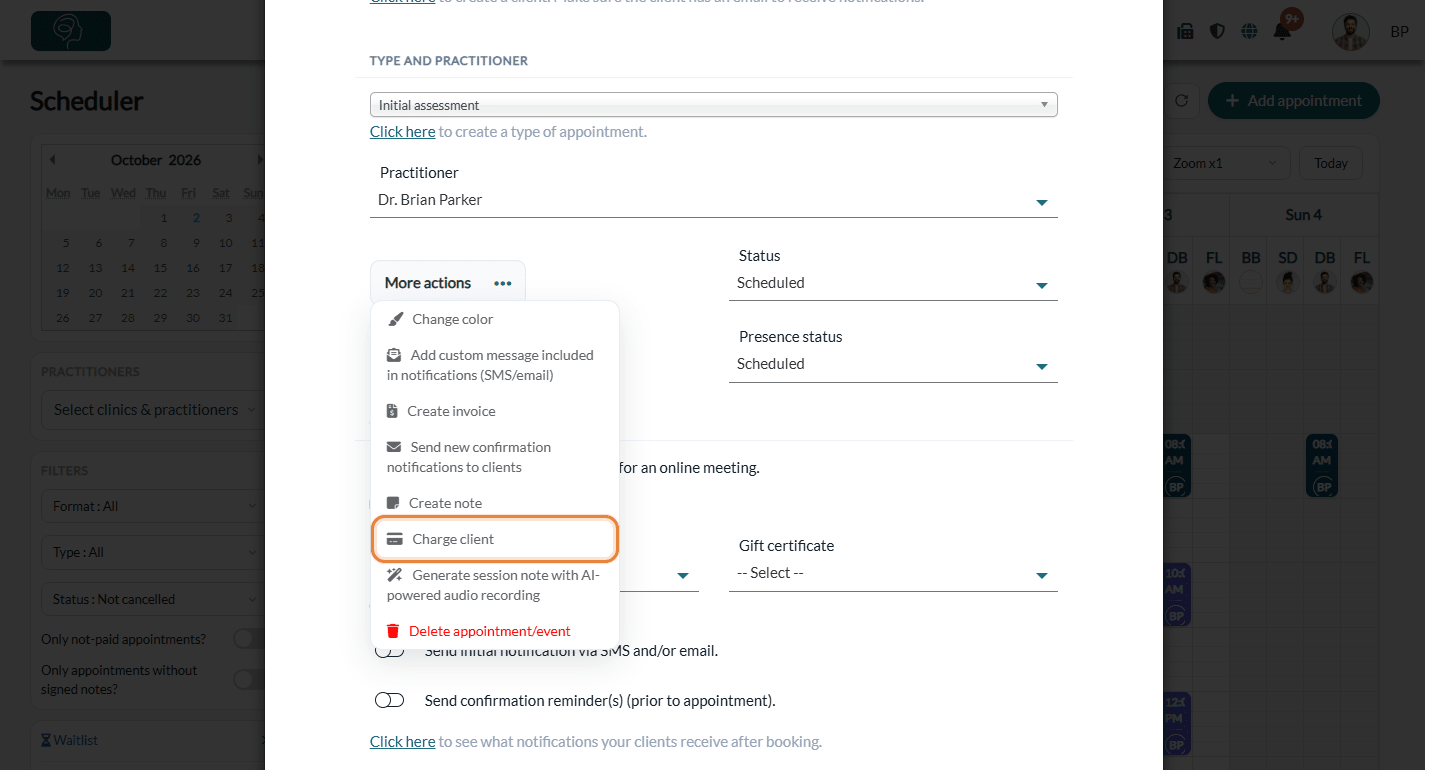
- Scroll down, click More actions, then Charge client.
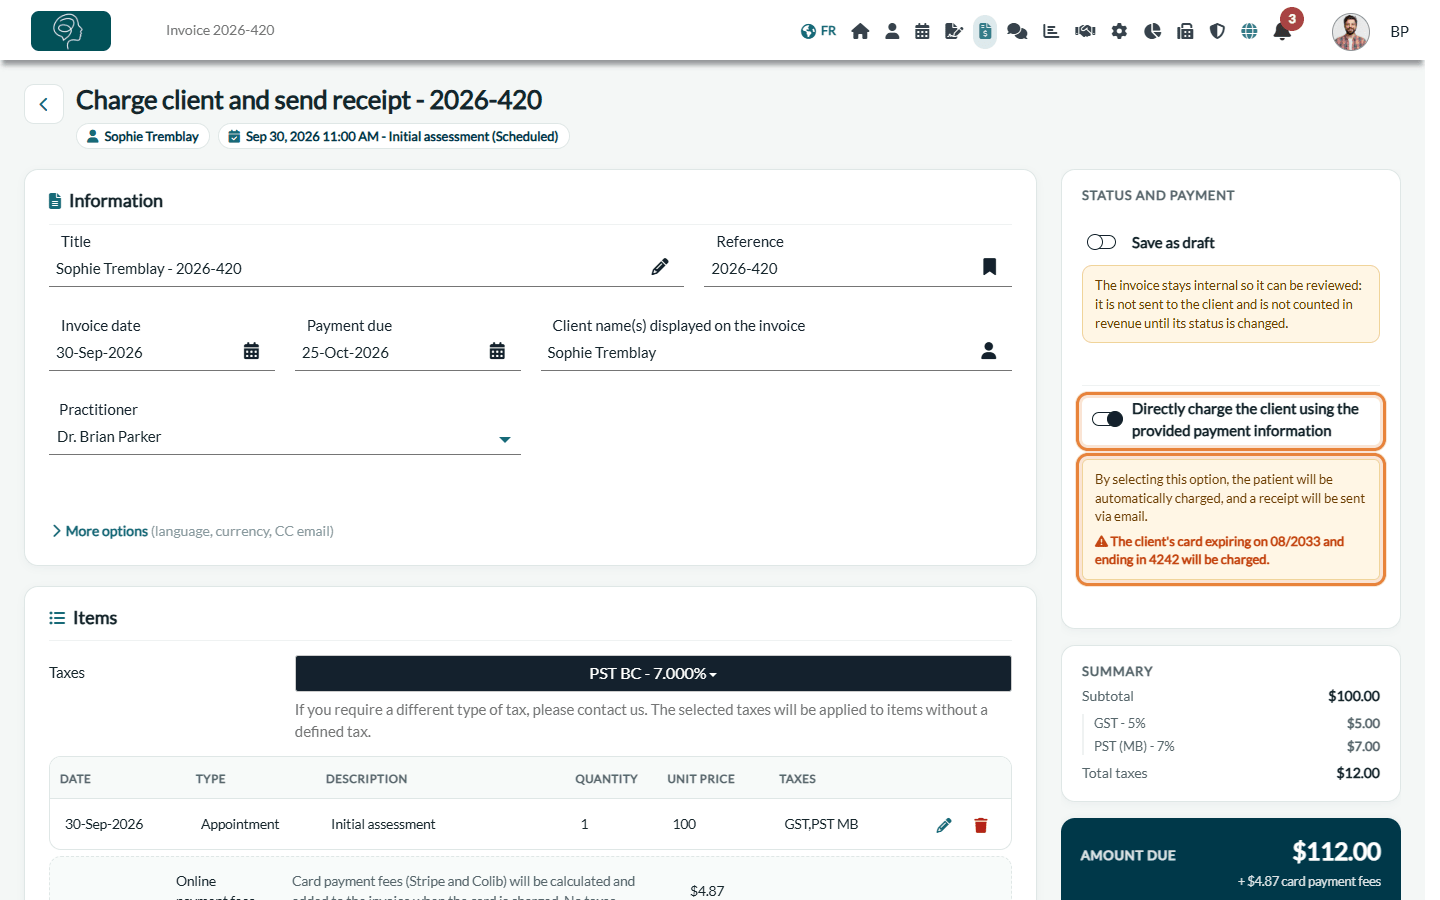
- The invoice opens with the title Charge client and send receipt and the option Directly charge the client using the provided payment information turned on, in the Status and payment panel on the right. Under the option, Colib shows which card will be charged (expiration date and last 4 digits).
- Check the items and the amount due, then click Save in the panel on the right, under Amount due (on a narrower screen, in the bar at the bottom of the screen).
- Colib asks you to confirm the amount that will be charged. Click Yes to charge the card, or No to go back to the invoice.
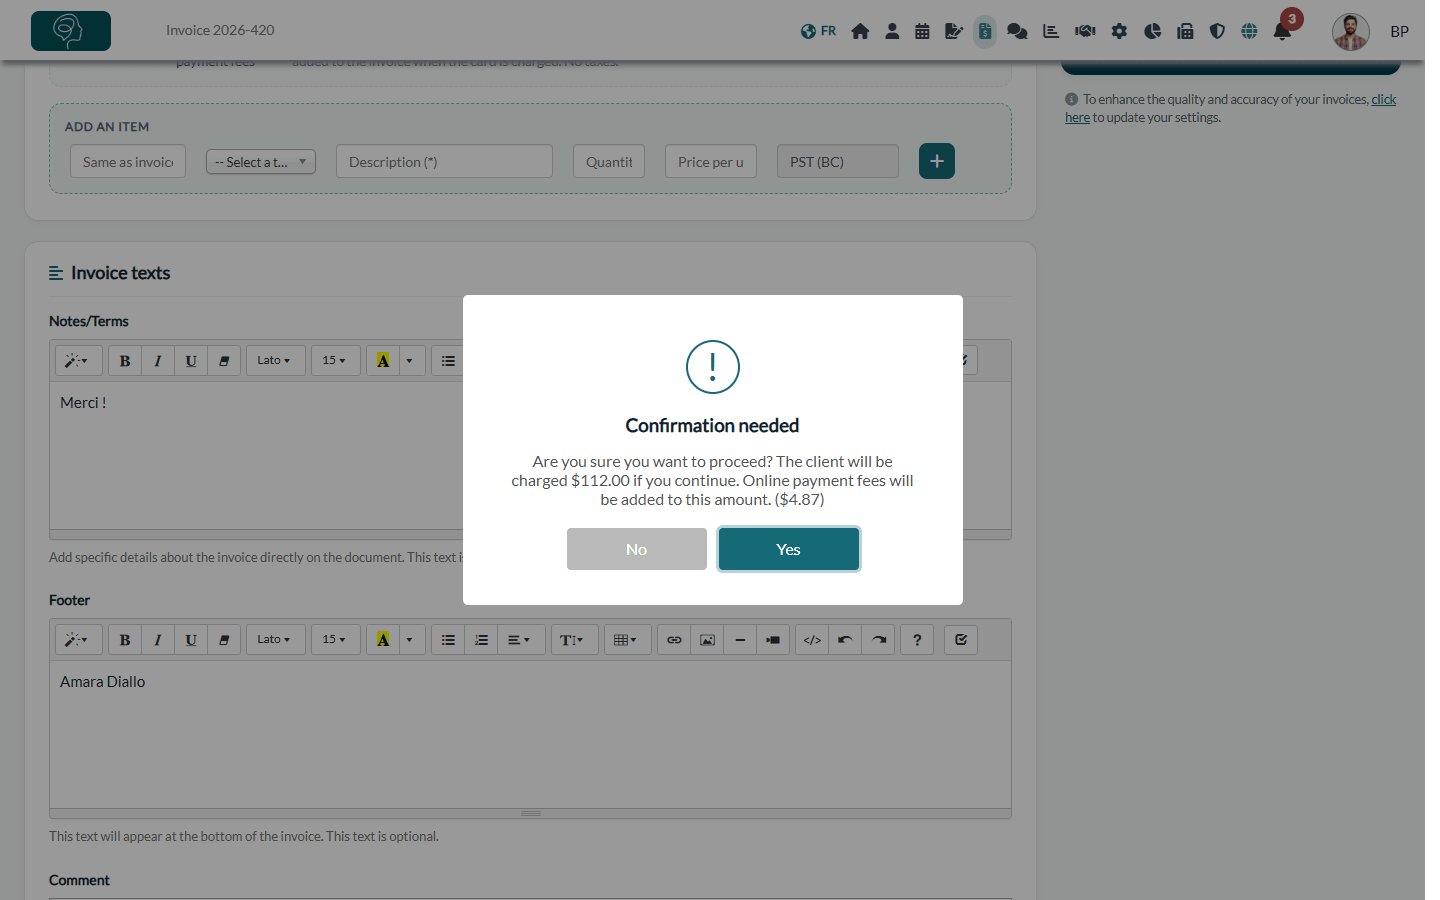
If your practice passes the online payment fees on to its clients, the estimated fees are shown under Amount due (for example, + $4.87 card payment fees) and in the confirmation message: they are added to the invoice when the card is charged. Please see the article titled "How to pass online payment fees on to your clients".
When the payment goes through, the invoice is marked as Paid and the receipt is emailed to the client. The payment appears in the Payments card, at the bottom of the invoice.
2Charge from the Invoices page or an existing invoice
To start a new invoice: on the Invoices page (www.colib.io/invoices), click Create Invoice, select the client and their appointment, then click Continue. The same option is displayed on the invoice when the client has an active card.
Open an unpaid invoice from the Invoices page (www.colib.io/invoices) or from the client record. When the client has an active card, the option Directly charge the client using the provided payment information is displayed in the Status and payment panel on the right: turn it on, click Save, then confirm with Yes.
3Charge automatically when the appointment is completed
- Go to Settings > Invoices (www.colib.io/settings?show=invoices) and open the Automation section.
- Turn on Automatically charge the client. and save.
- From now on, when you change the status of an appointment to Completed, Colib asks you to confirm, then creates the invoice, charges the client's card and sends the receipt.
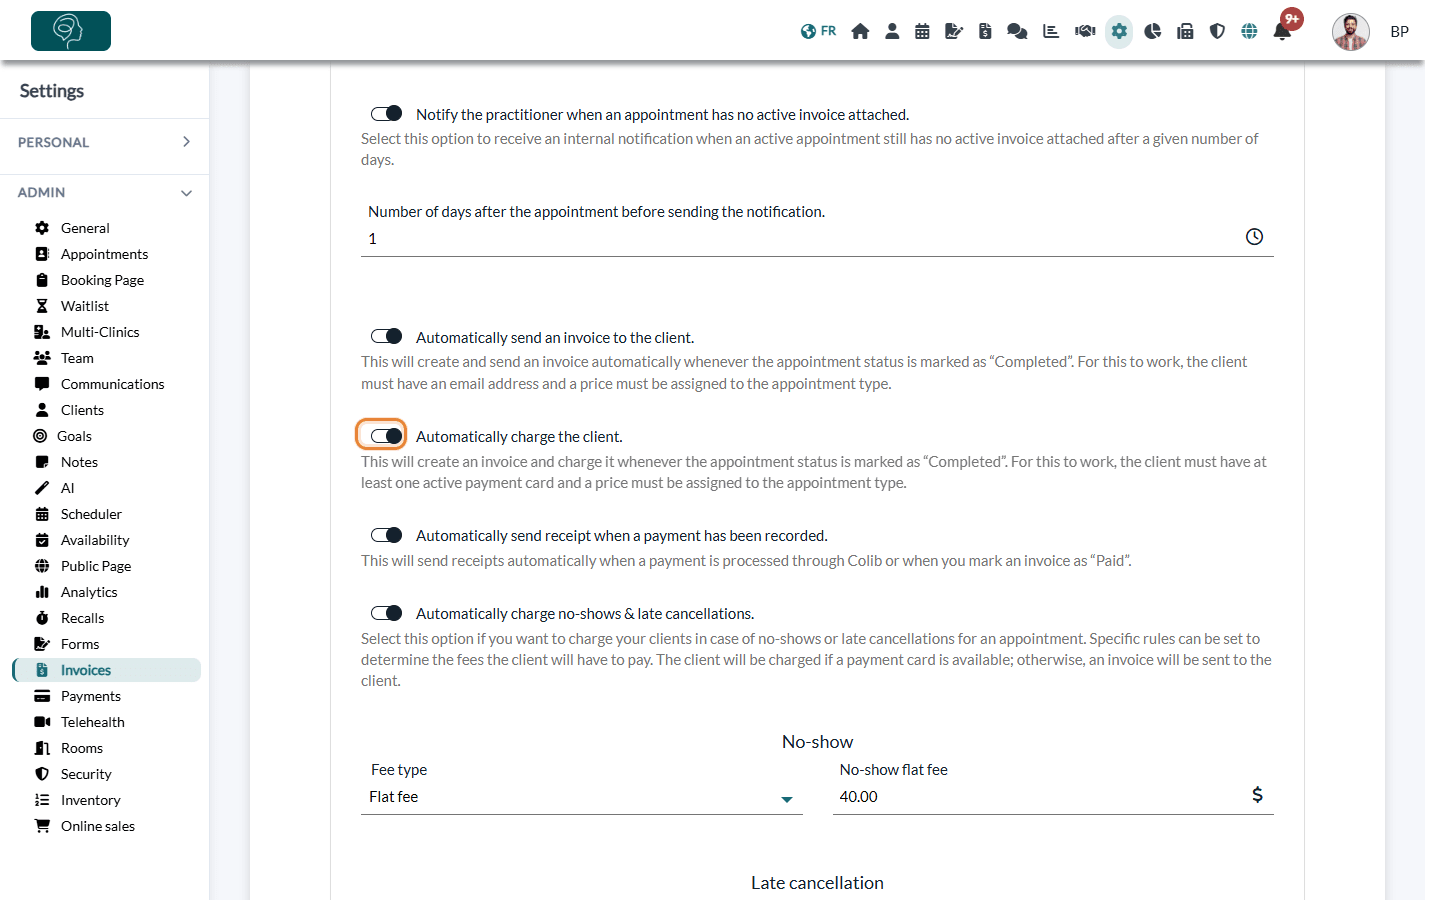
For this to work, the client must have at least one active payment card and the appointment type must have a price. To exclude some clients from these automations, see How to skip invoicing automation for specific clients.
Good to know
- Which card is charged: the card linked to the appointment (for example the one entered when the client booked online), otherwise the client's most recently used active card.
- Payment declined: Colib displays the error returned for the card and nothing is charged. You can request another card or send the invoice instead.
- No card on file: the invoice shows a warning with a Request payment information link.
- Refund: in the Payments card of a paid invoice, click the refund icon. The client is notified, and the payment fees are charged to your clinic.
- Fees: the online payment fees are shown in Settings > Payments (www.colib.io/settings?show=payment).
- At booking: to charge clients when they book online, see How to charge clients automatically during online booking. For no-shows and late cancellations, see How to charge no-shows and late cancellation appointments.
Still have a question?
Write to us at support@colib.io, we will be happy to help.
Was this article helpful?
That’s Great!
Thank you for your feedback
Sorry! We couldn't be helpful
Thank you for your feedback
Feedback sent
We appreciate your effort and will try to fix the article