Who is this article for?
Questions are the heart of your forms: a yes/no question, a short or long text, a date, a list of choices or a document to attach. In Colib, each question belongs to a section of the form and has its own options (mandatory, help text, alert, link with the client record...).
This article explains how to add a question, which type to choose, how to set its options, and how to reorder, move, duplicate or delete your questions. It also explains what happens to the answers you have already received when you change a question.
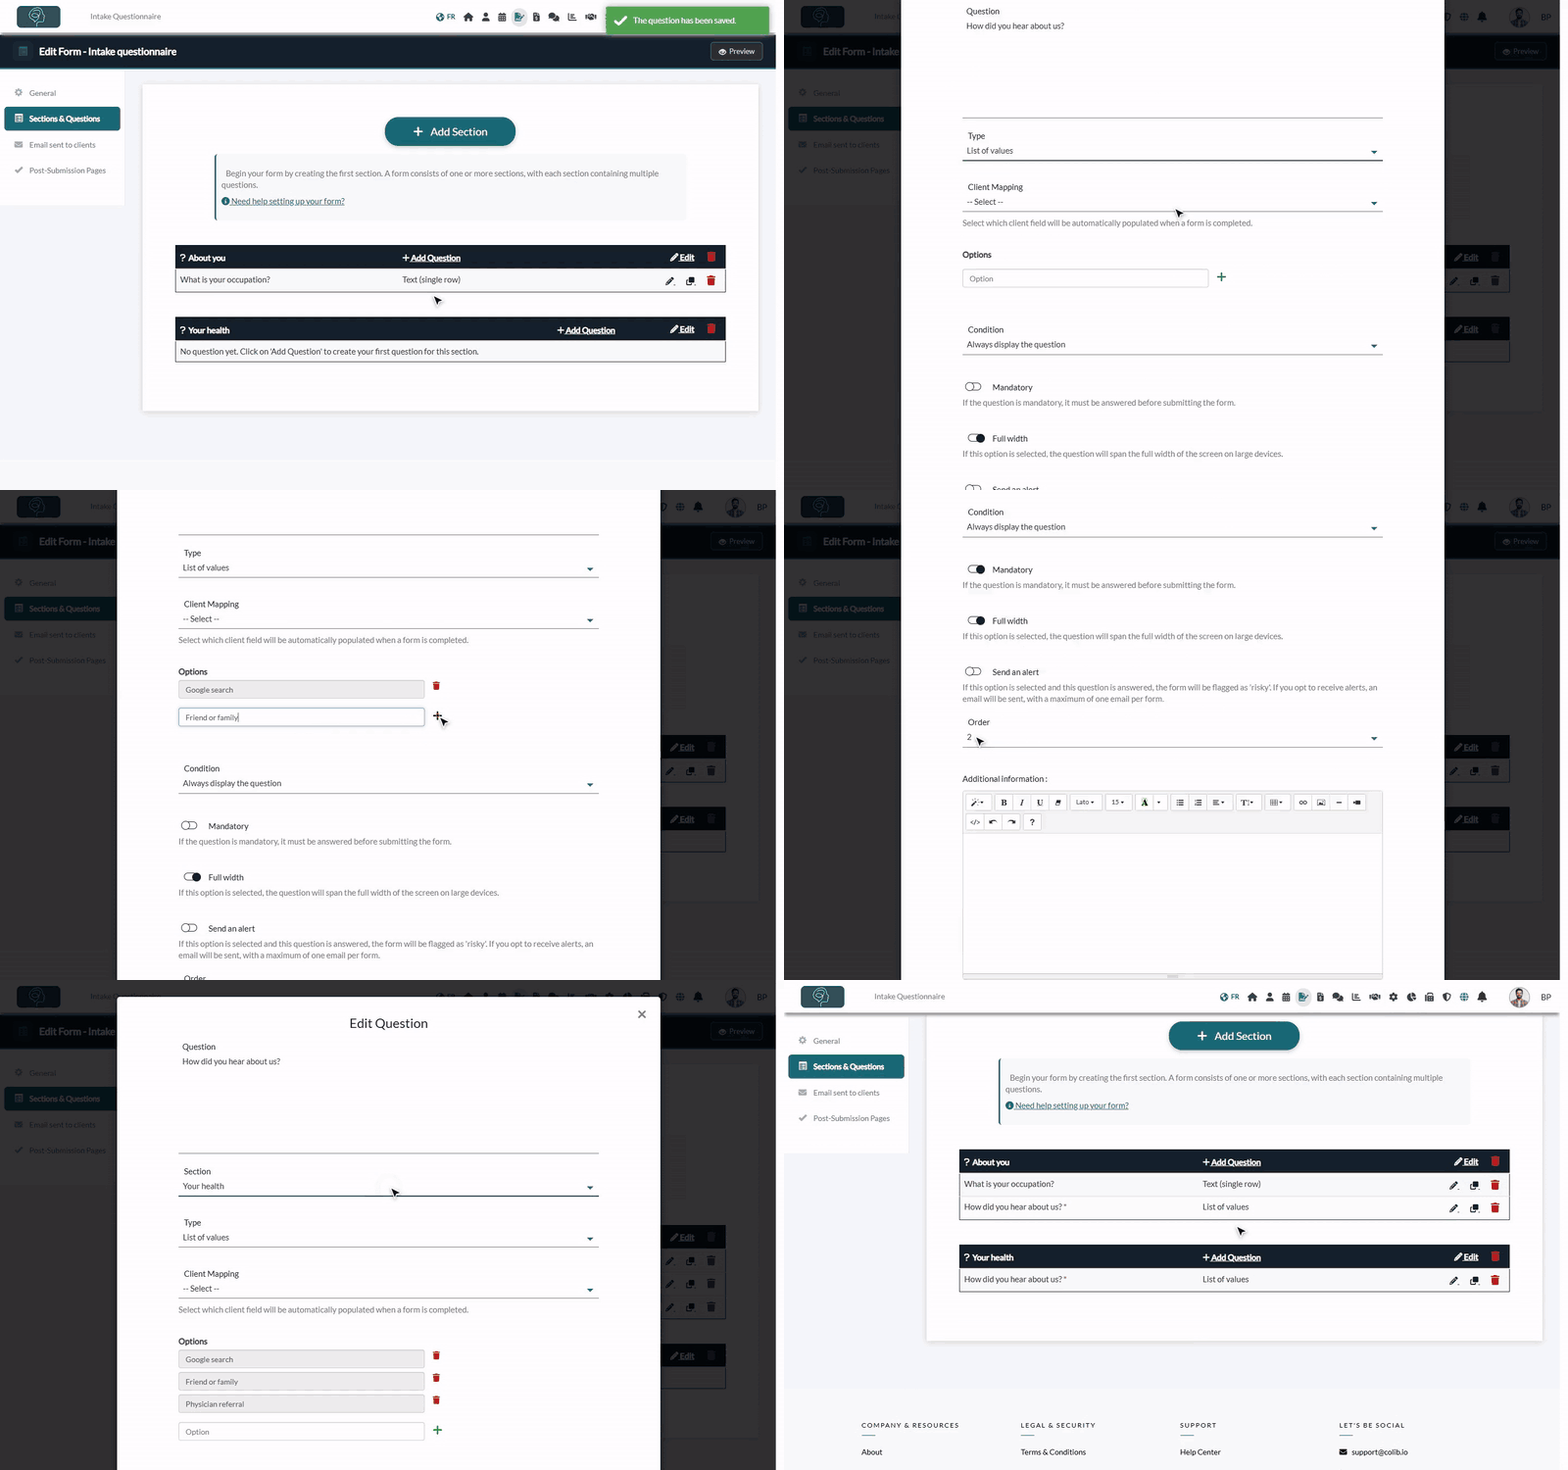
Before you start: questions are added in a section of type Questions. Go to www.colib.io/forms, click the pencil icon (Edit) of your form, then Sections & Questions. If your form has no section yet, see the article titled "How to add a section to a form". Only the administrators of your practice can edit forms.
1Create the question
- In the Sections & Questions tab, click Add Question in the header of the section that will hold the question.
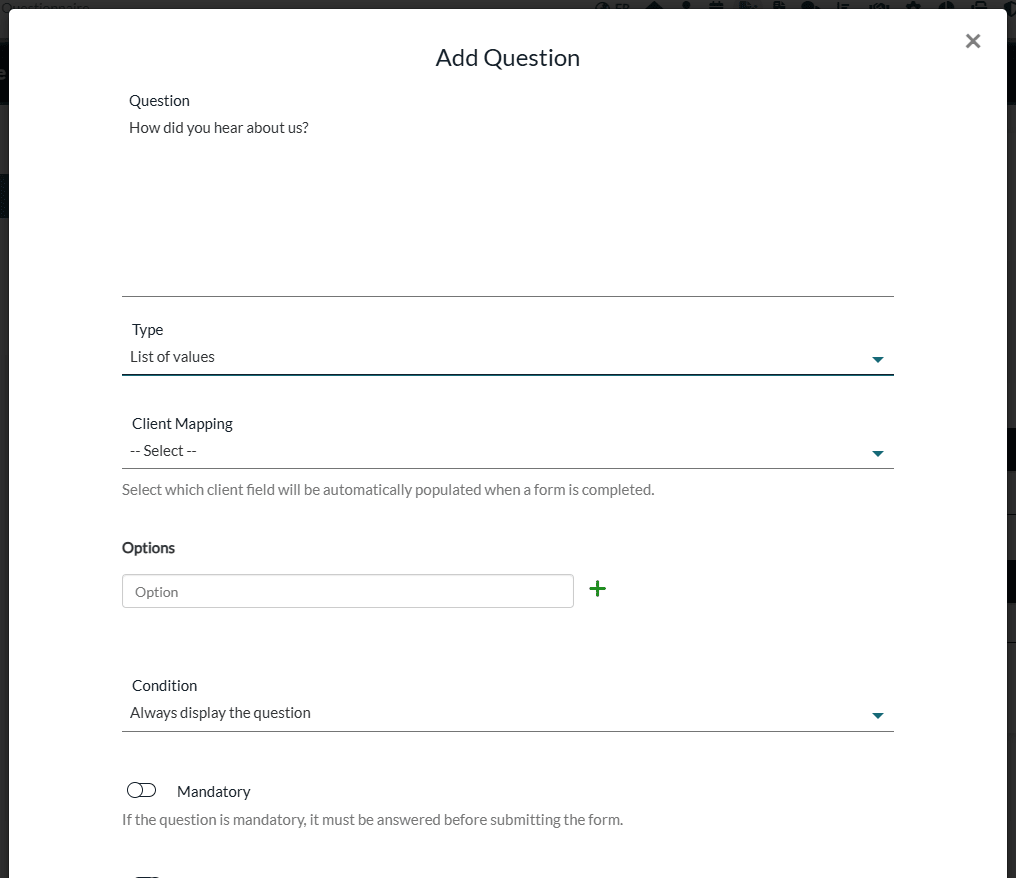
- Type the Question, exactly as your clients will read it.
- Choose its Type (see the table below). The options of the window change with the type.
| Type | What your client does | Options specific to this type |
|---|---|---|
| Yes/No | Clicks Yes or No. Example: Do you have any allergies? | Ask details if answer is 'Yes': a mandatory Details text box appears when the client answers yes. |
| Text (single row) | Types a short answer: occupation, name of the family doctor, phone number. | — |
| Date | Picks a date in a calendar: date of birth, date of an accident. | — |
| List of values | Chooses one answer in a drop-down list. | Options: the choices of the list (see step 2). |
| Text (several rows) | Types a long answer: reason for consultation, medical history. | Always uses the full width of the form (no Full width option). |
| Multi selection list | Ticks one or several answers in a list. | Options: the choices of the list (see step 2). |
| Document | Attaches a file (PDF or image: JPG, PNG or GIF, up to 20 MB), by drag and drop or by choosing it on their device: referral letter, prescription. | Cannot be linked to the client record or used as a condition. |
2Enter the choices of a list
For a List of values or a Multi selection list:
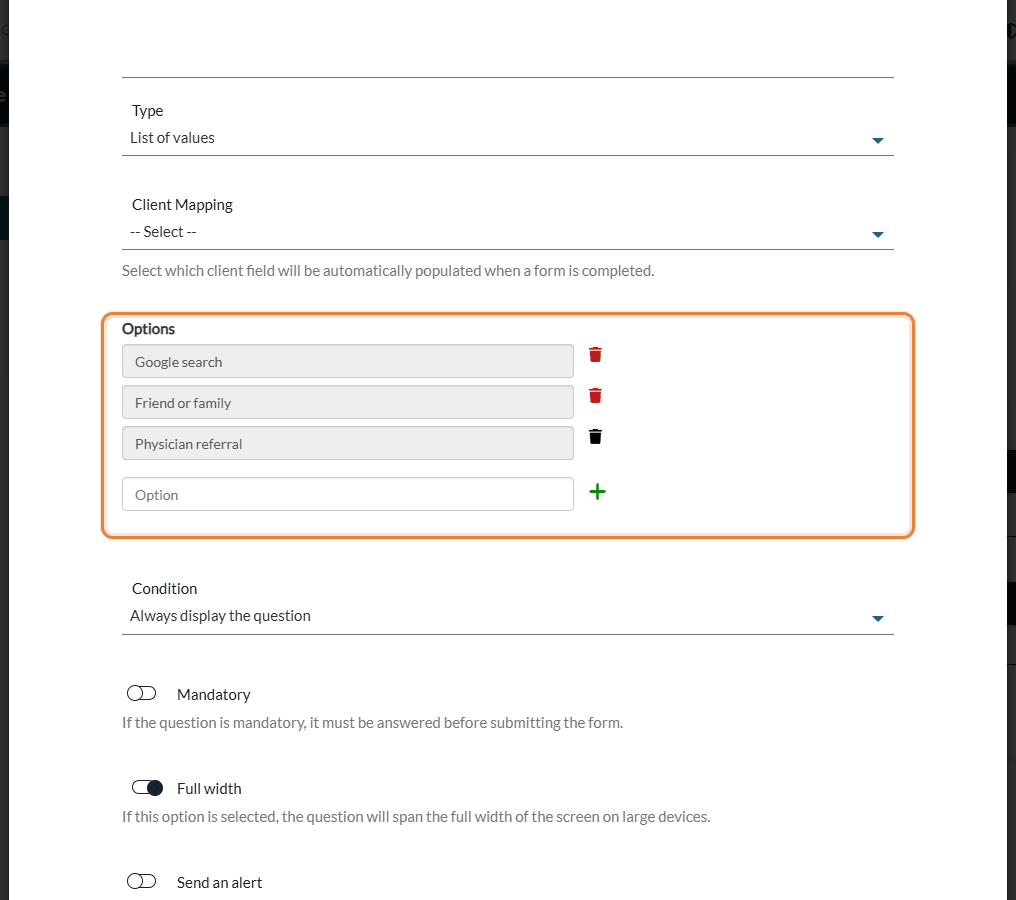
- Type a choice in the Option box.
- Click the green + button. The choice is added to the list above.
- Repeat for each choice. The red trash icon next to a choice removes it.
3Set the options of the question
| Option | What it does |
|---|---|
| Client Mapping | Copies the answer into a field of the client record (phone, address, date of birth, one of your custom fields...). This list only appears when Link every completed form to a client record is turned on in Settings > Forms. See How to connect your client fields to your form questions. |
| Condition | Always display the question (default), or Display the question depending on the answer of another question. See the article titled "How to show a question based on the answer to another question". |
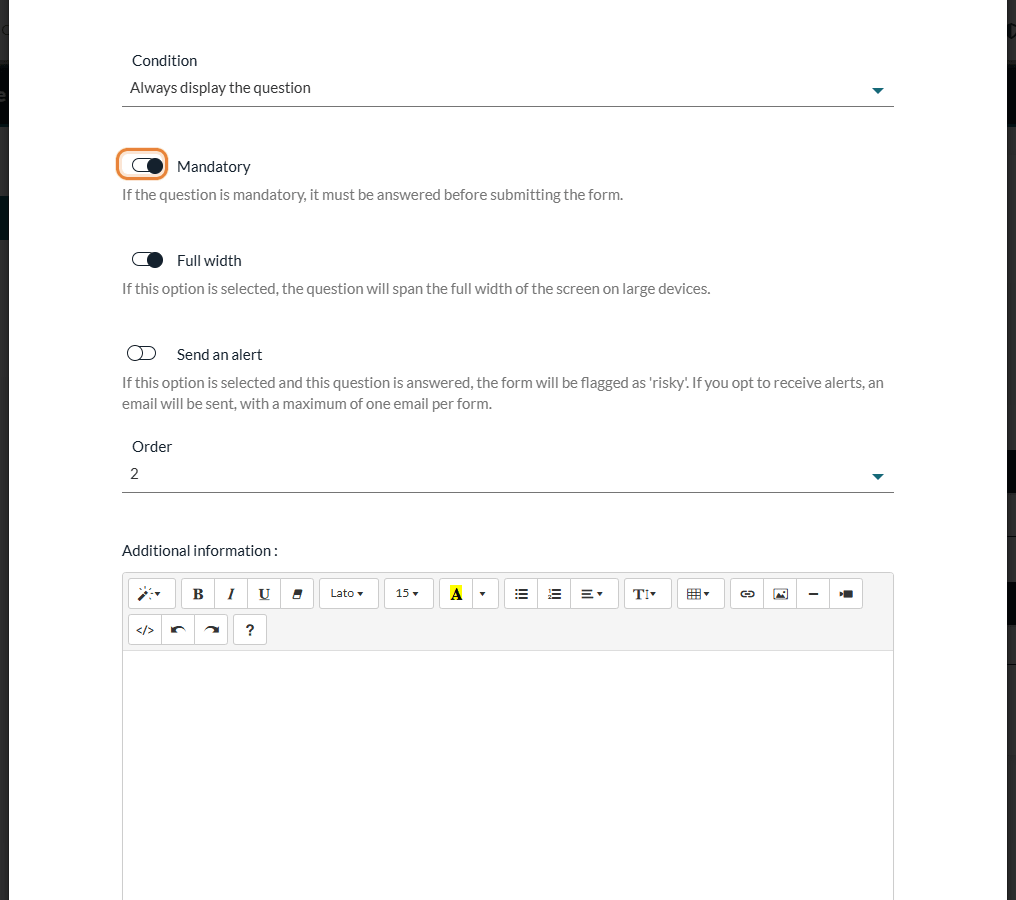
| Mandatory | The client must answer before submitting the form. Mandatory questions show a red asterisk, in the editor and on the form. Leave it off for an optional question. |
| Full width | On by default: the question uses the full width of the screen on a computer. Turn it off to show short questions side by side. |
| Send an alert | The form is flagged as risky when the answer is Yes (Yes/No question) or when the question is answered (other types). You can receive an email, at most one per form. See the article titled "How to get alerted when a risk is detected in a form". |
| Order | The position of the question in its section. By default, a new question is added at the end of the section. |
| Additional information | A help text shown just before the question: an explanation, an example, a link or an image. Useful when the question is long or needs context. |
Click Save. Colib displays The question has been saved. and the question appears in its section.
4Edit, duplicate or delete a question
Each row of the list shows the question, its type and three icons on the right:
- Pencil — opens the question to change its text, its type, its options or its condition.
- Copy icon — duplicates the question: the copy is added right below it, with the same text, type, choices and options, but without its Client Mapping (choose it again if needed). Edit the copy to adapt it.
- Trash icon — deletes the question after a confirmation (Are you sure you want to delete this question?).
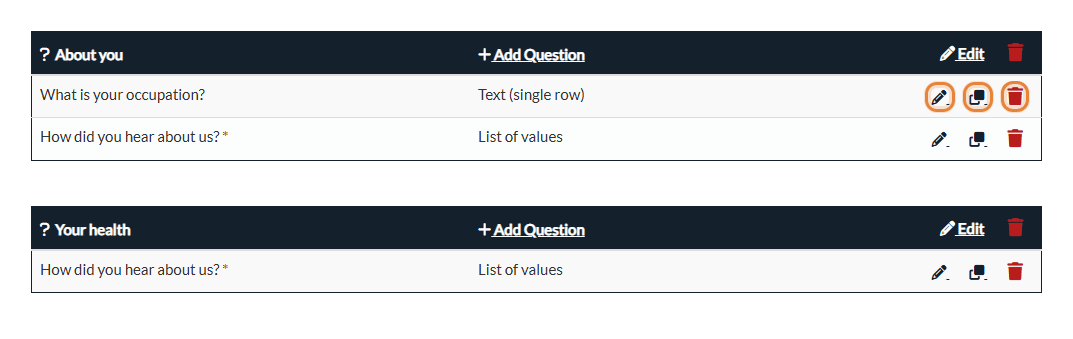
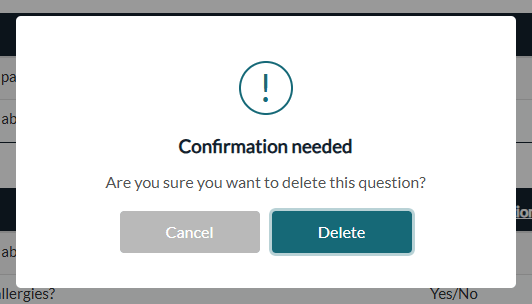
In the list, a red asterisk marks a mandatory question, a question shown in purple has a condition, and a gears icon means the question is linked to a field of the client record.
5Reorder a question or move it to another section
- Within its section — drag and drop the row of the question, or edit the question and change its Order.
- To another section — click the pencil of the question, choose the new Section, then click Save. The question keeps all its settings and goes to the chosen section.
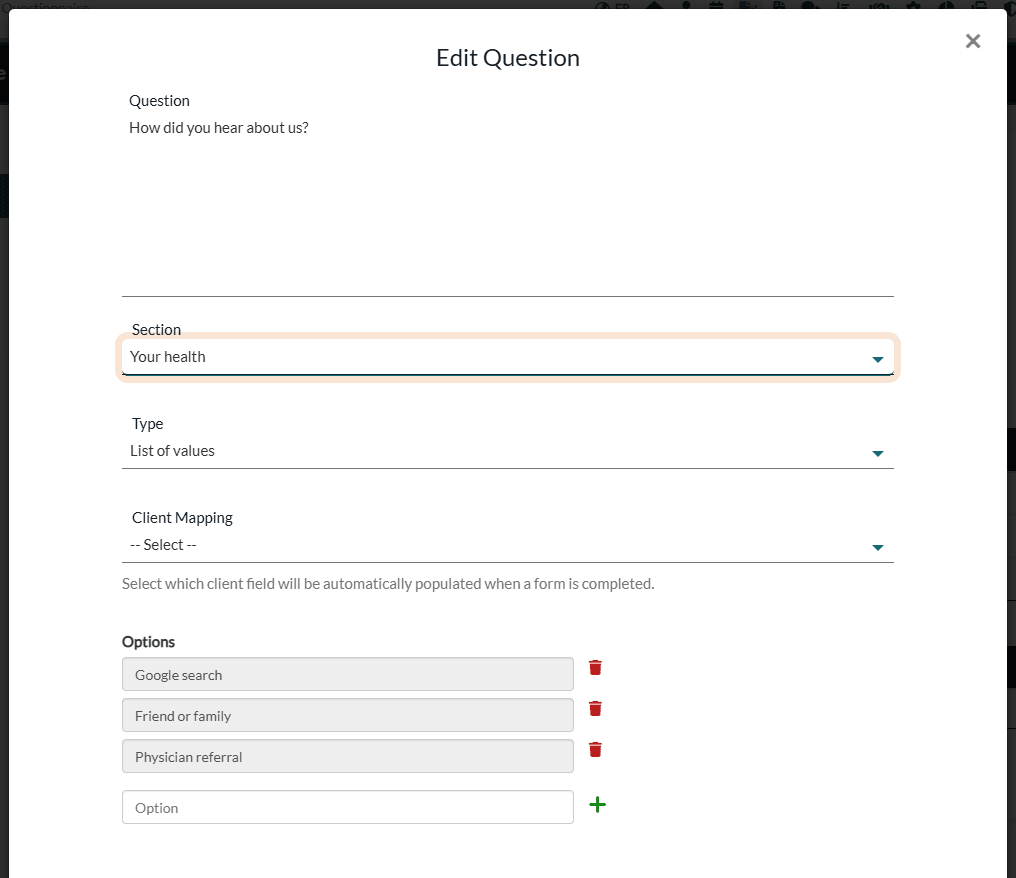
The Section list only appears when you edit an existing question and the form has at least two sections of type Questions. When you create a question, it goes to the section where you clicked Add Question.
6Check the questions as your clients see them
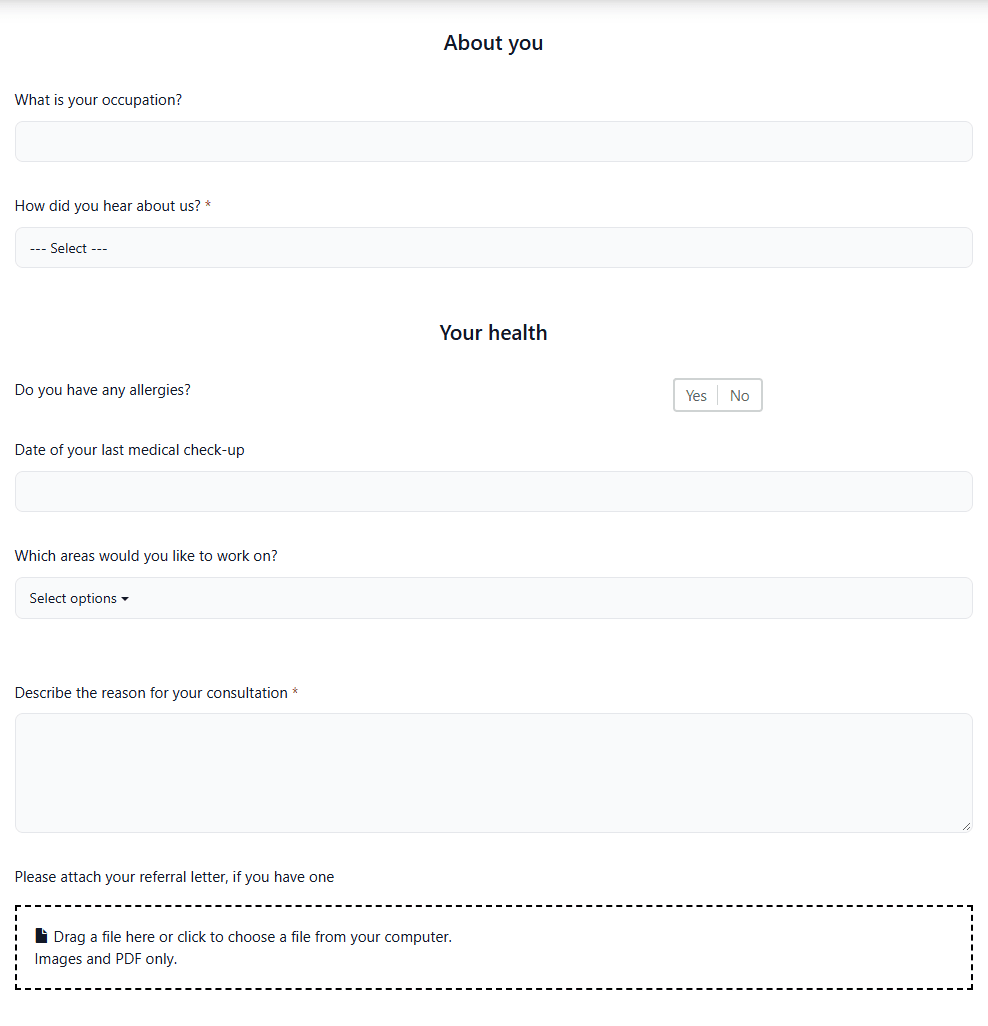
Click Preview at the top right of the form editor. Here is how each type of question appears on the form:
What happens to the answers already received?
- Completed forms do not change — when you edit or delete a question, the answers and the PDF of the forms already submitted stay exactly as they were.
- Changes apply right away — the next client who opens the form sees the new version, including a client who received the link earlier and has not completed it yet.
- Deleting a question — the question disappears from the form; the answers already received for it are kept in the completed forms. If other questions were displayed depending on its answer, they are then always displayed.
- Removing a choice from a list — if a question was displayed only for that choice, its condition is removed and it is then always displayed. Check your conditional questions after such a change.
- Changing the type — if you change a list into another type, its choices are removed.
- Countersigned forms — if your practice countersigns forms, you must first countersign the forms waiting for your signature before you can change the questions (How to countersign a form).
Tip: to prepare a new version without changing the form your clients currently use, duplicate the form in the Templates tab of www.colib.io/forms and edit the copy (How to edit an existing form).
Good to know
- Forms in English and French — each language version has its own questions. Choose the version in the Language list above the sections, then add the questions of that version.
- First name and last name — every form already asks for the first name and the last name of the client at the top: you do not need to add these questions.
- Signature — the signature is not a question: it is set in the General tab of the form. See the article titled "How to add a second signature to a form".
- Related articles — How can I build a new form from scratch?, the article titled "How to add a section to a form", How do I see forms results?
Still have a question?
Write to us at support@colib.io, we will be happy to help.
Was this article helpful?
That’s Great!
Thank you for your feedback
Sorry! We couldn't be helpful
Thank you for your feedback
Feedback sent
We appreciate your effort and will try to fix the article