Who is this article for?
Your clients can book online, but you and your team can also create appointments yourselves, directly in the scheduler. This article explains every way to open the appointment window, what each field is for (clients, type, practitioner, online or in person, room, notifications, message...) and what happens once the appointment is saved.
Before you start: you need at least one appointment type, created in Settings > Appointments (www.colib.io/settings?show=appointments). The client can be created on the fly from the appointment window.
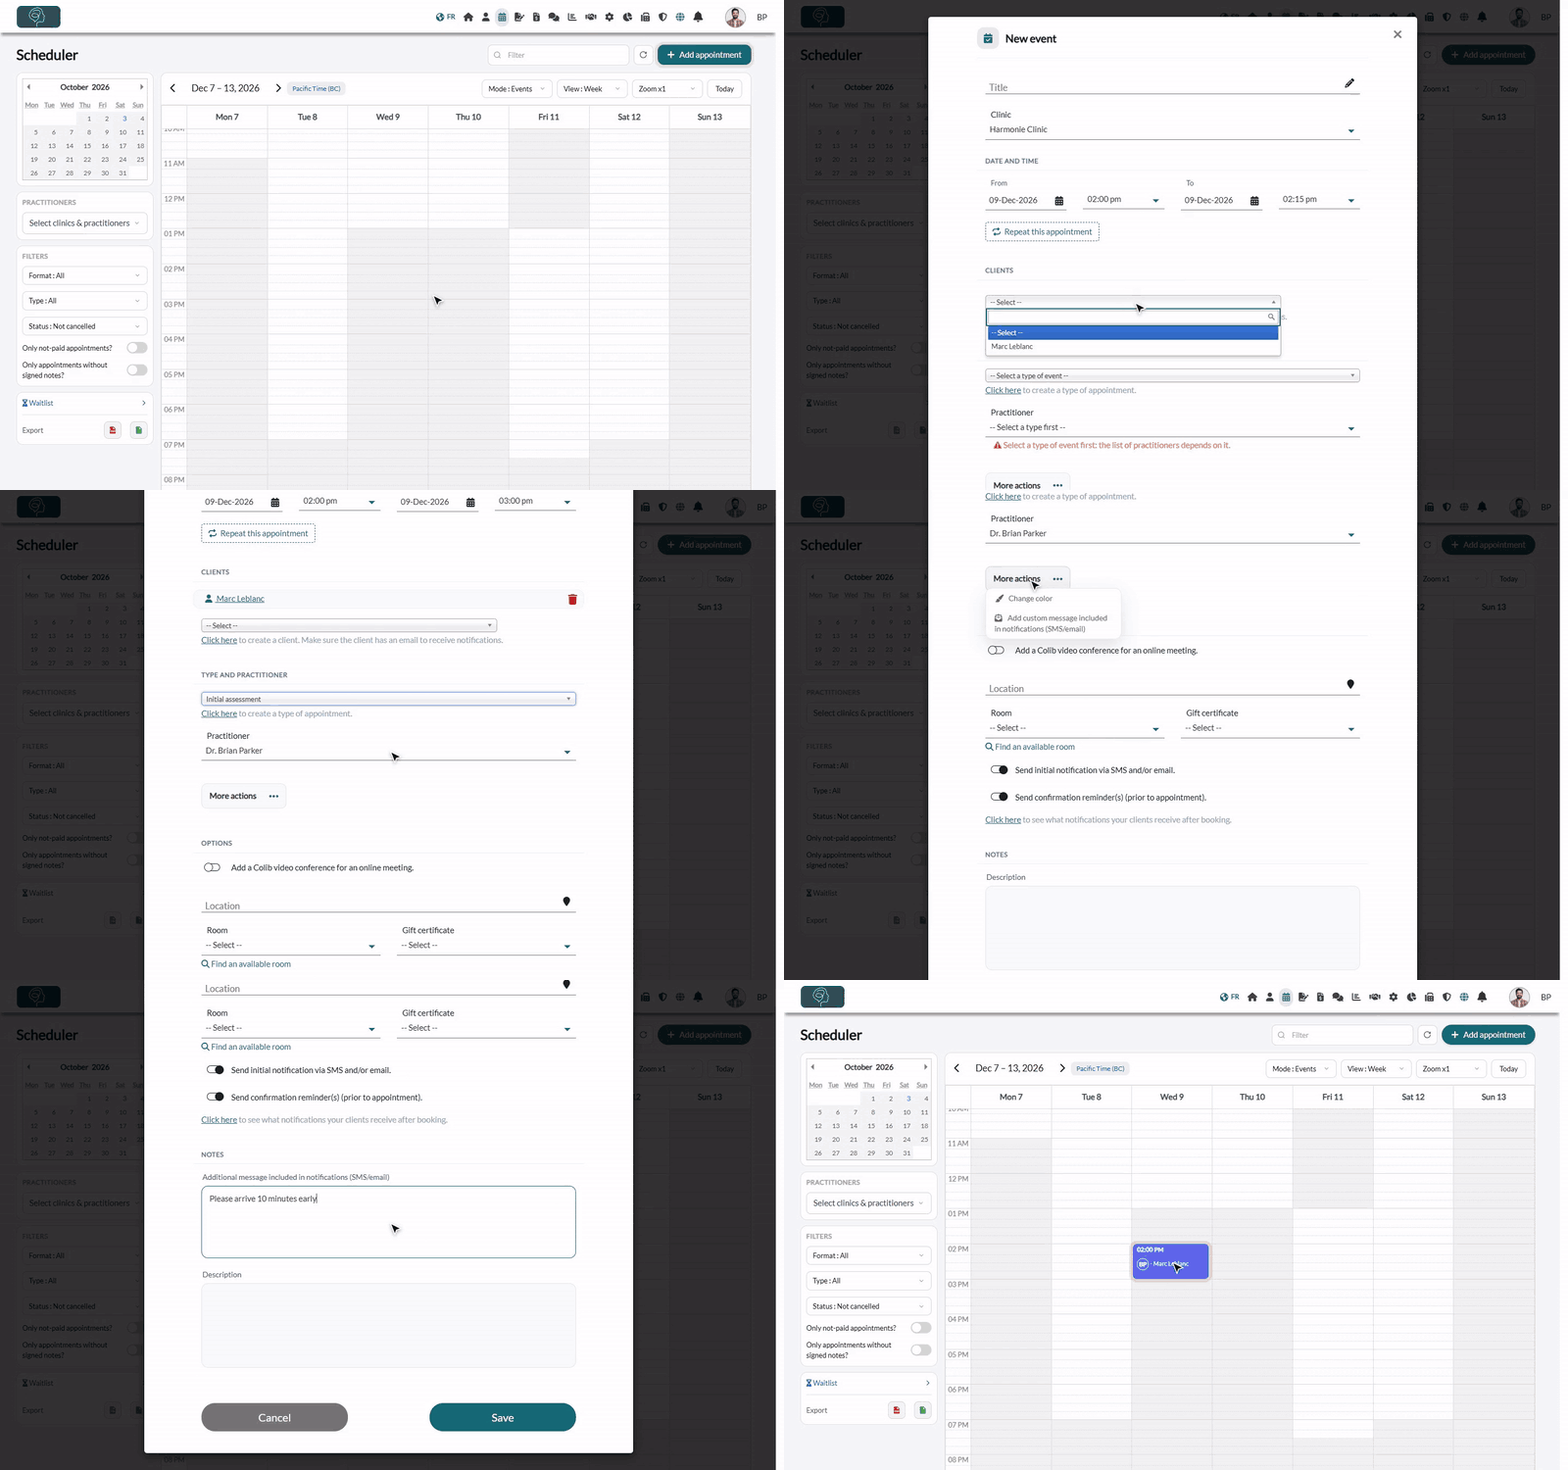
1Open the appointment window
Choose the way that suits you best:
- From the scheduler, on a time slot — go to www.colib.io/scheduler and click on the day and time of the appointment (or click and drag to select a longer period). The date and times are filled in for you.
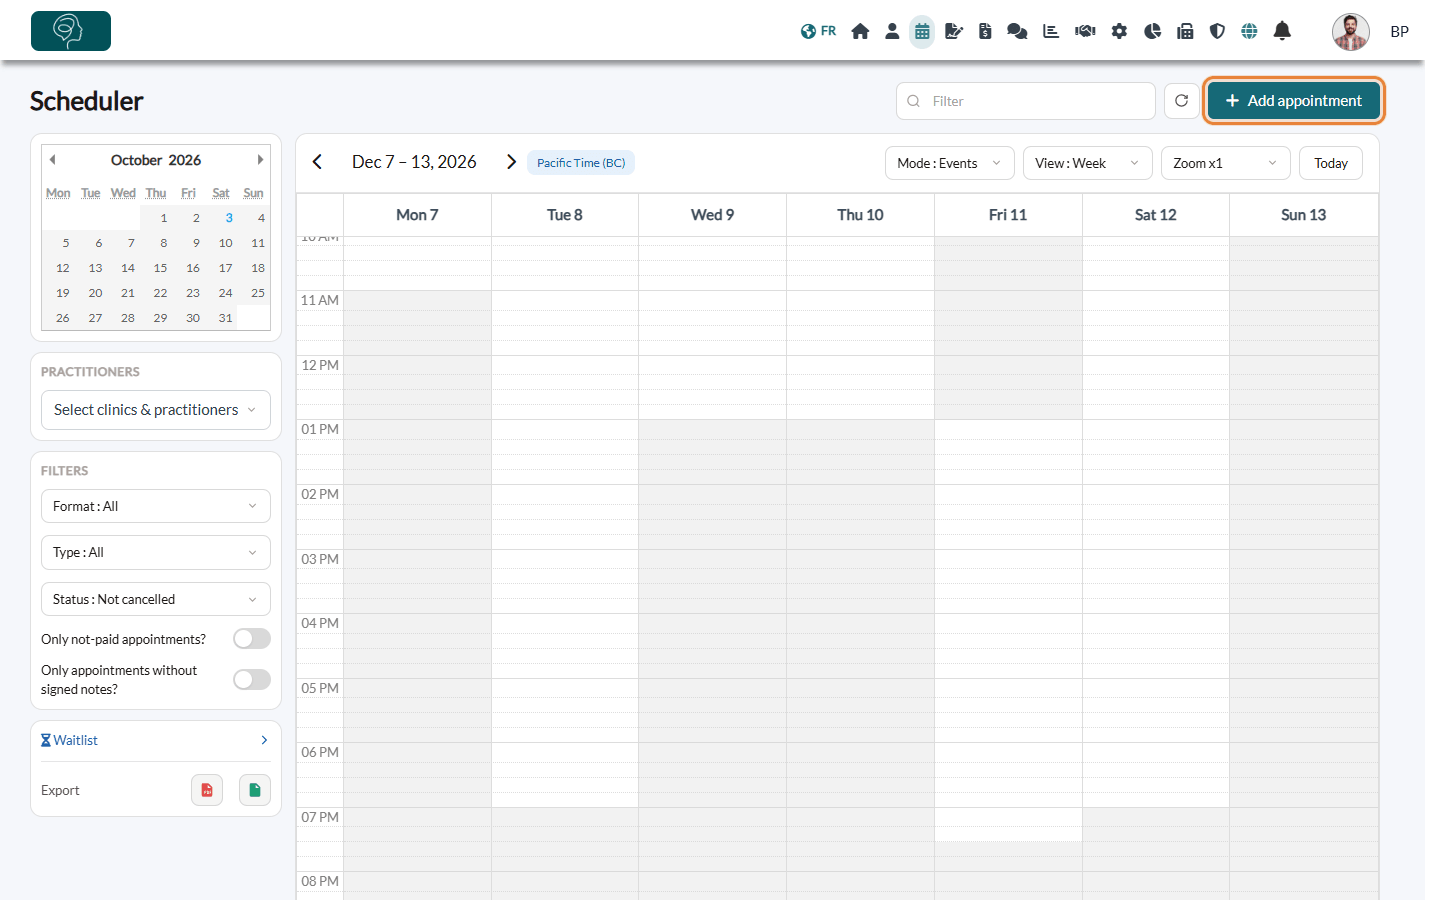
- From the scheduler, with the button — click Add appointment at the top right. The window opens on the next full hour, for one hour: change the date and times as needed.
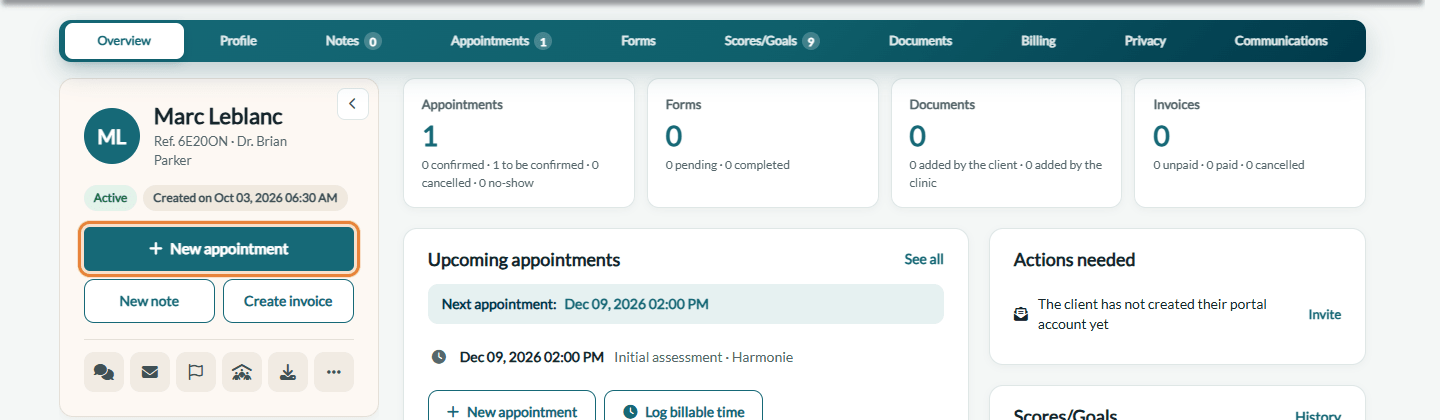
- From a client record — open the client from your client list (www.colib.io/clients) and click New appointment. The scheduler opens with the client already added: choose the date and times.
- From the waitlist — on a request linked to a client, click the calendar icon Create appointment for client.
2Choose the date, the client and the type
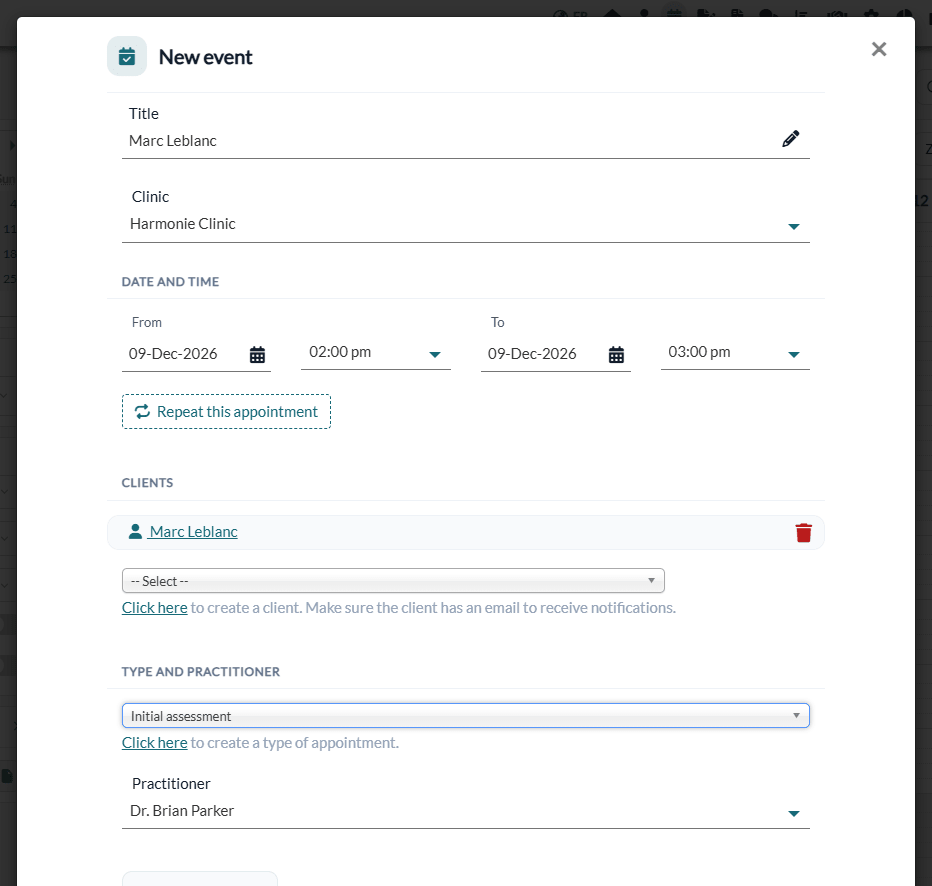
- Date and time — check the From and To dates and times (in 5-minute steps). Once you choose the appointment type, the end time is calculated from the duration of the type.
- Clinic — if your practice has several clinics, choose the clinic of the appointment.
- Clients — open the list and pick the client (type a few letters to search). The client is added right away, and the Title takes the client's name. To book several clients together (a couple, a family), pick the other clients the same way. The trash icon removes a client.
- New client? Under the list, click Click here to create a client. Once the client is saved, you come back to the scheduler with the same date, times and type, and the new client already added. Make sure the client has an email address to receive notifications.
- Type and practitioner — choose the appointment type, then the practitioner. The list of practitioners depends on the type: only the practitioners who offer it are listed.
The client is optional: you can save an event with only a Title (no client will be notified). To block time for a meeting or a lunch break, use the ** Busy ** or ** Other ** types instead: see How can I block time on my scheduler? Tasks are also in this list: see How to use tasks in your scheduler
For a group type (a class, a workshop), the window shows the number of Booked clients compared with the maximum: see this article on group appointments. To repeat the appointment every week or every month, click Repeat this appointment: see How to create and edit recurring appointments
3Set the options
The Options section appears once an appointment type is chosen:
- Online or in person — Add a Colib video conference for an online meeting. is turned on or off automatically according to the appointment type, and you can change it for this appointment. When it is on, the clients receive the link to join the online meeting. When it is off, you can enter the Location of the appointment.
- Room — if you manage rooms, choose a room or click Find an available room: see How to manage your practice rooms
- Send initial notification via SMS and/or email. — sends the confirmation of the appointment to the clients when you save.
- Send confirmation reminder(s) (prior to appointment). — schedules the reminders set for the appointment type.
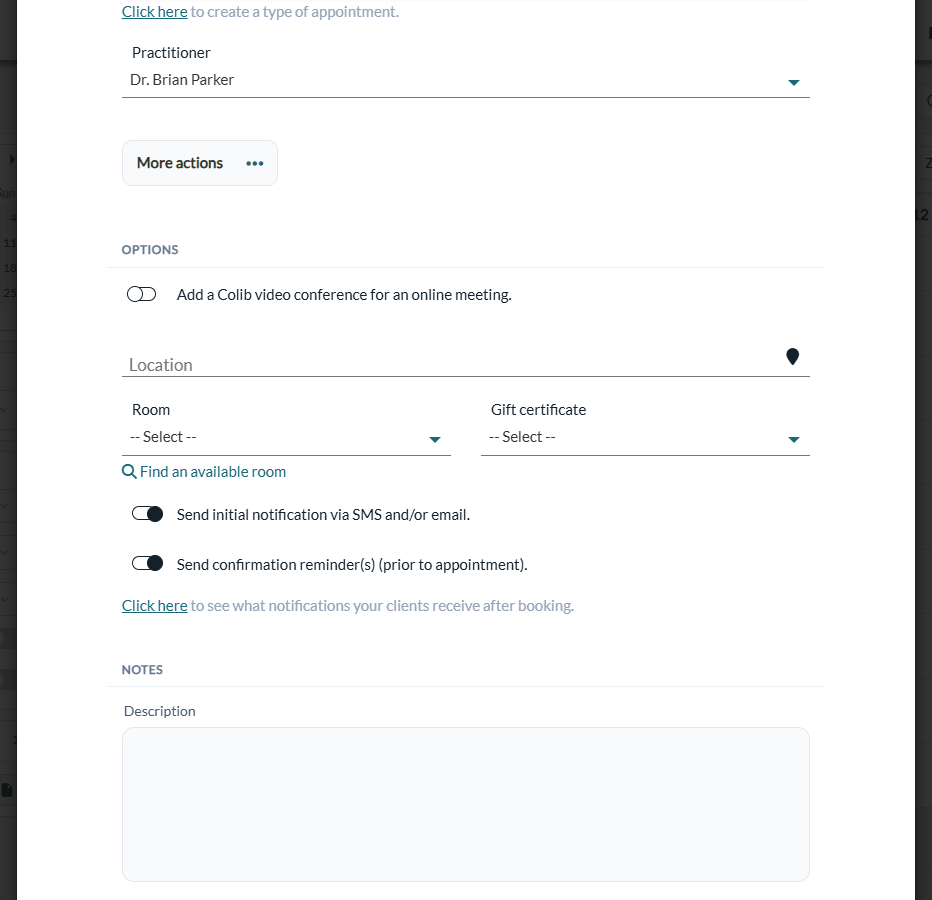
Both notification options are turned on or off by default according to Notifications options selected by default, in Settings > Scheduler (www.colib.io/settings?show=scheduler). To learn what your clients receive and when, see What notifications do clients receive after booking?
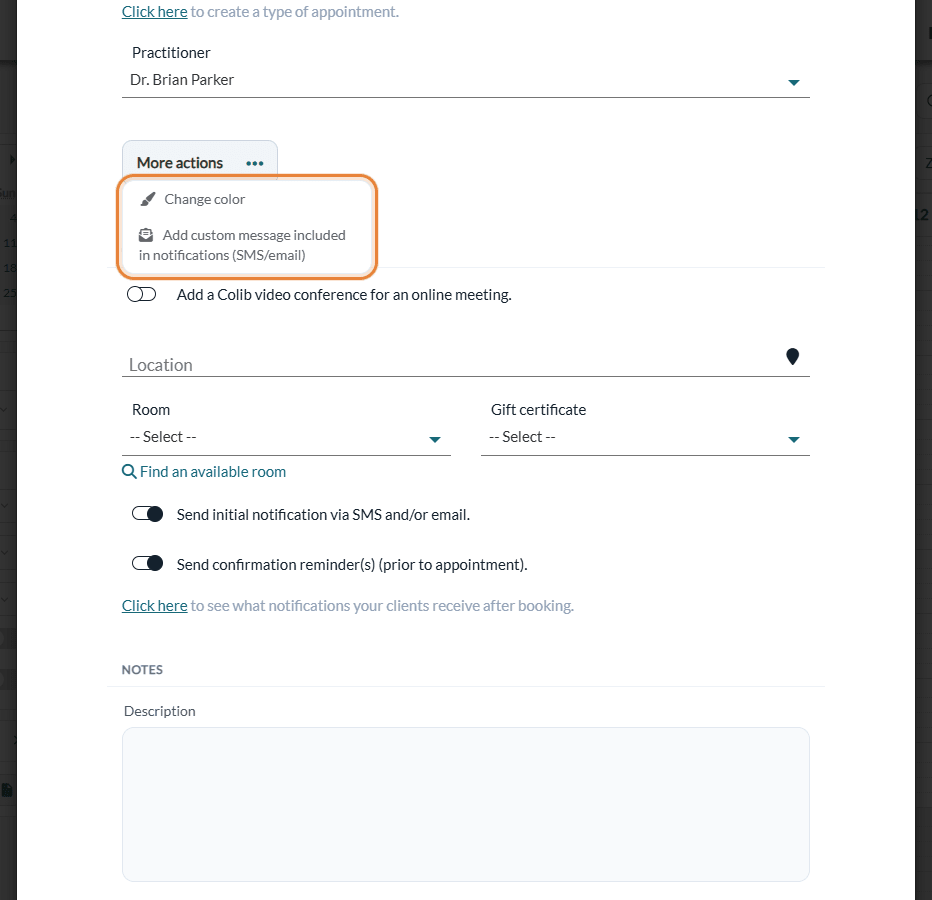
The More actions menu offers two more options for a new appointment:
- Change color — gives this appointment another color in the scheduler: see Can I use the color code for different appointment types?
- Add custom message included in notifications (SMS/email) — adds a short message (up to 400 characters) to the confirmation and the reminders of this appointment, for example Please arrive 10 minutes early. See How to add a custom message to an appointment?
At the bottom of the window, the Description field is for your team only: it is never sent to the clients.
4Save
- Click Save.
- The window closes and the appointment appears in the scheduler.
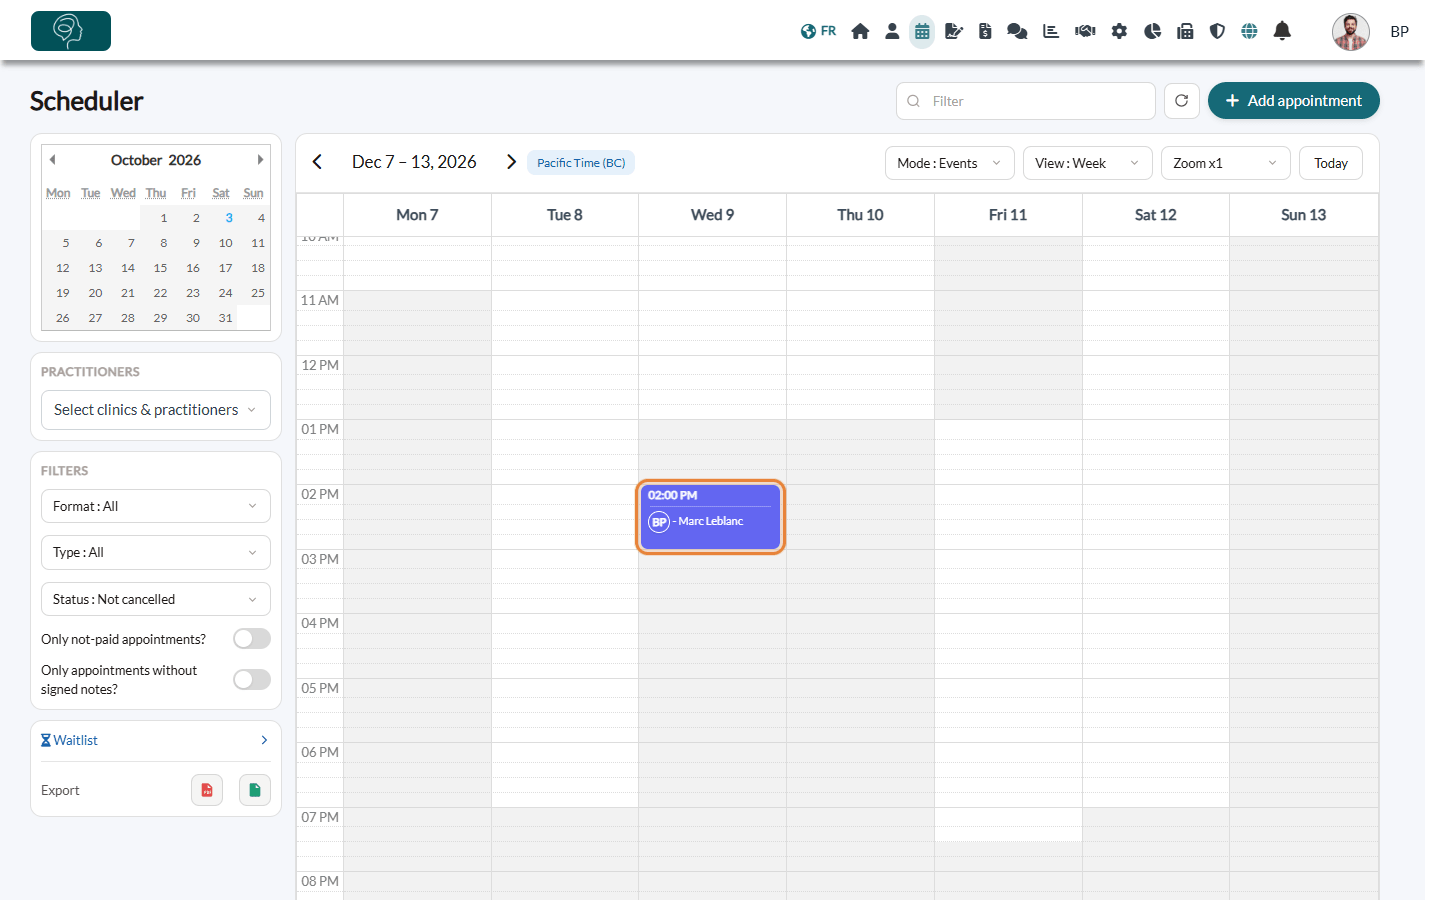
What happens next:
- If the initial notification is on, the clients receive the confirmation of the appointment by email and/or SMS, and the reminders are scheduled.
- If you booked the appointment for another practitioner, that practitioner is notified in Colib.
- Click the appointment at any time to change it, confirm it, write a note or create an invoice.
Good to know
- Required fields — Colib asks you to select a type of event, a practitioner, and either a client or a title. The end must be after the start.
- No double-booking check — Colib does not stop you from booking two appointments at the same time for the same practitioner, or outside their working hours. Look at the scheduler before you save. Only a room that is already taken blocks the save.
- Online booking — appointments you create in the scheduler make the time unavailable on your booking page, like those booked by clients.
- 24-hour clock — to show times in the 24-hour format, turn on Use 24 hour date format in Settings > Scheduler.
- Cancel or delete — see How to cancel an appointment: for practitioners and clients and How to delete an appointment?
- Icons on appointments — see What do the icons on appointments represent?
Still have a question?
Write to us at support@colib.io, we will be happy to help.
Was this article helpful?
That’s Great!
Thank you for your feedback
Sorry! We couldn't be helpful
Thank you for your feedback
Feedback sent
We appreciate your effort and will try to fix the article