Who is this article for?
Your practice information is the first thing to set up in Colib. Your logo, name, contact details and address appear on your invoices and receipts, in the emails sent to your clients and on your public pages (booking page, public web page, forms). Your opening hours set the default availability of your practitioners.
This article walks you through the General tab of the practice settings, section by section.
Before you start: this page is in Settings > General (www.colib.io/settings?show=general). Only the administrators of the practice can see it. Nothing is saved until you click Save at the bottom of the page.
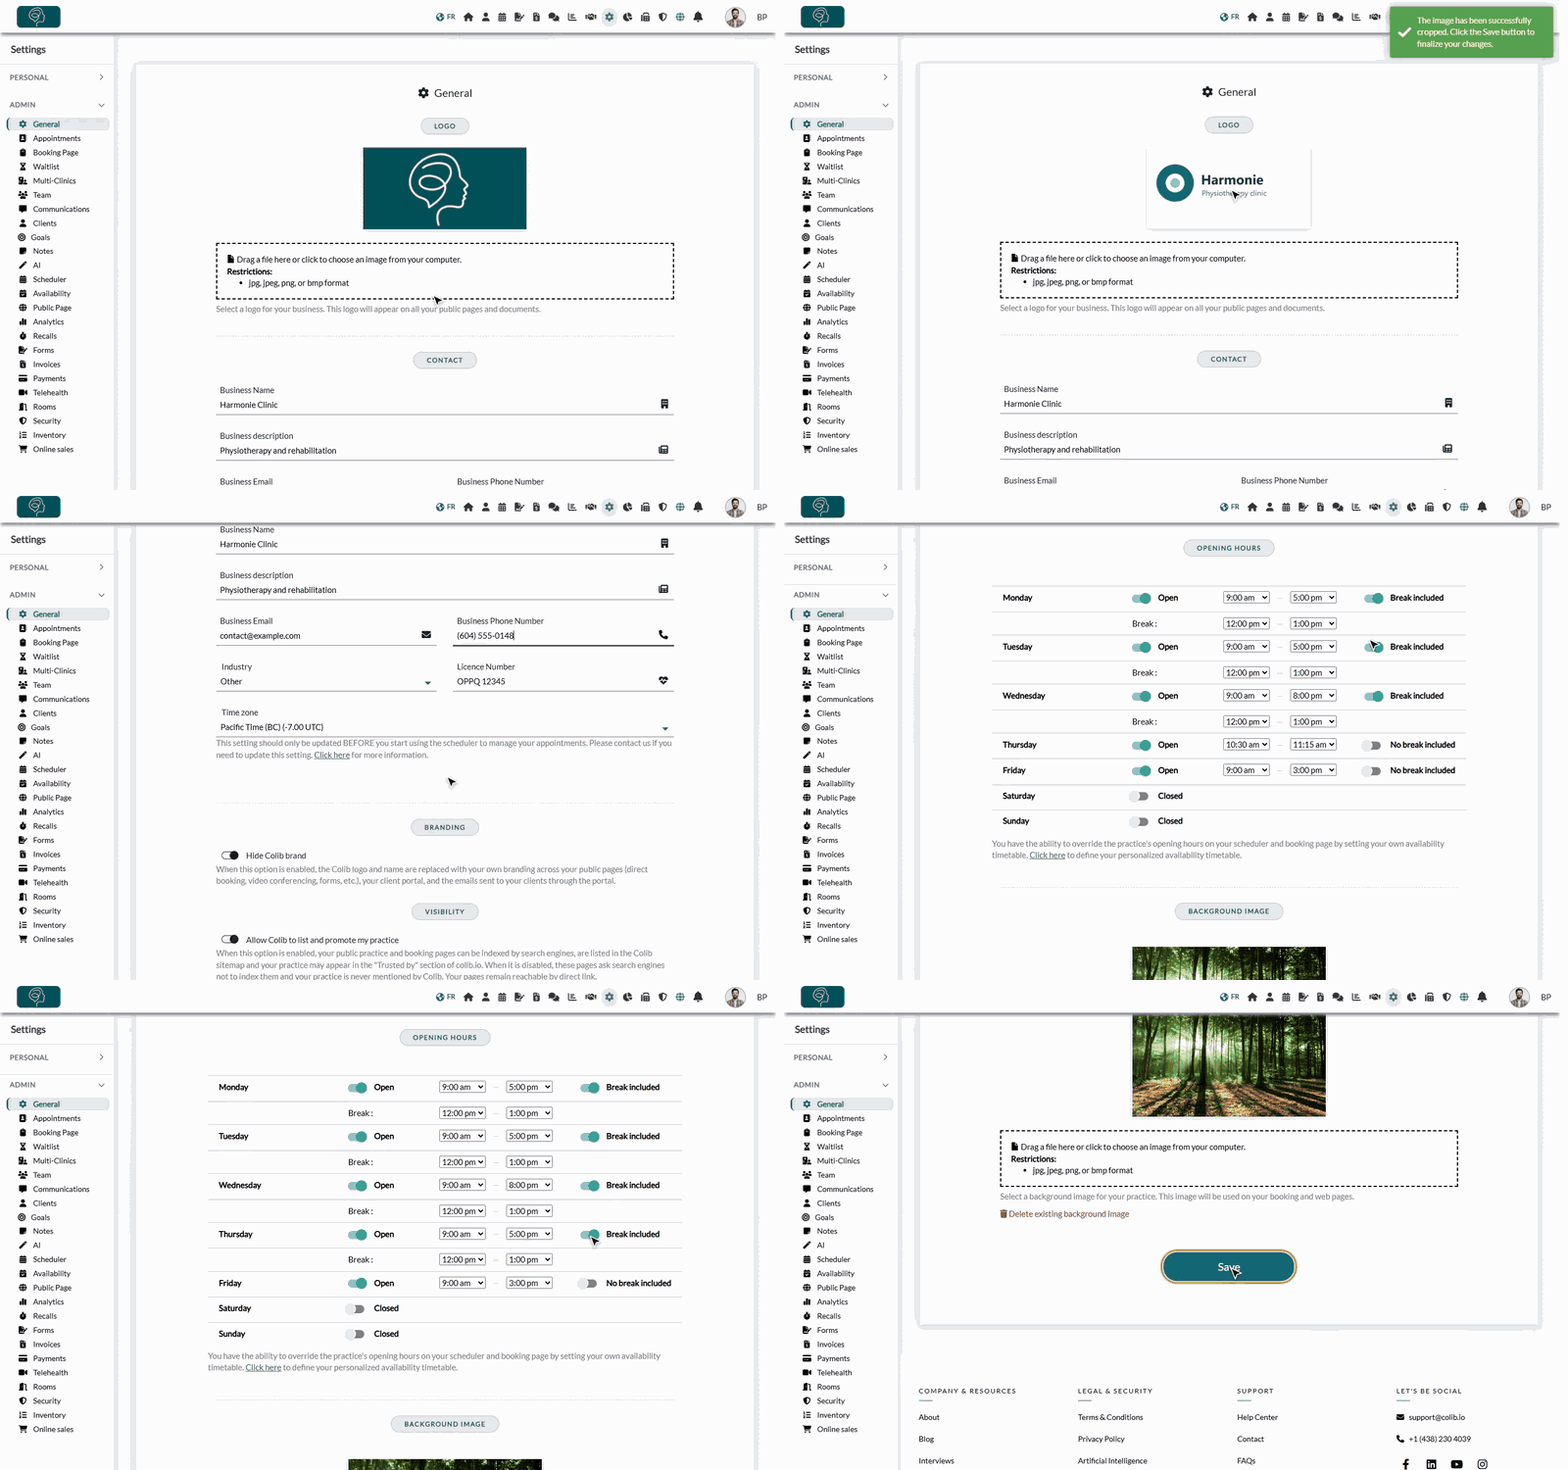
1Add your logo
- Go to www.colib.io/settings?show=general. You can also click the Settings icon (gear) in the top bar, then General in the Admin menu on the left.
- In the Logo section, drag your image onto the dotted area, or click it to choose a file on your computer. Accepted formats: JPG, JPEG, PNG or BMP.
- The Crop image window opens. Use the sizing bar to adjust the image in the frame (a rectangle twice as wide as it is high), then click Crop.
- The new logo appears in the preview. It will be kept when you click Save at the bottom of the page.
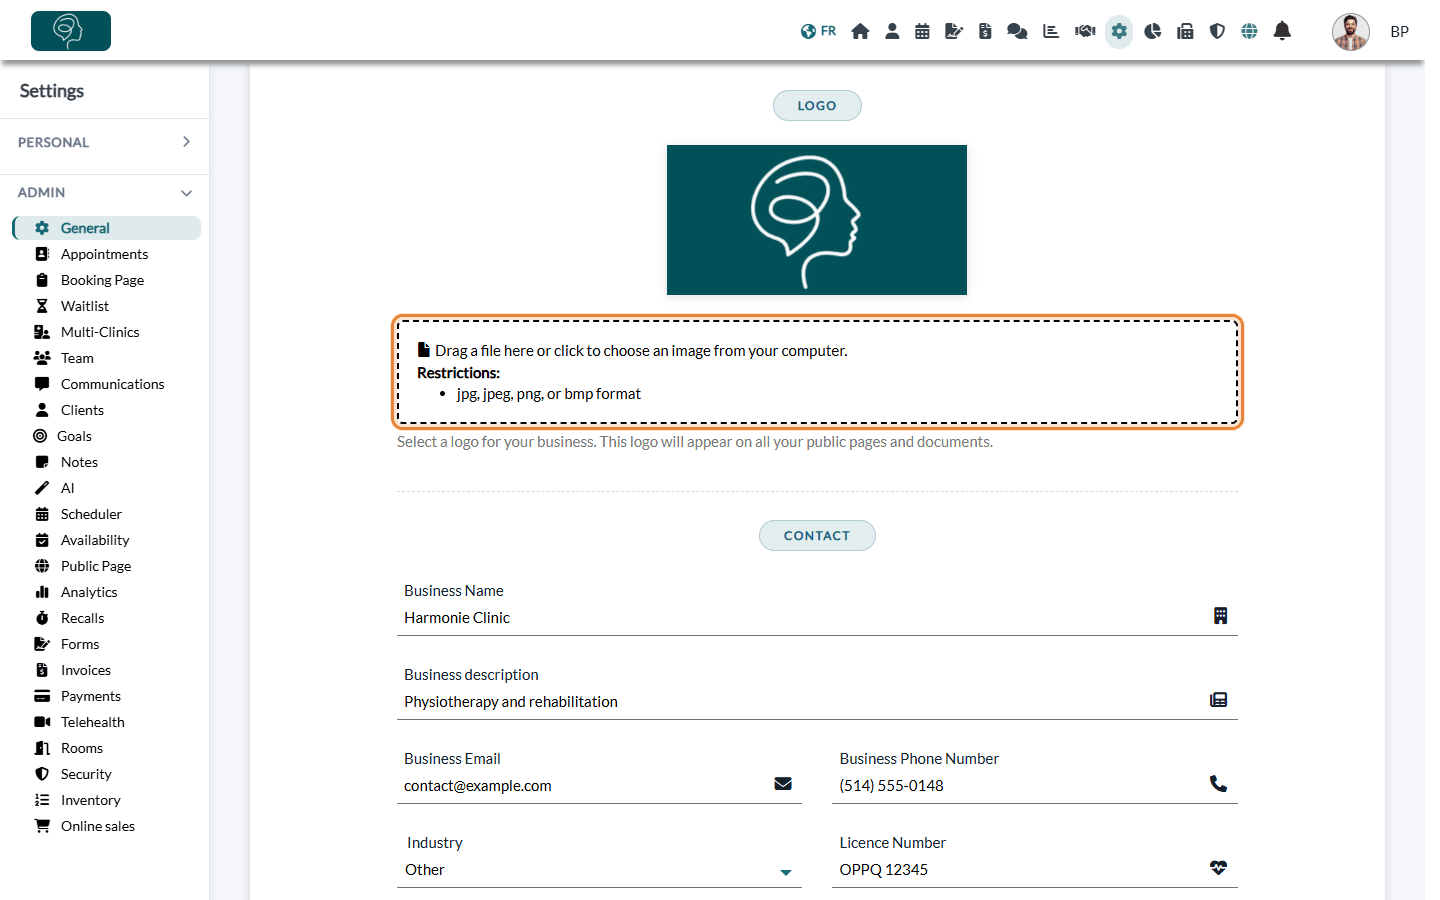
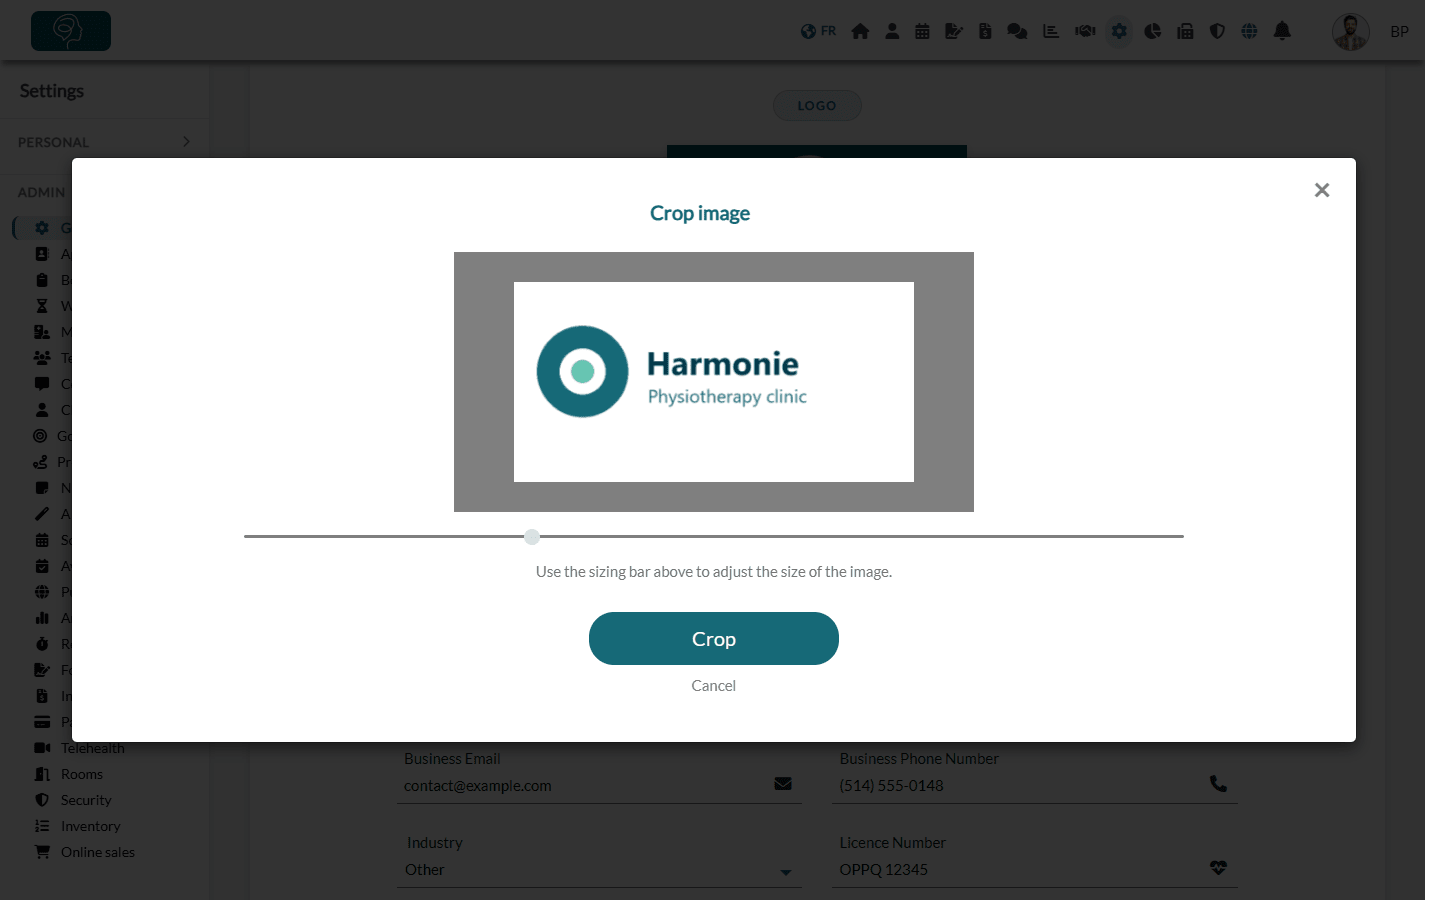
Your logo appears on all your public pages and documents: invoices and receipts, emails sent to your clients, notes and reports exported as PDF.
2Enter your contact details
In the Contact section:
| Field | What to enter |
|---|---|
| Business Name (required) | The name of your practice, as your clients know it. |
| Business description (required) | A short tagline, 40 characters maximum (for example, Physiotherapy and rehabilitation). |
| Business Email (required) | The email address of the practice. |
| Business Phone Number | The phone number of the practice. |
| Industry (required) | Your field of activity. |
| Licence Number | Your licence or permit number, if you have one. |
| Time zone | The time zone of your practice. Check it before you start booking appointments. |
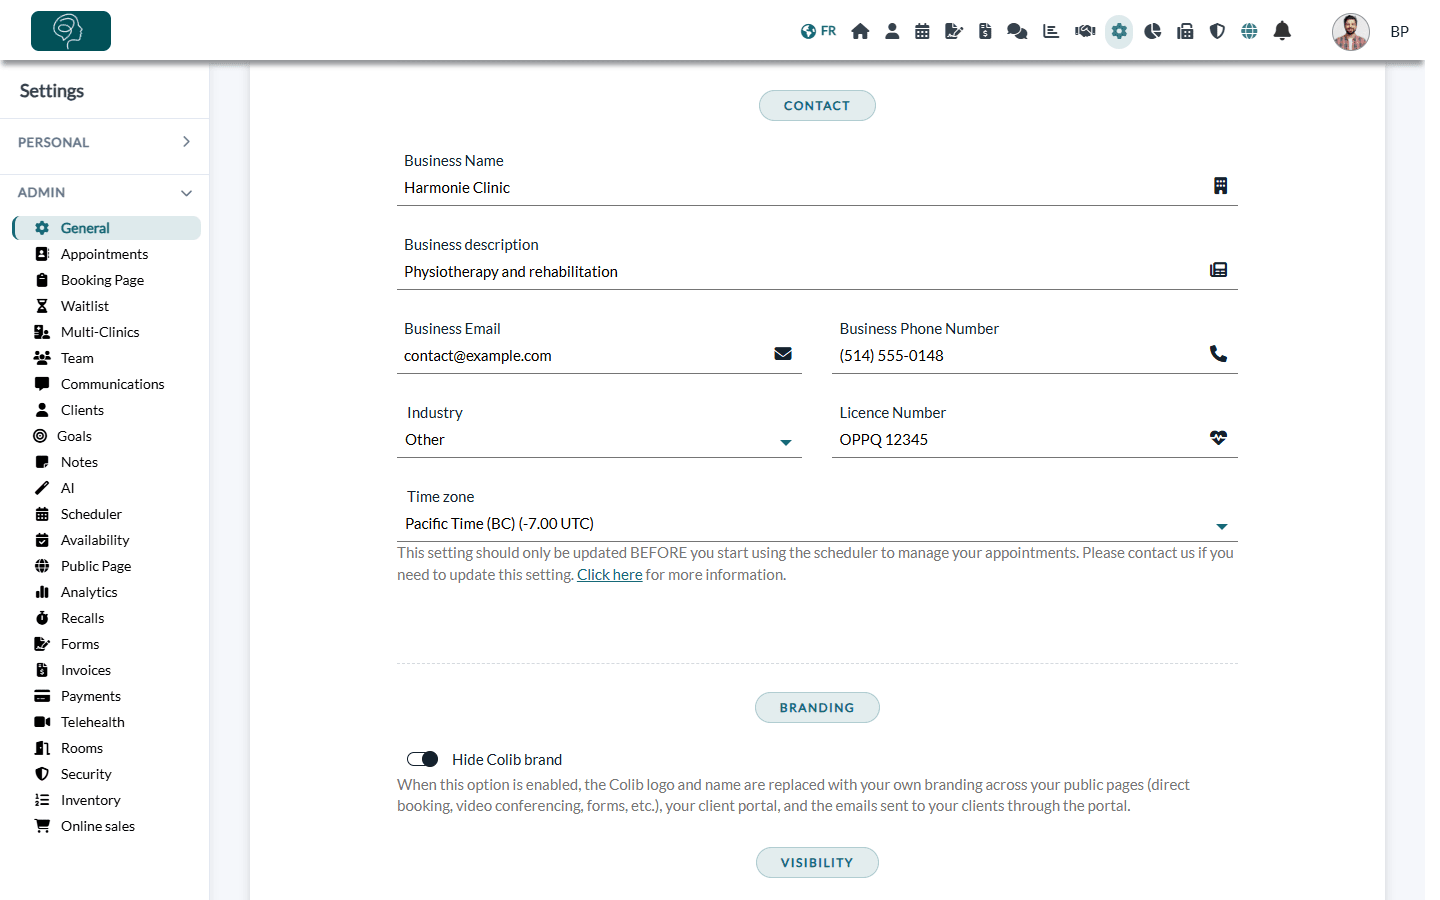
Important: set the Time zone before you start using the scheduler, and do not change it afterwards. If you need to change it once appointments are booked, contact us first. See How to manage a multi-time zone practice.
3Customize your branding (optional)
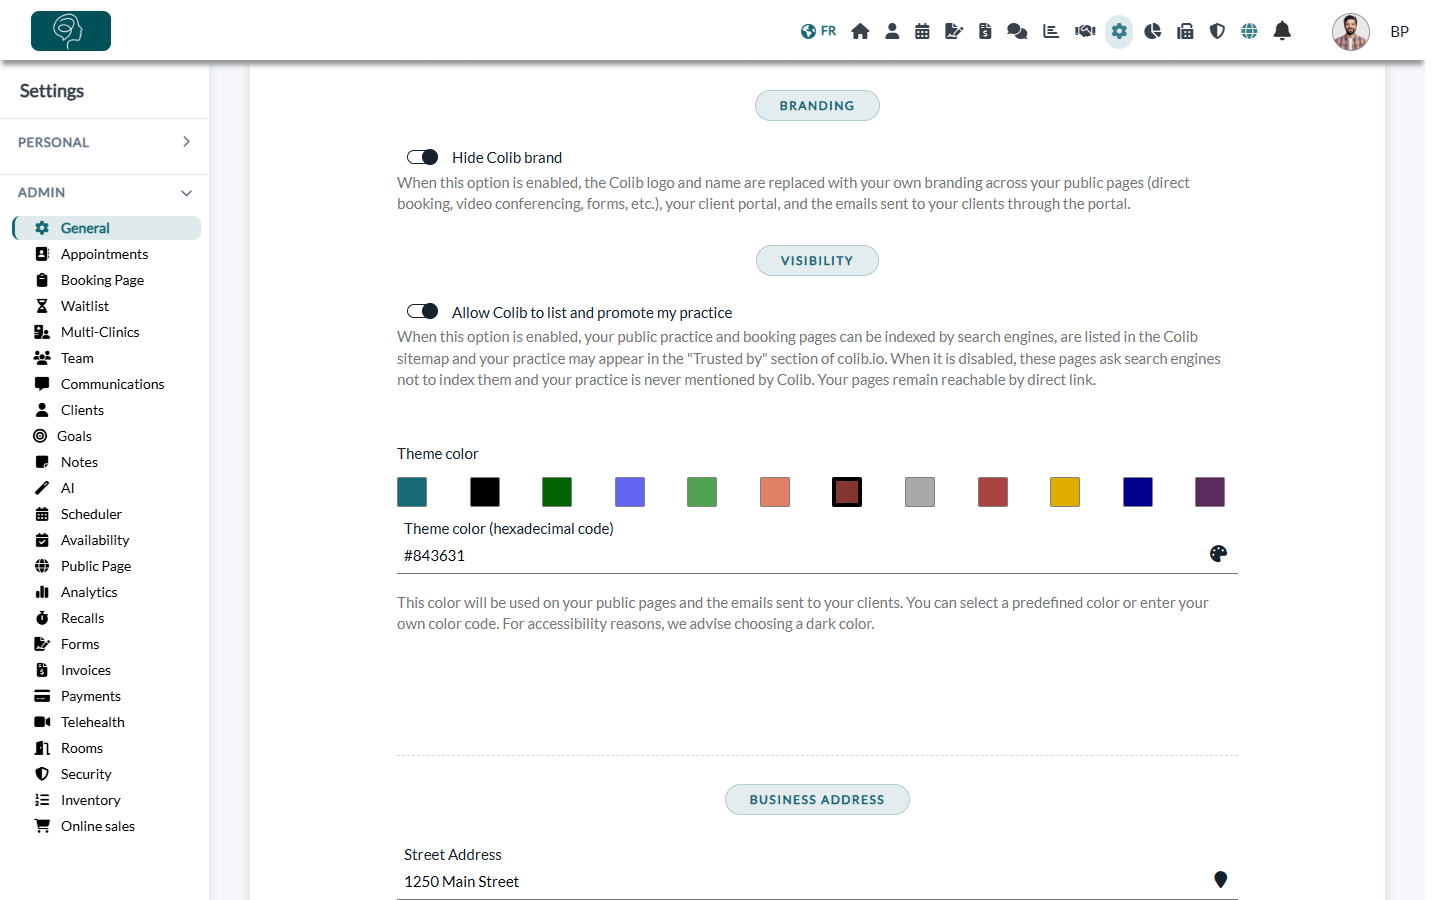
- Hide Colib brand — replaces the Colib logo and name with your own branding on your public pages (online booking, video conferencing, forms...), your client portal and the emails sent to your clients through the portal.
- Allow Colib to list and promote my practice — when this option is on, search engines can index your public practice and booking pages, and your practice may appear in the "Trusted by" section of colib.io. When it is off, search engines are asked not to index these pages; they remain reachable by direct link.
- Theme color — click one of the predefined colors or enter your own code in Theme color (hexadecimal code). This color is used on your public pages and in the emails sent to your clients. Choose a dark color so the text stays easy to read.
4Enter your address and choose what is displayed
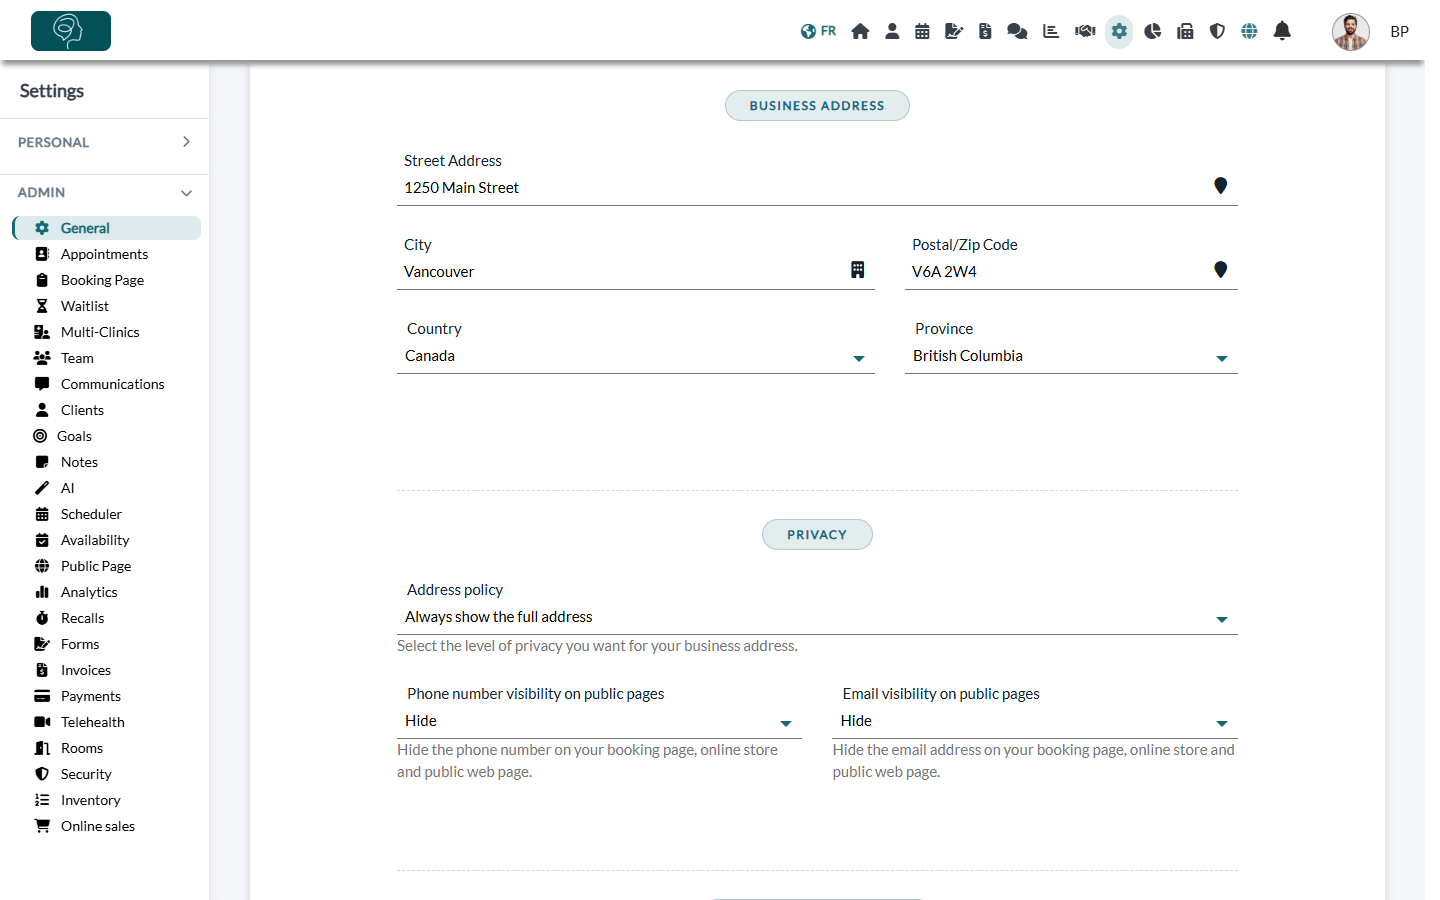
- In Business Address, start typing your Street Address: Colib suggests matching addresses. Then check the City, Postal/Zip Code, Country and Province. The street address is required.
- In Privacy, choose your Address policy: always show the full address, hide the street address on your public pages, always hide the street address (and the city), or hide it only on invoices and receipts.
- Choose Show or Hide for Phone number visibility on public pages and Email visibility on public pages (booking page, online store and public web page).
Practice located in Quebec? When the province is Quebec, a message reminds you that two-factor authentication is mandatory: it will be required at the next sign-in of every practitioner, staff member and client of the clinic.
5Add your website and social media (optional)
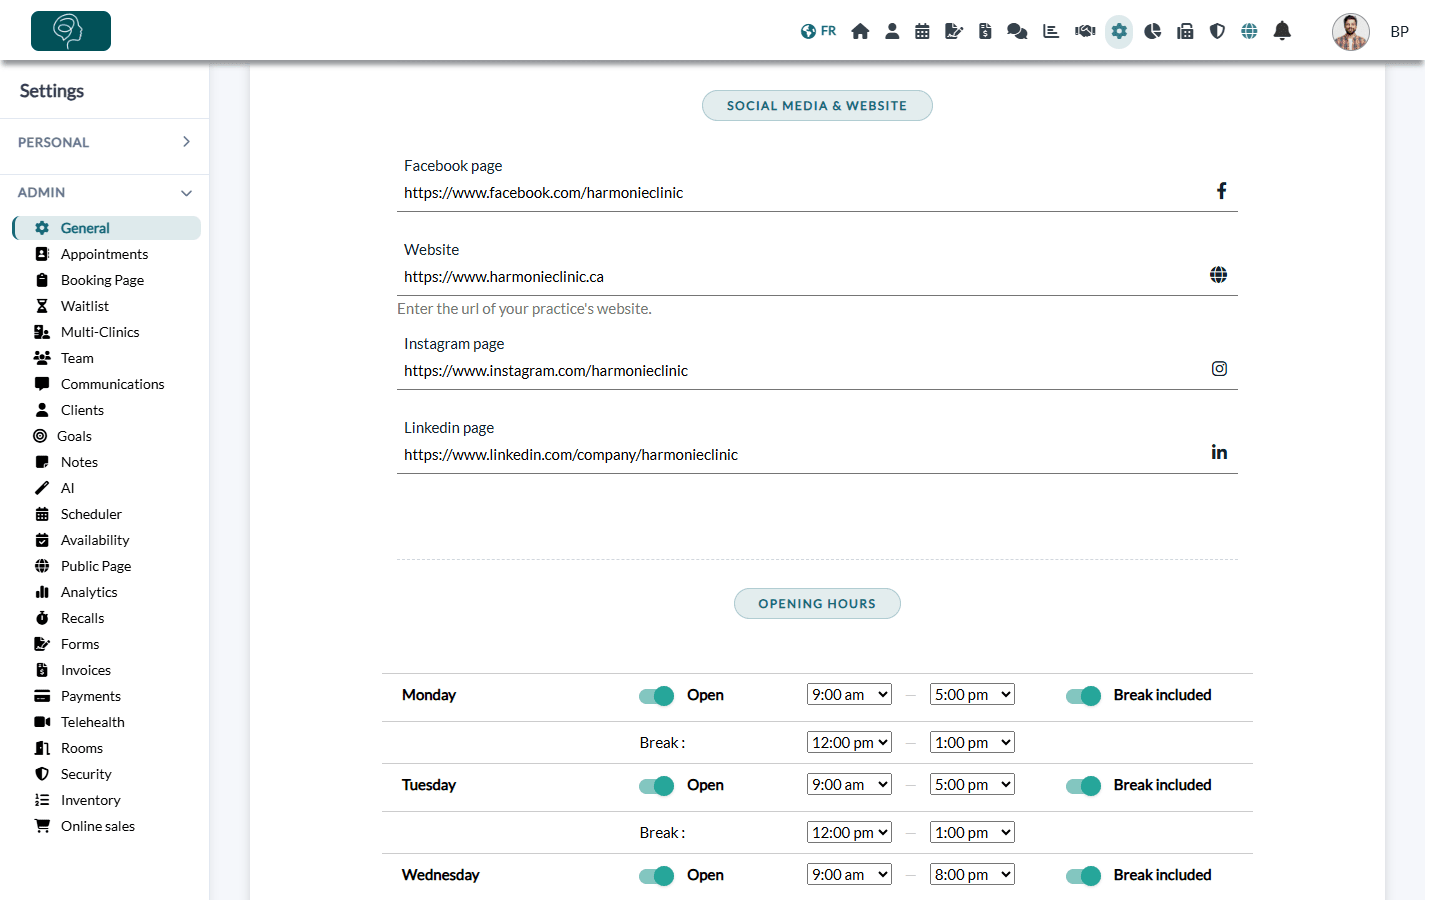
In Social Media & Website, enter the full address of your Facebook page, Website, Instagram page and Linkedin page. Each address must start with http:// or https://.
6Set your opening hours
- In Opening Hours, turn on the switch of each day your practice is open (Open). Leave it off for the days you are closed (Closed).
- For each open day, choose the opening time and the closing time, in 15-minute steps. Choose All day as the opening time if you are open all day.
- To block a lunch break, turn on Break included and choose the start and end of the Break. One break per day is possible.
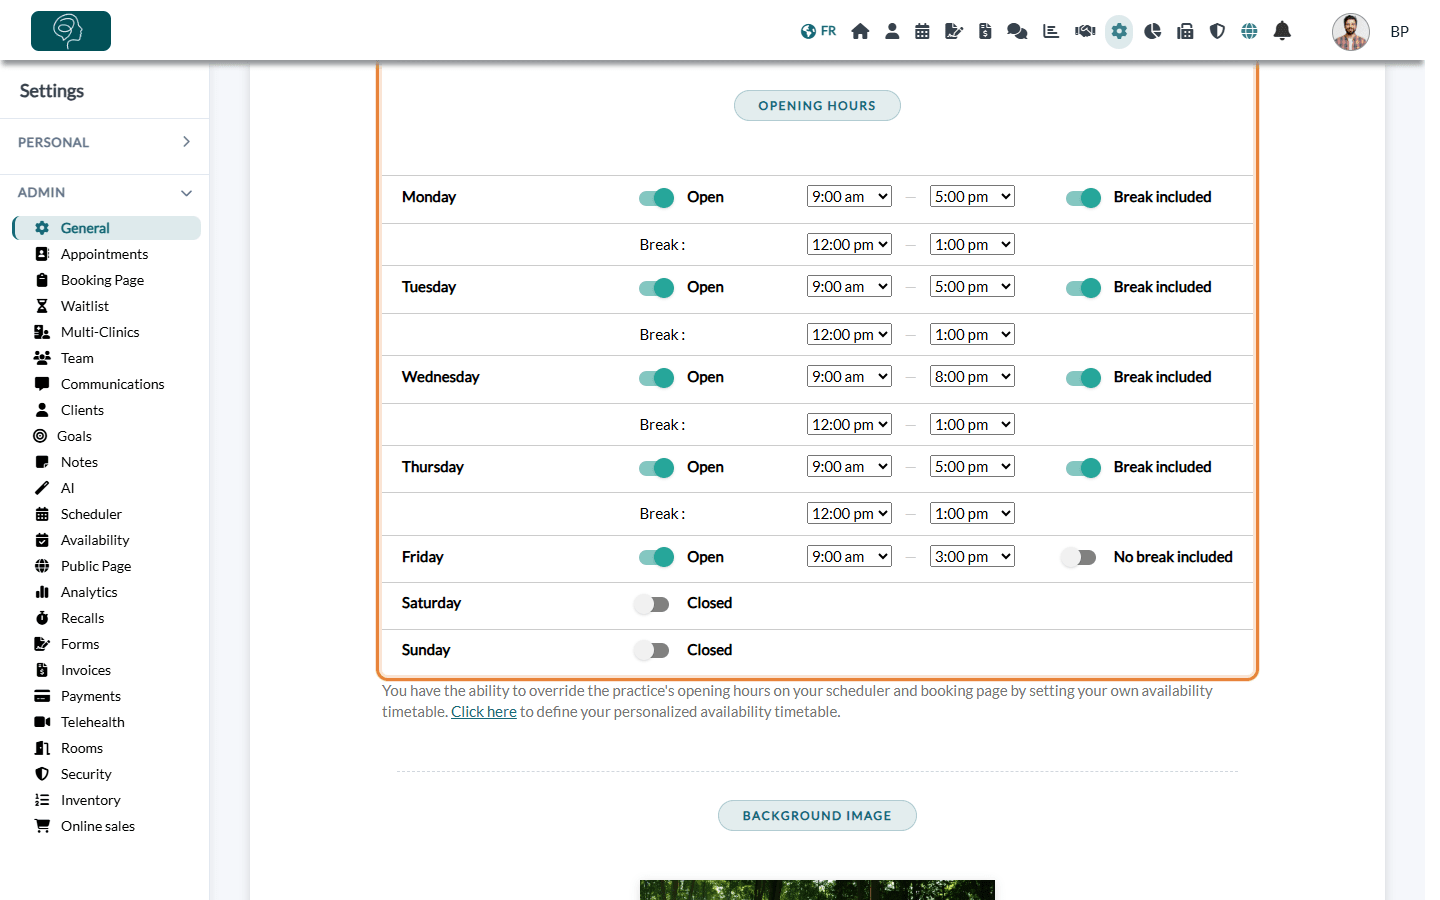
Your opening hours are the default availability of your practitioners, in your scheduler and on your booking page. A practitioner who works different hours can set their own availability in Settings > Personal > Availability (www.colib.io/settings?show=personalscheduler) by turning off Use the practice opening hours. See How can I update the days/hours that I work?
Important: check each day before saving. If the closing time is not after the opening time, the day is saved as closed. If the break is not inside the opening hours, it is not kept.
7Add a background image (optional) and save
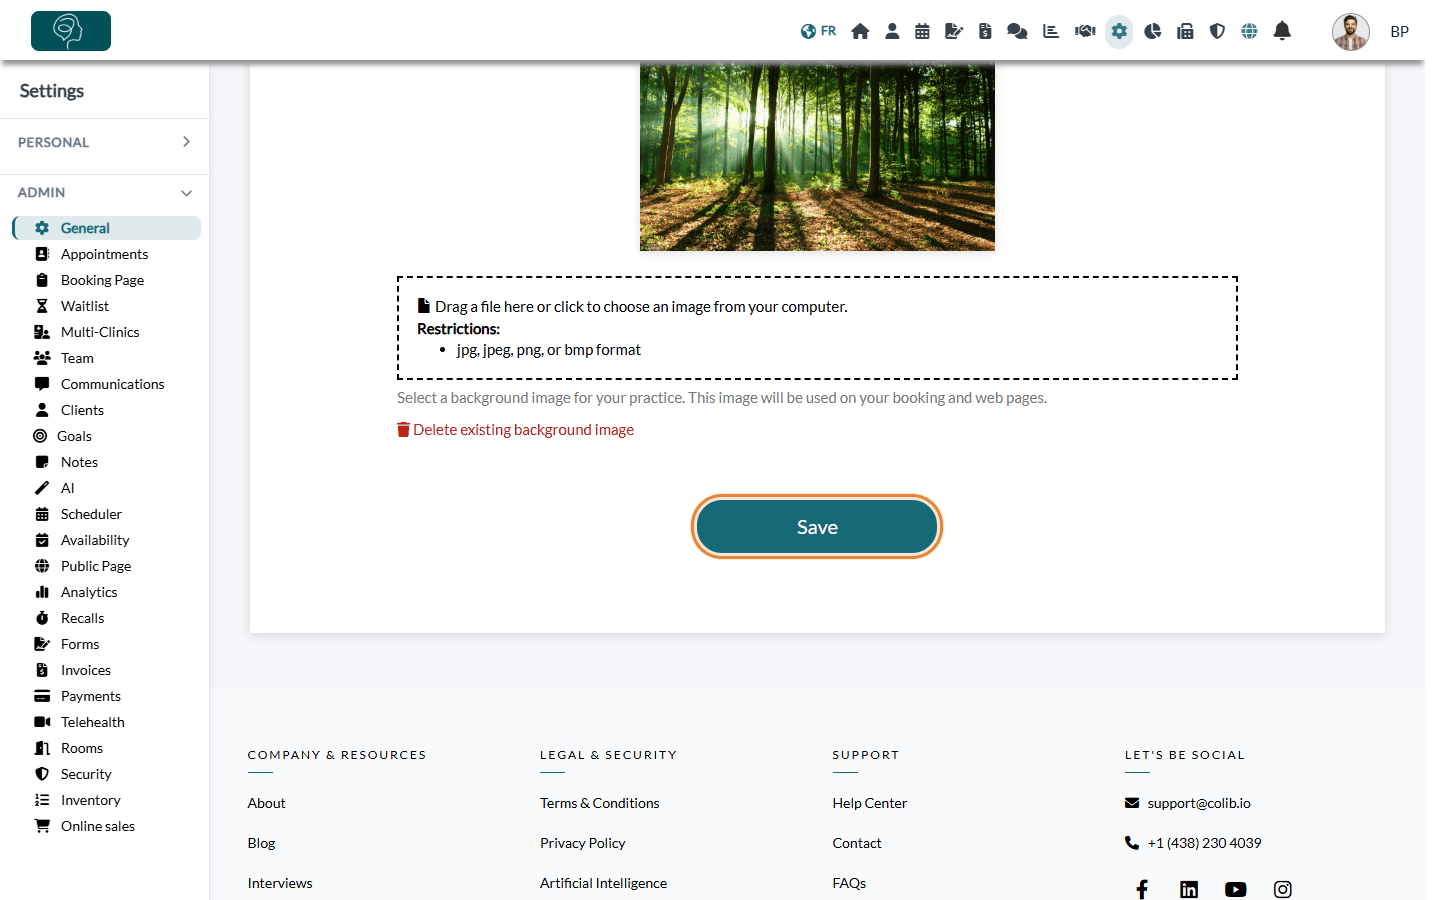
- In Background Image, drag or choose an image (JPG, JPEG, PNG or BMP, up to 10 MB). It is used on your booking page and your public web page. No cropping is needed. To remove the current image, click Delete existing background image.
- Click Save at the bottom of the page. The message The modifications have been successfully saved. confirms the changes.
If a required field is empty or an address is not valid, a message appears under the field: correct it and click Save again.
Good to know
- Where this information appears — your logo, name, address and contact details are printed on your invoices and receipts (according to your address policy) and shown on your booking page and public web page.
- Opening hours on your public page — they are displayed only if Display opening hours is turned on in Settings > Public Page (www.colib.io/settings?show=webpage). See How to configure the public profile page of the practice.
- No logo yet? — the Colib logo is used until you add yours.
- Next steps — invite your team and create your appointment types. See How to get started successfully on Colib.
Still have a question?
Write to us at support@colib.io, we will be happy to help.
Was this article helpful?
That’s Great!
Thank you for your feedback
Sorry! We couldn't be helpful
Thank you for your feedback
Feedback sent
We appreciate your effort and will try to fix the article