Who is this article for?
You have just created your Colib account and you wonder where to start? You are in the right place. This guide walks you through the essential steps, in a logical order, to set up your practice and schedule your first appointments with your clients.
It gives recommendations (actions and articles to read) to make the most of your first days on Colib. It goes further than the Get started with Colib checklist of your home page: you will find every setting worth looking at, who it is for, and where to find it. Of course, you are free to follow your own order: everything can be changed later.
Before you start: most steps are done in Settings (gear icon in the top bar, www.colib.io/settings). The Admin section of the settings is only available to the administrator of the practice. If you were invited by your clinic, go directly to If you were invited by your clinic at the end of this article.
Your checklist on the home page
The first time you open Colib, a short welcome questionnaire asks four questions: your profession, the size of your practice, what you want to do with Colib, and the software you used before. Your profession is used to rename your default appointment types. Your answers also adapt the checklist: for example, the Invite your team step only appears if several people work in your practice. You can click Skip: the checklist then shows all the steps, except Invite your team.
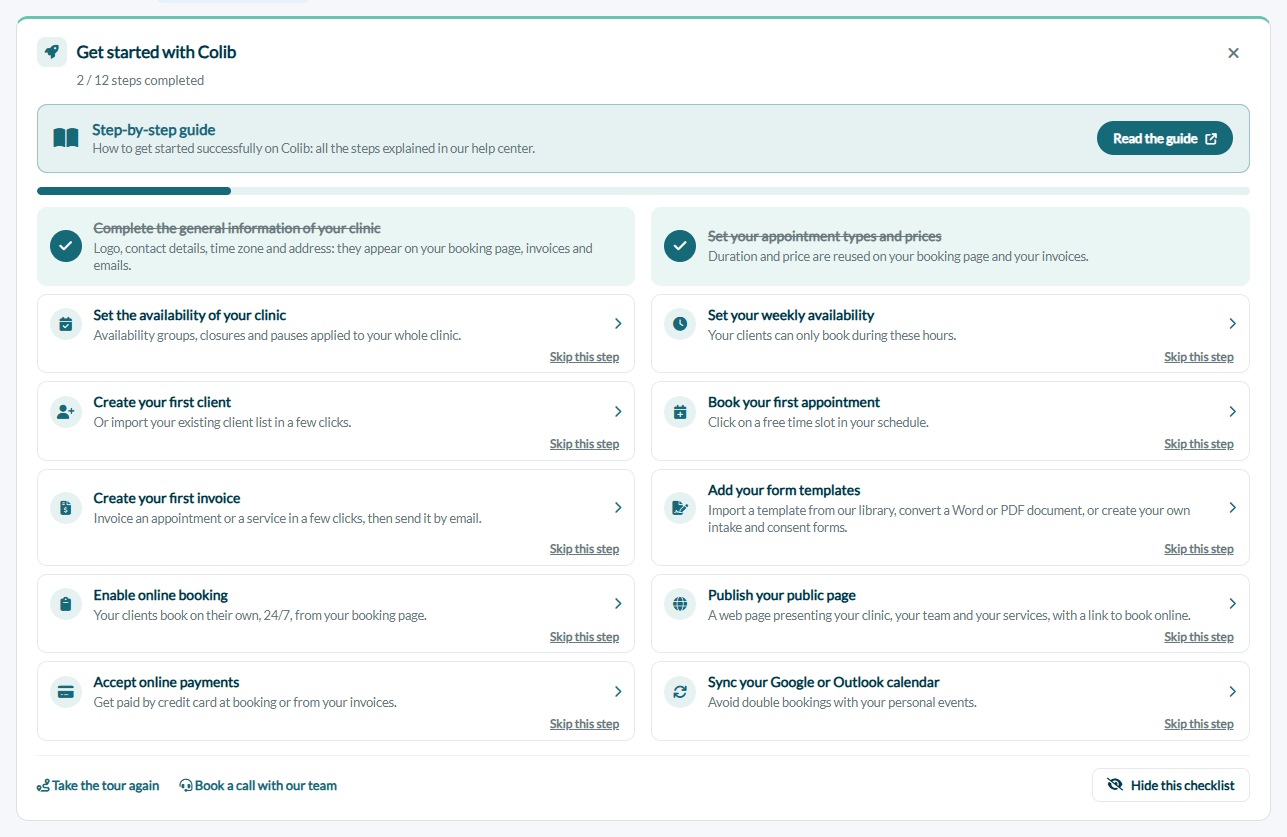
The Get started with Colib checklist then appears at the top of your Home page (www.colib.io/establishmentadmin/home):
- Click a step to open the right page directly.
- Steps are checked automatically as soon as Colib detects that they are done (a logo saved, a priced appointment type, a first client...).
- A step does not apply to you? Click Skip this step. Restore brings it back.
- Take the tour again replays the guided tour of the main menus, and Book a call with our team lets you book a free session with us.
- Hide this checklist removes it from your home page. It also disappears by itself 7 days after all the steps are completed, and in any case 30 days after the end of your free trial.
You hid the checklist and want it back? Once hidden (by you or automatically), the checklist cannot be displayed again. Nothing is lost: every step stays available in your settings and is described in this article. You can still replay the guided tour at any time by opening www.colib.io/establishmentadmin/home?tour=true, and book a free call with our team at www.colib.io/demo.
1Set up your practice
Go through these settings in this order. Each card tells you why the setting matters, who it is for, where to find it and which article explains it in detail.
A) General settings
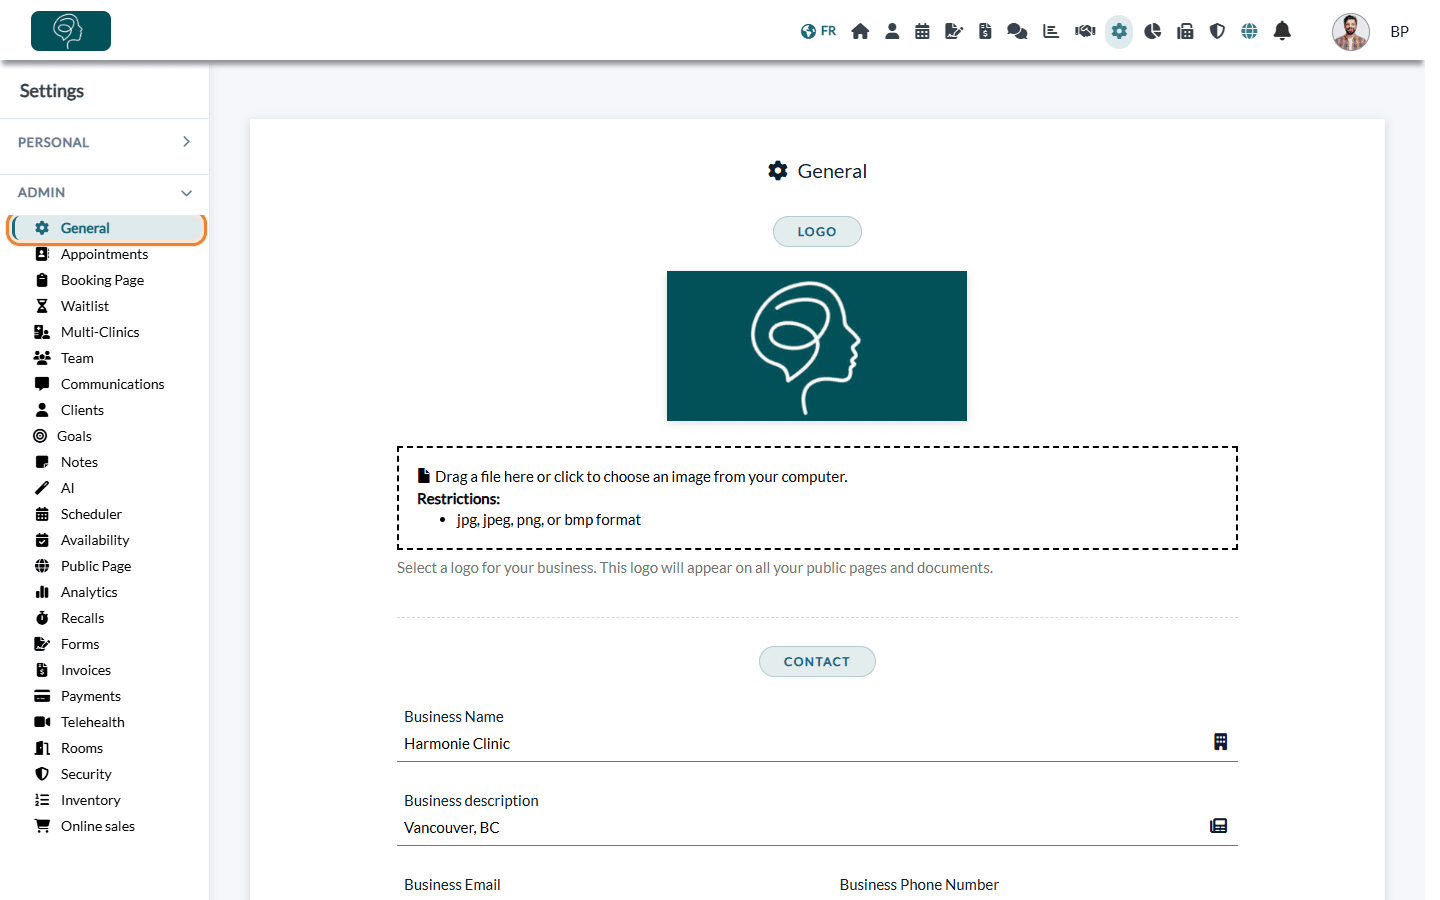
- Why is it important? this tab defines your logo, your contact details, your address, your opening hours and the time zone of your practice. They appear on your booking page, your invoices and your emails, so they should be the first settings you define.
- For whom? all new practices.
- Where? Settings > General (www.colib.io/settings?show=general)
- More information: please see the article titled "How to set up your practice information (logo, contact details, address, opening hours)".
B) Team settings
- Why is it important? invite your team members as soon as possible to make the setup easier. Each member gets their own access, rights and schedule, and some settings must be defined by each practitioner (availability, calendar sync, signature, notifications).
- For whom? practices with more than one person (practitioners, receptionists, administrators).
- Where? Settings > Team (www.colib.io/settings?show=team)
- More information: What are the different levels of rights/options for the members of my practice? and the article titled "How to invite a team member".
C) Payment settings
- Why is it important? this tab activates online payment, so your clients can pay their invoices by credit card, or be charged when they book. Some options of the other tabs (for example charging at booking) only appear once online payment is active. You can skip this part if you do not want to use online card payments.
- For whom? practices that want to accept online payments.
- Where? Settings > Payments (www.colib.io/settings?show=payment)
- More information: How do I activate the online payment system on Colib?, What payment methods are accepted on Colib? What are the fees?, Why is a photo ID required to activate the online payment system? and How to set up Interac payment automation.
D) Invoice settings
- Why is it important? setting up your taxes, your invoice numbering and the default messages of your invoices now will save you a lot of time later. We also suggest setting up your sliding scale fees (reduced rates for some clients) at this stage, and the automatic payment reminders if you want Colib to follow up on unpaid invoices for you.
- For whom? all new practices.
- Where? Settings > Invoices (www.colib.io/settings?show=invoices)
- More information: How to update the default taxes for my invoices, How to set up sliding scale fees for clients, How to customize invoices for each practitioner in my clinic and How to automate invoice payment reminders.
E) Appointment types
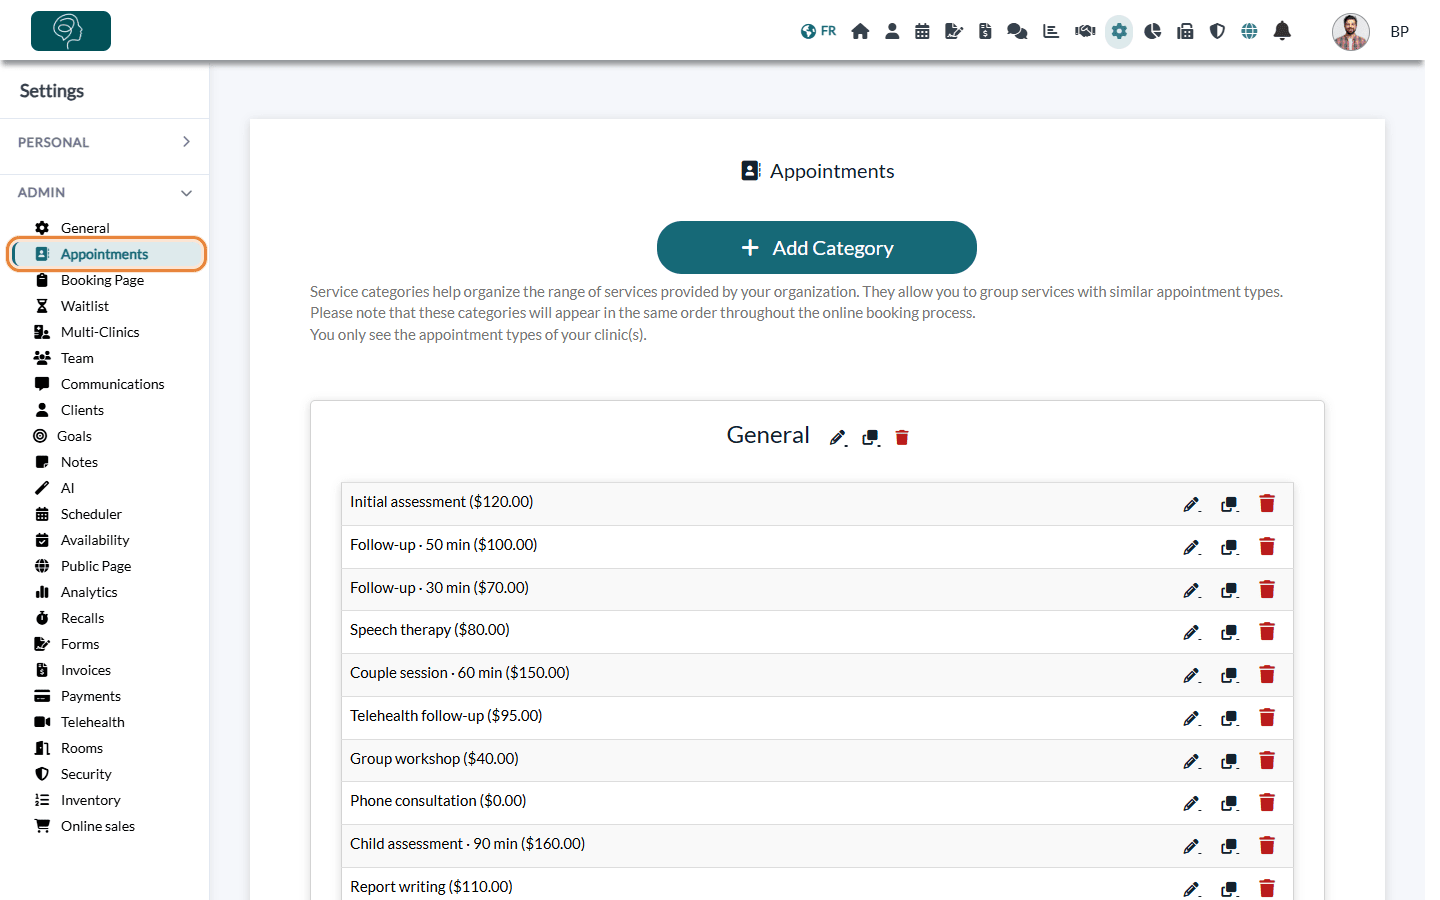
- Why is it important? most settings are defined per appointment type: price, duration, telehealth, reminders, forms sent before the appointment, online booking, follow-ups... The duration and price are reused on your booking page and your invoices. Organizing your services in categories and sub-categories also makes your booking page clearer for your clients.
- For whom? all new practices.
- Where? Settings > Appointments (www.colib.io/settings?show=appointments)
- More information: What appointment types are and why they matter, How to view, edit, duplicate and delete appointment types, How to organize appointment types with categories and sub-categories and the article titled "How to create an appointment type".
F) Booking page
- Why is it important? this tab sets up your online booking page: how clients book (direct booking or appointment request), its address and QR code, the information asked, the payment, the booking window and the cancellation policy.
- For whom? practices that want their clients to book their own appointments online.
- Where? Settings > Booking Page (www.colib.io/settings?show=bookingpage)
- More information: How to set up the booking process in Colib, What options does Colib offer for my clients to book appointments?, How to control how far in advance clients can book online and How can I embed my booking page on my website?
G) Availability settings
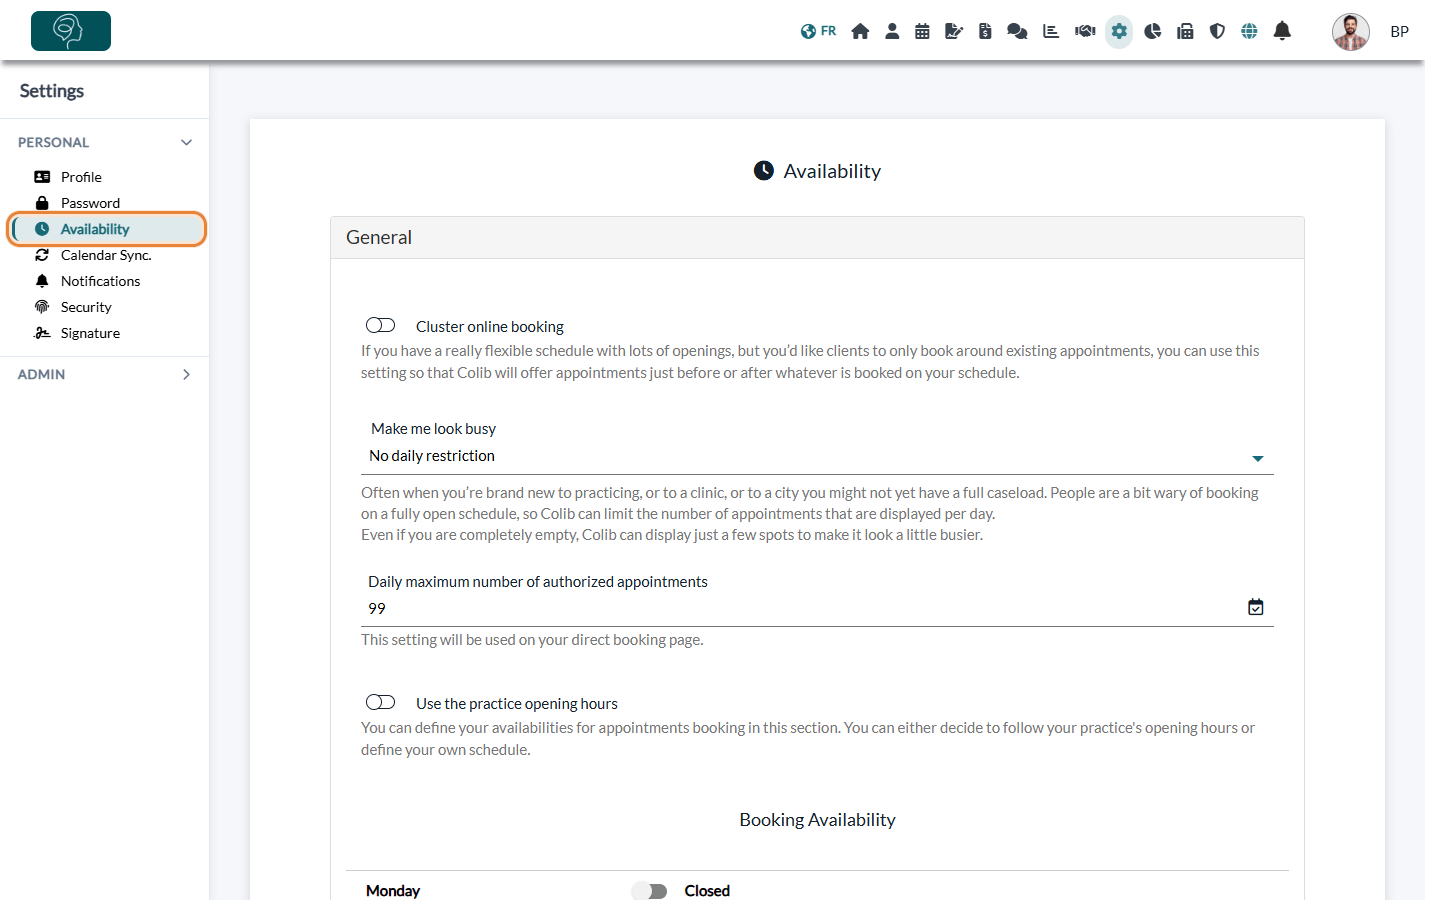
- Why is it important? your clients can only book during your availability. Set the availability of the whole clinic (availability groups, closures, pauses) in the Admin section, and each practitioner sets their own weekly hours in their personal settings (or follows the opening hours of the practice).
- For whom? practices that want to offer online booking, and every practitioner.
- Where? Settings > Availability (www.colib.io/settings?show=availability) and Settings > Personal > Availability (www.colib.io/settings?show=personalscheduler)
- More information: How to customize your availability with availability groups and Why are my availabilities not showing on my scheduler or booking page?
H) Note templates
- Why is it important? creating your own note templates, or importing templates from our library, will save you a lot of time when writing your session notes. Colib can also write notes for you: voice dictation, and notes generated by artificial intelligence during or after the session.
- For whom? all new practices.
- Where? Settings > Notes (www.colib.io/settings?show=notes)
- More information: How to create and use note templates, How to dictate a note with voice recognition and How does the artificial intelligence note generation work?
I) Additional client fields
- Why is it important? add your own fields to client records (referring physician, insurance company, how the client heard about you...) to adapt them to your practice. You can also ask some of them on your booking page.
- For whom? all new practices.
- Where? Settings > Clients (www.colib.io/settings?show=clients)
- More information: How to add custom fields to your client records.
J) Public profile page
- Why is it important? create a public web page that presents your practice, your team and your services, with a button to book online. The page is fully customizable.
- For whom? practices that do not have a website and need a simple, professional page to present their practice online.
- Where? Settings > Public Page (www.colib.io/settings?show=webpage)
- More information: How to configure the public profile page of the practice?
K) Client communications
- Why is it important? Colib sends your clients confirmations and reminders by email and SMS. Check the tone, the greeting and the signature of your emails, the default notification channel (email, SMS or both), the welcome email and the messages sent before and after an appointment.
- For whom? all new practices.
- Where? Settings > Communications (www.colib.io/settings?show=communications)
- More information: What notifications do clients receive after booking?, How can I customize the emails sent to my clients before and after an appointment? and How to configure and send a welcome email to clients.
L) Telehealth
- Why is it important? Colib includes secure video sessions. You can add the meeting link to your online appointments automatically, use a waiting room, record sessions, or use another provider.
- For whom? practices that offer online sessions.
- Where? Settings > Telehealth (www.colib.io/settings?show=video)
- More information: How to automatically add telehealth conference links to appointments, What features are integrated into the video conferences provided by Colib? and How does the waiting room work for online meetings?
M) Security
- Why is it important? protect access to your client records: turn on two-factor authentication for your account, and choose the security options of your practice.
- For whom? all practices.
- Where? Settings > Personal > Security (www.colib.io/settings?show=personalsecurity) and Settings > Security (www.colib.io/settings?show=security)
- More information: How to turn on two-factor authentication (2FA), What data security and compliance measures does Colib offer? and Are you compliant with Canadian privacy laws?
N) Client portal and private messaging
- Why is it important? your clients get a secure portal to see their appointments, invoices, documents and forms. You can also turn on private messaging to exchange securely with them instead of regular email.
- For whom? practices that want to share information with their clients securely.
- Where? Settings > Communications (www.colib.io/settings?show=communications)
- More information: What is the client portal?, Who can access the client portal? and How to activate private messaging with your clients.
O) Several locations
- Why is it important? if your practice has several clinics or locations, create them before going further: rooms, availability, booking pages, invoices and rights can then be set per clinic.
- For whom? practices with more than one location.
- Where? Settings > Multi-Clinics (www.colib.io/settings?show=clinics)
- More information: How to configure a multi-clinic (multi-location) practice? and How does creating multiple clinics affect practitioners' rights?
2Prepare your practice forms
Intake questionnaires, consent forms, assessments: create or import your forms in Forms (www.colib.io/forms). Import a template from our library, convert a Word or PDF document, or build your own form, then send it to your clients or attach it to an appointment type so it is sent automatically.
- Does Colib provide forms templates?
- How can I build a new form from scratch?
- How can I send the form to my clients?
- How can I transform my PDF or Word form into an online form with Colib?
- How can I automatically ask a client to fill out a form before an appointment?
3Create your first clients, appointments and invoices
A) Client
When you created your account, Colib added a demo client named John Doe-Test, linked to your own email address. Use it to try everything safely: schedule test appointments, see the emails and receipts your clients will receive. Because it uses your own email address, it cannot be used to test the client portal invitation: for a complete test, please see the article titled "How to test Colib with a fictitious client before going live". You can archive or delete it later.
To create your real clients, open Clients in the top bar (www.colib.io/clients) and click Create Client. Coming from another software? You can import your client list instead of typing it.
- Please see the article titled "How to create a client"
- Do I have to create all clients manually?
- How to migrate clients, appointments, documents and notes to Colib
B) Appointment
Open the Scheduler (www.colib.io/scheduler) and click a free time slot to book an appointment. You can also block time for your personal events.
- How to create an appointment
- How to cancel an appointment: for practitioners and clients
- What notifications do clients receive after booking?
- How can I block time on my scheduler?
C) Invoice
Open Invoicing in the top bar (www.colib.io/invoices) to invoice an appointment or a service in a few clicks, then send it by email. Your clients can pay online if you activated online payment.
- How to create and send an invoice or a receipt
- Invoices and receipts: how does it work?
- How to record an offline or manual payment on an invoice
4Next steps
- Complete your personal profile (photo, phone number, time zone, signature) so your clients and your team recognize you: How do I edit my profile (picture, phone number, time zone)?
- Explore every tab of Settings (www.colib.io/settings) and your personal profile (www.colib.io/myprofile) to adapt Colib to your practice.
- Sync your Google or Outlook calendar with the scheduler to avoid double bookings: How to sync your Colib scheduler with Google Calendar or Outlook (two-way sync) (Apple Calendar: How to use Google ↔ Apple calendar sync with Colib (two-way sync via Google)).
- Share your referral code with your network and earn credit: How does the referral code work?
- Import your client data from your old software if needed: How to migrate clients, appointments, documents and notes to Colib.
- Measure the traffic of your booking page with Google Analytics: How to connect Google Analytics, Google Ads and Google Tag Manager to Colib.
- Choose your plan before the end of your free trial: How does payment for Colib plans work?
- Book a free onboarding session if you need help configuring your clinic: book a session with our team.
- Browse the help center for more information on every part of Colib.
Enjoy the peace of mind that comes with using Colib!
If you were invited by your clinic
Team members do not have access to the clinic settings, so their checklist is shorter: Complete your profile (add your photo in Settings > Personal > Profile, www.colib.io/settings?show=personalgeneral; see How do I edit my profile (picture, phone number, time zone)?), Set your weekly availability and Sync your Google or Outlook calendar. The client, appointment, invoice and form steps only appear if your rights allow you to create them. Also turn on two-factor authentication in Settings > Personal > Security.
Still have a question?
Write to us at support@colib.io, we will be happy to help. You can also browse the help center.
Was this article helpful?
That’s Great!
Thank you for your feedback
Sorry! We couldn't be helpful
Thank you for your feedback
Feedback sent
We appreciate your effort and will try to fix the article